You are using an out of date browser. It may not display this or other websites correctly.
You should upgrade or use an alternative browser.
You should upgrade or use an alternative browser.
Break tip installation
- Thread starter chipperd
- Start date
It depends on the ferrule material and if it's fully capped, or a sleeved ferrule. As mentioned above, sanding the tip FLAT is important, as most tips from the factory are not flat.Also make sure the ferrule is faced flat.....I press the tip to the ferrule without glue and see if it rocks even slightly to one side or another, if it does, I re-work the tip and or the ferrule until it sits flat. I also prime the tip and ferrule with a thin CA first, then lightly sand flat again using 320 grit on a surface plate, careful to not go thru the layer of CA, if I do, I re-apply and repeat the sanding, then I install the tip. I can't remember the last time one fell off, while breaking.
Hope this helps,
Dave
Hope this helps,
Dave
Make sure your ferrule is faced 100% flat. Lap the backside of the tip on a flat surface, place 180 grit sandpaper on a piece of granit or glass, then sand the tip in circles.
I don`t score the tip or ferrule anymore, I just make sure both surfaces are flat and use a dab of denatured alcohol to remove any fat left by my fingers.
I use Loctite 401 or B.S.I IC-Gel, both seems to work great.
Installing hard break tips on a ferrule that is not capped, seems to present problems in the long run, the wood compresses more than the ferrule, wich break the glue bond.
Capped ferrule is recomended.
One more very important factor to get them stay on is that the glue is given enough time to truly set. When I installed a Taom on my breaker, I turned flat the black pad that is on BK3 shaft, removing as little material as I possibly could, sanded flat the Taom with 320 grit on a flat surface, then made small scratches 90degrees to each other by moving it on 180paper gently. Glued it on with Loctite 401, let set for 8hours, cut it down to size, let it set for 24 hours more and then using it to break.
Patience, fresh glue and flatness of surfaces are the keys to succes here :smile:
I had some pop off when I didnt give the glue enough time. They lasted for a day or two and broke off. This latest has been on for a couple of weeks and it has stayed on, even when it has really been beaten hard as I have been working that time mostly on my break shots for 8 ball and 9 ball :thumbup:
Great point. Even though it`s instant glue and it feels like it hardens instantly, leving it for a few hours or better yet, a day makes a huge difference.
Dp 420
On this forum a few years ago, it was suggested to use 3M Scotch-Weld DP 420. The epoxy requires an applicator gum that is a little pricey, but necessary. The epoxy requires about 2 days at 70 degrees to almost fully cure. This epoxy is suggested for use by Samsara. It was developed for gluing on gulf club heads and is very impact resistant. I have only put on a few break tips with this. but so far so good.
Jim
how to install a white diamond tip
I believe hard break tips pop off because the glue joint is sheared by side force on an off center hit. So this is what I do now....
Prepare the ferrule and tip by facing the ferrule and then drill shallow holes in the tip and in the ferrule with a 1/16 in drill,,,,,,,,,,,,,,,,sand each smooth and blow off the dust,
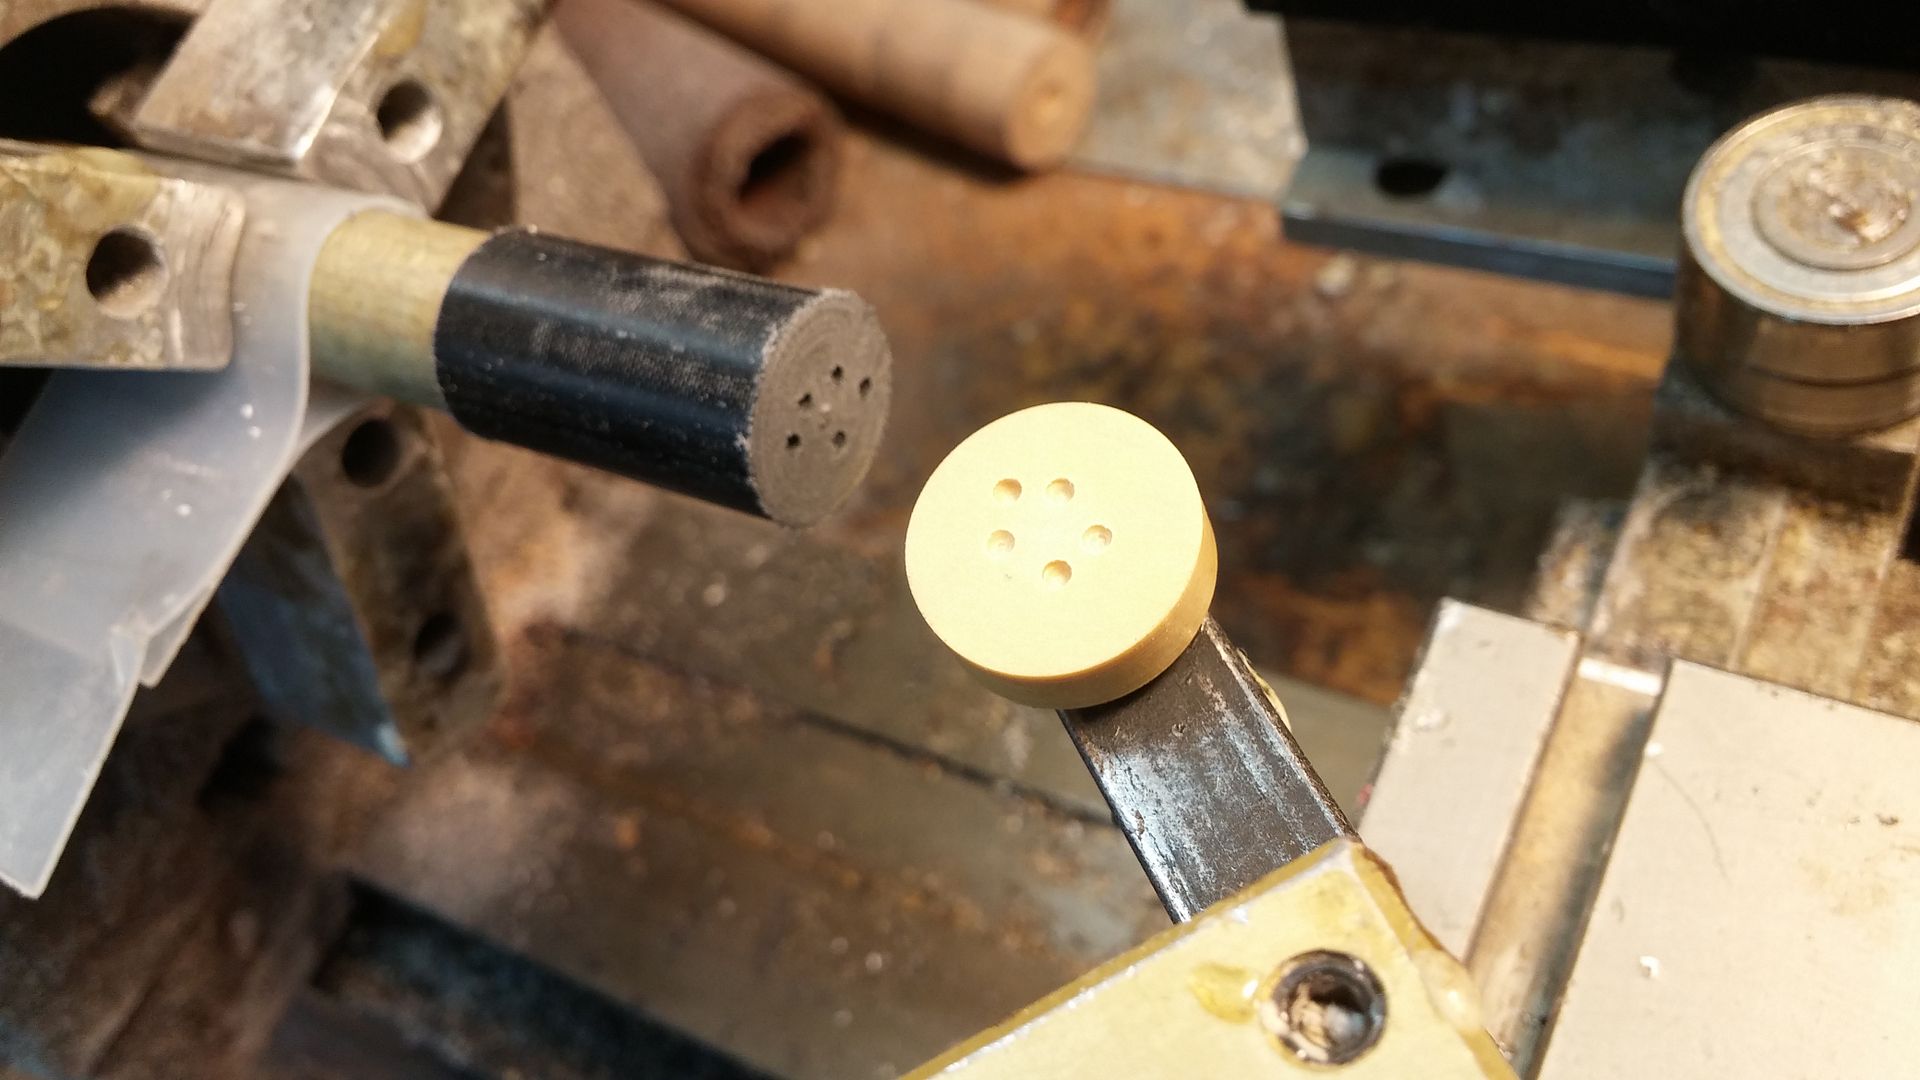
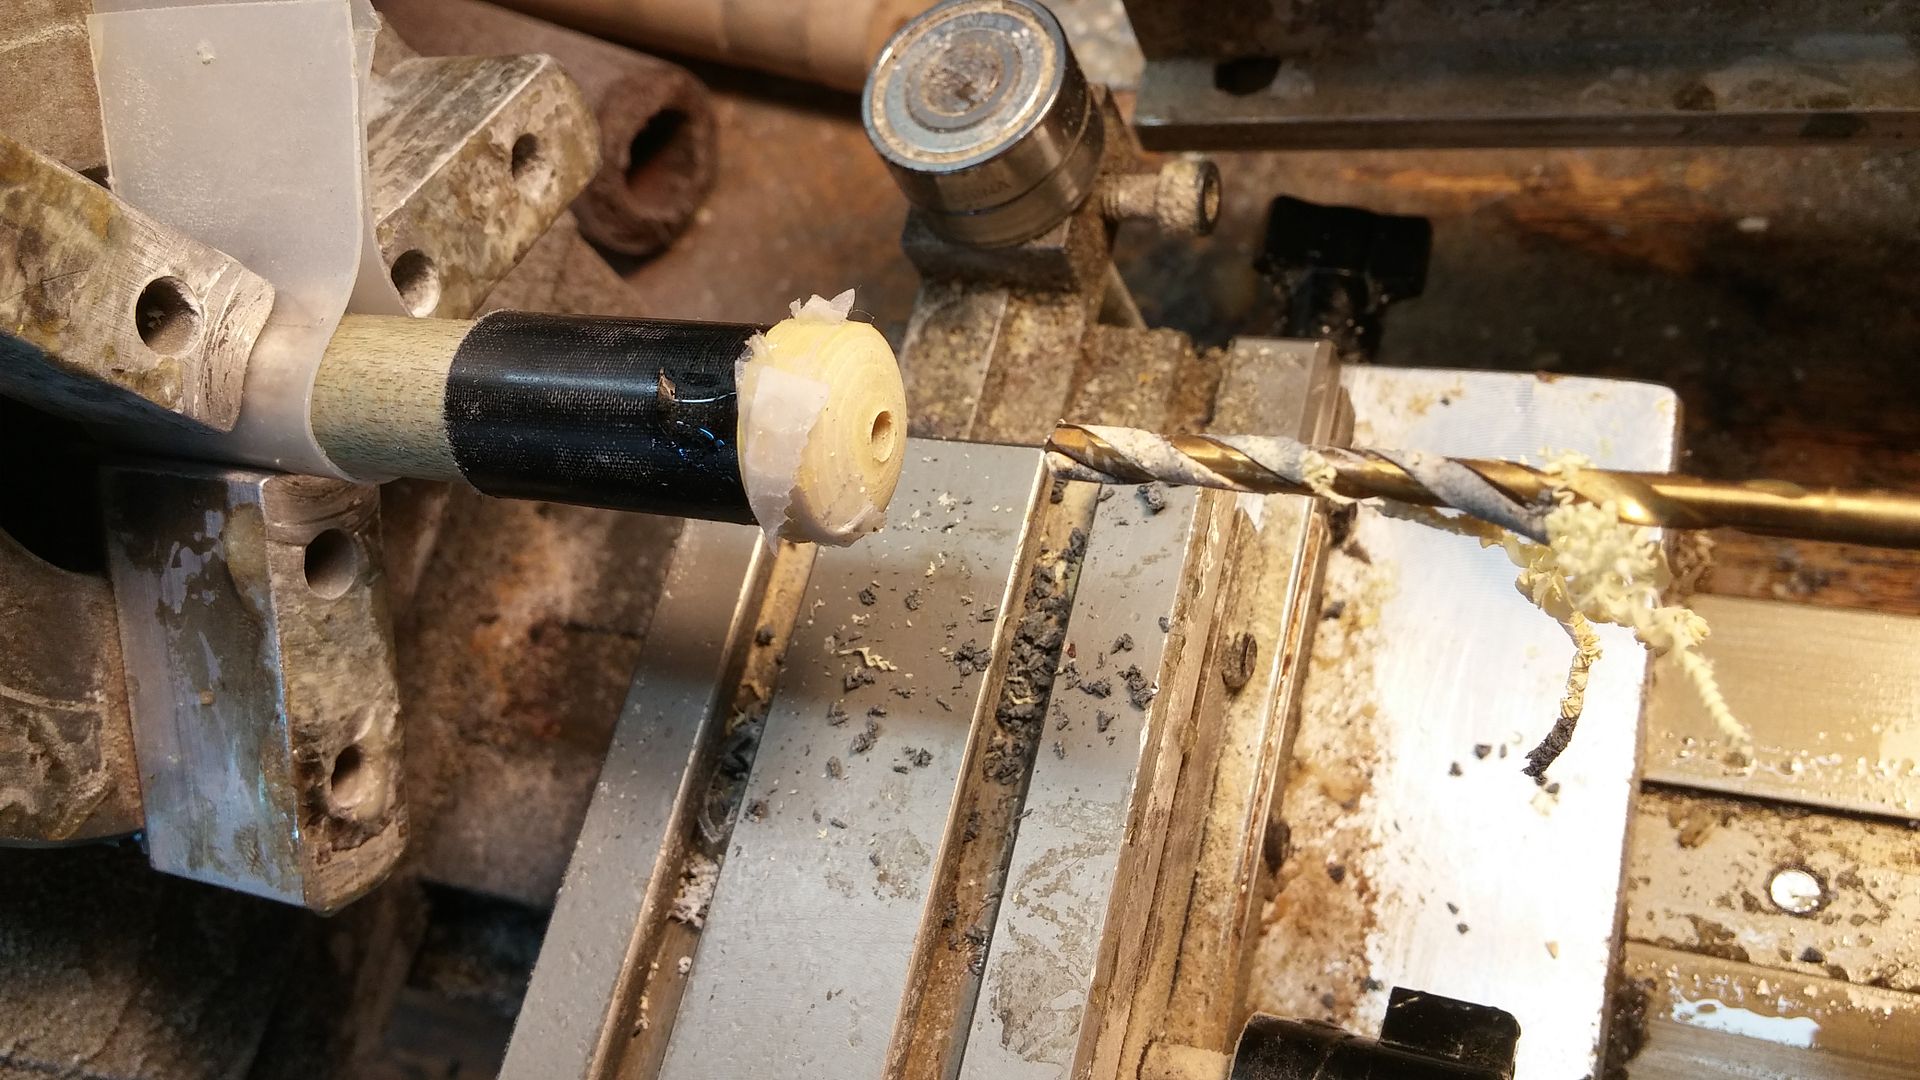
Glue on the tip with 5 min epoxy... that's what I use but choose what you like. When the glue has set, drill a 1/8 in hole about 1 inch deep right in the center of the tip,
Use 5 min epoxy to glue in a 1/8 in phenolic rod.
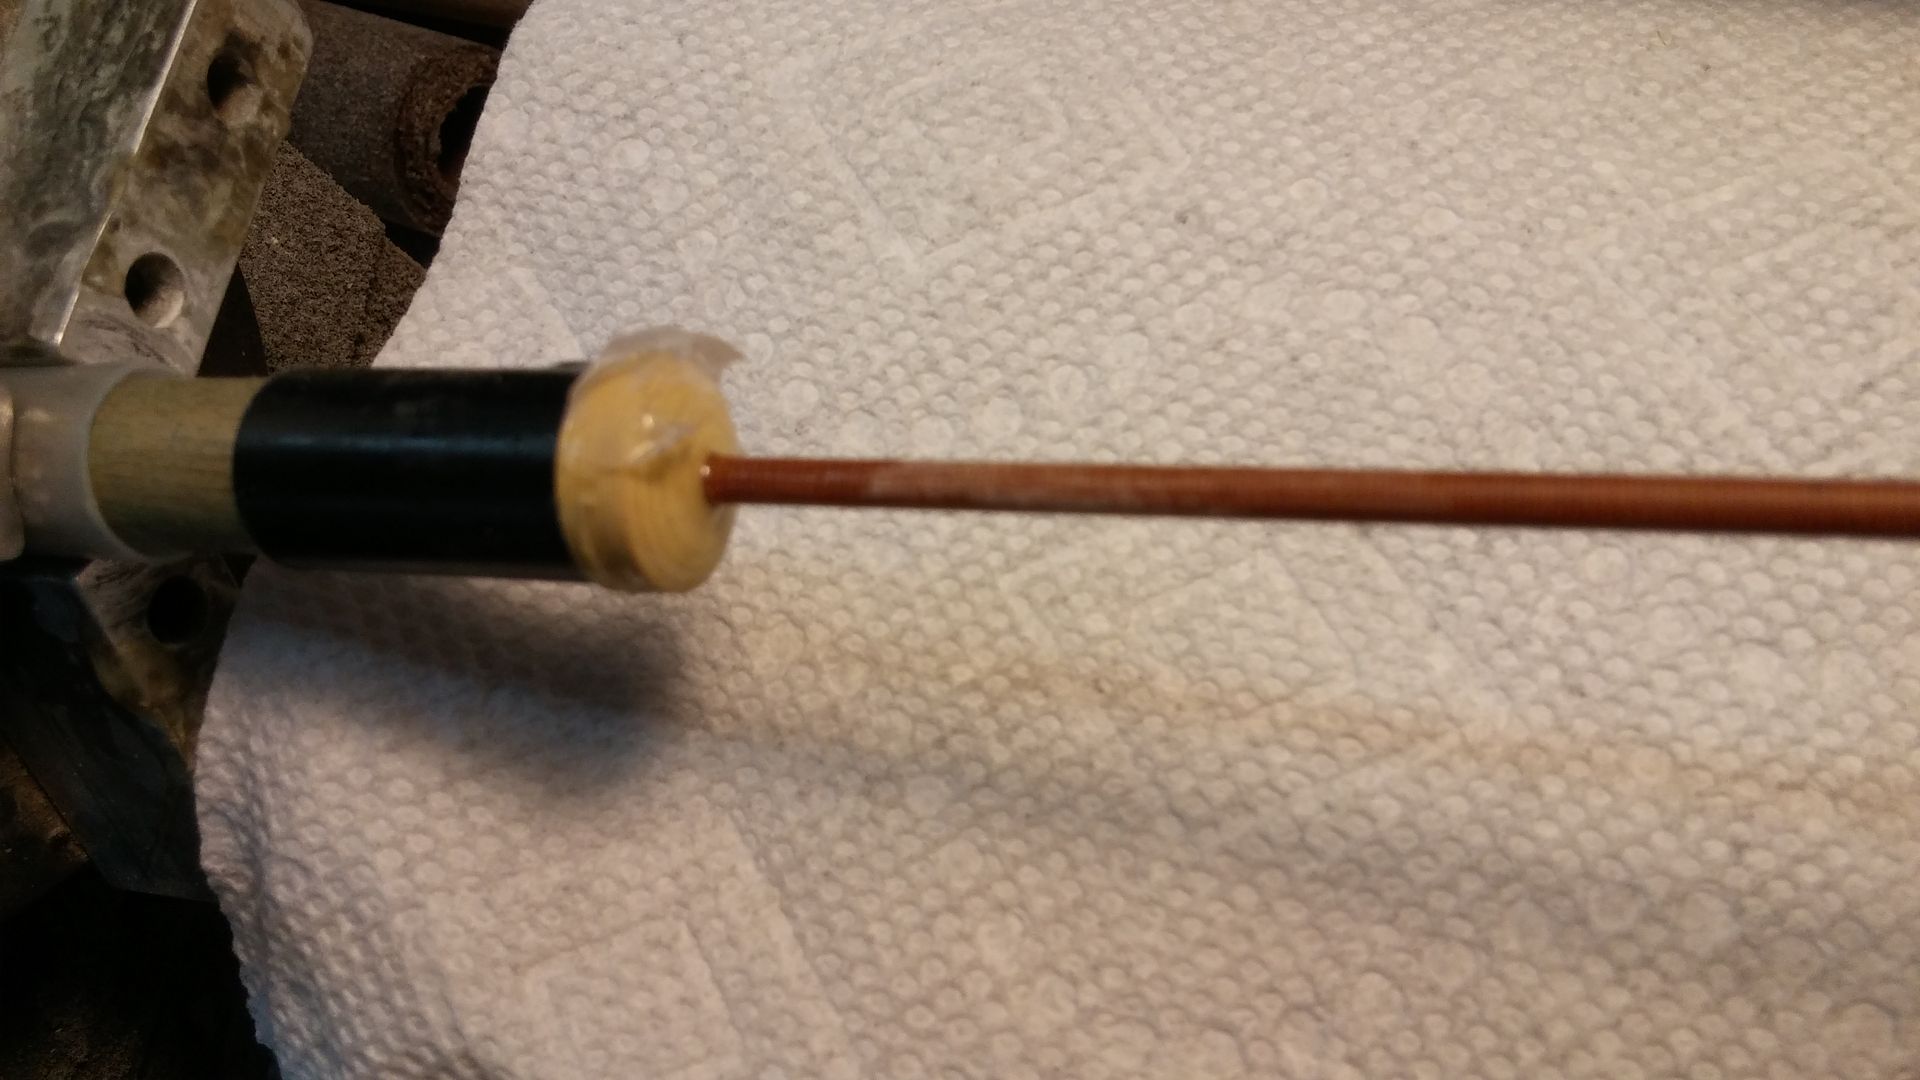
When the epoxy has set, cut off the rod and finish the tip.

I have never had any installed like this pop off. Before this ... they all popped off. The 1/8 in phenolic rod is available from Mcmaster Carr....... cheap.
Kim
I believe hard break tips pop off because the glue joint is sheared by side force on an off center hit. So this is what I do now....
Prepare the ferrule and tip by facing the ferrule and then drill shallow holes in the tip and in the ferrule with a 1/16 in drill,,,,,,,,,,,,,,,,sand each smooth and blow off the dust,

Glue on the tip with 5 min epoxy... that's what I use but choose what you like. When the glue has set, drill a 1/8 in hole about 1 inch deep right in the center of the tip,

Use 5 min epoxy to glue in a 1/8 in phenolic rod.

When the epoxy has set, cut off the rod and finish the tip.

I have never had any installed like this pop off. Before this ... they all popped off. The 1/8 in phenolic rod is available from Mcmaster Carr....... cheap.
Kim
RBC
Deceased
All tips, but break tips especially must have the following:
Both the tip and the ferrule must be flat! no wiggle or wobble or flex when you hold it up against the end of the ferrule
Both the tip and the ferrule must be smooth and clean. No grooves or holes or big scratches. Remember, CA adhesive is happiest gluing glass to glass. The smoother the better.
On leather tips, if they are dry, they will wick the glue away from the surface. You must either use enough CA to fill the wicking, or pre-treat the tip with CA letting it dry.
The tip must be pressed with reasonable pressure against the ferrule. CA is brittle and if there's a layer between the tip and the ferrule, the CA will crush and fail.
The tip must not move or slide once the CA has begun to set. Sometimes, while holding the pressure on the tip, it will slip a little and then re-stick. If this happens, pull it off and start over.
Last but not least, use a CA that is in between a gel and the thin stuff. CA in it's purest form is so thin it will climb a wick. In order to make it thicker, they add fillers, which lessens the purity of the CA. Too think is really hard to use, but the gel's have too many impurities for me. We use the LocTite professional. It's in constant demand at the local Home Depot so I know it's always fresh, and it's the right consistency for me.
I hope that helps!
Royce Bunnell
www.obcues.com
I believe hard break tips pop off because the glue joint is sheared by side force on an off center hit. So this is what I do now....
Prepare the ferrule and tip by facing the ferrule and then drill shallow holes in the tip and in the ferrule with a 1/16 in drill,,,,,,,,,,,,,,,,sand each smooth and blow off the dust,
Glue on the tip with 5 min epoxy... that's what I use but choose what you like. When the glue has set, drill a 1/8 in hole about 1 inch deep right in the center of the tip,
Use 5 min epoxy to glue in a 1/8 in phenolic rod.
When the epoxy has set, cut off the rod and finish the tip.
I have never had any installed like this pop off. Before this ... they all popped off. The 1/8 in phenolic rod is available from Mcmaster Carr....... cheap.
Kim
Love this idea. Unfortunately, I am installing an ice breaker tip with a leather strip in the middle. I did however just order the 1/8 phenolic rod for other break tips. Thanks for the heads up!
I would be hesitant to do Kim's method to a predator or any other similar designed break shaft without letting the customer know first that this would void their lifetime warrantee. I wonder if it would also cause more problems due to the shaft being hollow at that end?
Dave
Dave
I would be hesitant to do Kim's method to a predator or any other similar designed break shaft without letting the customer know first that this would void their lifetime warrantee. I wonder if it would also cause more problems due to the shaft being hollow at that end?
Dave
I would not use one of those shafts for a break shaft....... I don't think it would take the beating. Some of those shafts break with regular use as a shooter.
Kim
I would not use one of those shafts for a break shaft....... I don't think it would take the beating. Some of those shafts break with regular use as a shooter.
Kim
I was referring to the BK2 BK3 break cues or the OB break cues series. I agree the 314s and such wouldn't hold up to breaking.
Dave
I was referring to the BK2 BK3 break cues or the OB break cues series. I agree the 314s and such wouldn't hold up to breaking.
Dave
I am not familiar how the BK2 and BK3 are constructed....
Kim
My system for White Diamond tip install
FWIW, I always had a hard time getting White Diamonds to stay on no matter how much roughed them up and/or what glue I used. I always attributed the lateral forces of off-center breaks were the cause.
Here's crude sketch of my solution.

It's a slightly different version of the "rod through the middle" solution shown earlier. I chuck the tip in the lathe and machine what is basically a very shallow tenon on the back of the tip. I machine a matching counterbore on the end of the cue. When fit together and glued with 5 minute epoxy, I've never had on pop off. This prevents any lateral force applied to the tip to cause the glue to fail. This also eliminates the need to drill through the tip and have the center of the tip a different material. Even on "center ball" breaks, your breaking with a White Diamond and not phenolic.
Just another way to skin the proverbial cat
FWIW, I always had a hard time getting White Diamonds to stay on no matter how much roughed them up and/or what glue I used. I always attributed the lateral forces of off-center breaks were the cause.
Here's crude sketch of my solution.
View attachment 399112
It's a slightly different version of the "rod through the middle" solution shown earlier. I chuck the tip in the lathe and machine what is basically a very shallow tenon on the back of the tip. I machine a matching counterbore on the end of the cue. When fit together and glued with 5 minute epoxy, I've never had on pop off. This prevents any lateral force applied to the tip to cause the glue to fail. This also eliminates the need to drill through the tip and have the center of the tip a different material. Even on "center ball" breaks, your breaking with a White Diamond and not phenolic.
Just another way to skin the proverbial cat
Interesting method.............. nice job
Kim
I would not use one of those shafts for a break shaft....... I don't think it would take the beating. Some of those shafts break with regular use as a shooter.
Kim
Kim, I agree!! Here is a photo that was sent to me by a customer of a Predator that was used for breaking....
