Designing new light, projector mount, and camera for table

iusedtoberich

AzB Silver Member
Silver Member
I'm redoing my table, light, and camera setup. I also just purchased the Projection Pro Billiards system. I also moved my table a few feet, which was the impetus for the new light. I'll be updating this thread with my progress. All comments welcome!
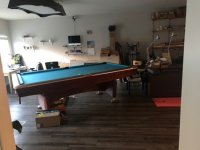
IMG_4064.jpg
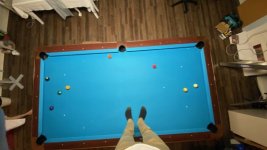
This is what it looked like before. (The table was of course straight and centered under the light...)
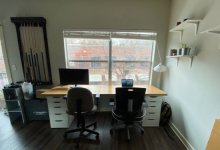

IMG_4090.jpg
Made a new working desk from a large office door and two Ikea drawers.
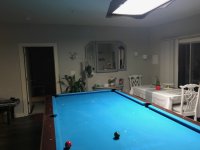

IMG_4107.jpg
Found this table and chairs on the side of the road for trash and took them home and painted them.
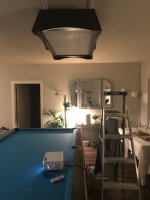

IMG_4124.jpg
With more room for the two "new" tables, the pool table moved over a few feet. This was the impetus to do a new light, since I would have had to do a lot of work to move the old light anyway, and it was time for an upgrade.
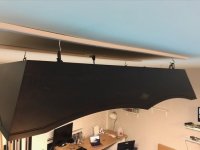

IMG_4178.jpg
This is how I had mounted the old light 7 years ago when I got the table. I had tried it lower on chains, but hated the look (in my living room). I much prefer the aesthetic high up. And I never have to worry about banding my head:)

To be continued...
 
Last edited:
iusedtoberich

AzB Silver Member
Silver Member
IMG_4175.jpg
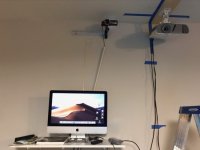
This is how the camera is now. It feeds directly into the computer. It records to the computers hard drive, bypassing the camera's memory card entirely. I will most likely be keeping this setup, but moving it so it aligns with the new table location.

Next to the camera you can see my first pass at mounting the projector for the Projection Pro Billiards system.


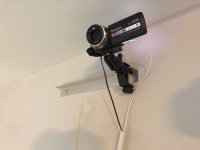
IMG_4176.jpg
Here is a closeup of the mount. The camera was in the middle of the aluminum channel before I moved the table.

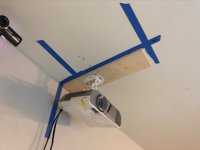
IMG_4177.jpg
Here is a closeup of the projector. The mount is ugly because I knew the projector selection and mounting would require a lot of trial and error. Once figured out, I will make the mount nice. Blue painter's tape is to mark the studs in the ceiling, and the centerline of the pool table on the wall, to align the camera lens with center table.

I took a chance and bought 2 different no-name brand projectors (not in this picture) for $180 and $250 on amazon, compared to about $500 for the projectors that the Projection Pro Billiards company recommends. Both were horrible. They had 3 main problems:
1) The light they threw off did not cover the entire envelope of the pool table. It was very close, and would probably have covered an 8' table, but not my 9'.
2) The brightness of light they did put out was not enough to see the lines the program draws on the table very well.
3) The focus of the projector could only be adjusted to make about 1/3 of the table in focus at any given time.

(Note, the projectors were good to play a movie on the wall, but definitely not for this very specialize application). Back to Amazon free reruns they went:)

So I returned them, and bought the one in the picture next, which is a Viewsonic brand. This was about $500, and the one recommended. Mounting this in the exact same spot, all the problems of the no-name brands were solved. The light envelope overlapped the pool table about 2 or 3 feet in each direction. It was bright enough to see the ball/line layouts. It was in focus the entire bed of the table.
 
Last edited:

iusedtoberich

AzB Silver Member
Silver Member
https://www.youtube.com/watch?v=fjq9OBdVMJw&feature=youtu.be

This is a 20 sec youtube video. It shows the no-name projector mounted on the ceiling and projection on the table in its full brightness. Then, I'm holding with my hand the Viewsonic projector (in the same location as the mounted projector), and moving it's image over the other one. You can see the Viewsonic one completely takes over, in both brightness and envelope of the table. If anyone buys the projector pro billiards system, definitely go with Viewsonic, and don't try to skimp like I did:)
 

iusedtoberich

AzB Silver Member
Silver Member
The Viewsonic projector worked pretty well, and I fooled around with the Projection Pro Billiards software, to do some practice drills. It worked fairly well. The issue was there was pixilation and more dimness at the end of the table furthest from the projector. This was to be expected, due to the mounting location. I saw a post on their website, that a projector mounted directly overhead of the table would work super well, (since it would be perpendicular to the table), but most people have a light there that would be in the way.

So that brings us to making a new light. I figured if the projector worked directly over the top of the table, I would build a new LED light using two panels while leaving a space between the panels for the projector to pop through.

First step was seeing if the projector could light the table from that location with 9' ceilings, and a table that is 5" higher than normal (I put it on blocks when I had it installed to save my back...)

I took the Viewsonic projector off the wall, stood on top of the table, and held it in my hands up agains the ceiling. The light not being in the correct (since the table moved) place made this much simpler. I now had access to the full ceiling height.

The ceiling was not high enough. However, while looking for projectors on Amazon before, I came across "short throw" projectors, where you can put them much closer to the intended viewing surface. I took a chance, and bought one. Free returns again, and this time I learned my lesson and bought another Viewsonic one. It was also about $500.

When it arrived, I got up on the table, held it with my hands, and was amazed! It had no problem covering the table, even when a foot lower than the ceiling. And the picture looked amazing, since the projector was perpendicular to the table. There was one problem, however. The projector had to be outbound of the table. Still centered over the side pockets, but about 1 foot outbound of the long rail. I did not anticipate that, but it makes perfect sense, for their designed operation. So, that thew a wrench in my idea of centering the projector inside a custom built two panel LED.

However, it would actually make it easier for most people's existing setups since there is no need to move the existing light. I let the company know, so they could have a new recommendation for their customers.

To be continued:
 
Last edited:

iusedtoberich

AzB Silver Member
Silver Member
A break from the projector...

I have been looking for a way to mount a video camera directly overhead of the table like in Accu-Stats that fits on a 9' ceiling for years. Nothing I tried before looked good. A screw on wide angle lens on a decent pro-sumer Panasonic camcorder that was wide enough made the table look like absolute garbage. Completely distorted.

I just tried a borrowed iPhone 11, and it was a HUGE improvement. The table doesn't seem distorted at all to my eye. The balls towards the end rails may be a bit bigger, but certainly pretty good. Take a look at the 20 second video clip below directly from the iPhone 11. This is the regular model, not the pro, that has 2 lenses, not 3. I think Apple figured out a way to combine two lenses to get a wider view without much distortion.

https://www.youtube.com/watch?v=CLHVxVav-nM&feature=youtu.be

I don't know if I can make this work. I'd have to buy a new iPhone and dedicate it to the table. And I'd have to figure out how to get its video feed out. Probably too much to undertake now. But I"m super impressed with the lens.
 
Last edited:

iusedtoberich

AzB Silver Member
Silver Member
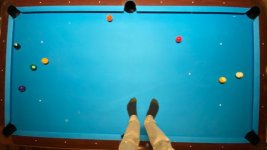
Here are two stills from the iPhone 11. One with the camera against the ceiling, and the other much closer to the table. I think in video mode it distorted even less than snapshot mode. My phone is an iPhone 7, and I can only get about half the table from the same camera position against the ceiling.

IMG_1575 (1).jpg

IMG_1576 (1).jpg
 

iusedtoberich

AzB Silver Member
Silver Member
Based on my experience with the iPhone 11, I just looked up its camera spec to see if I can find a traditional camera that can have the same picture. The iPhone sites list it as a 13mm equivalent lens. I think if I get an SLR camera with a 10mm to 20mm equivalent range lens, I should be able to match the iPhone 11. I don't know anything about photography, but I see new Canon and Nikon DSLR kits on amazon and Ebay for $350. I will watch Ebay to see what they sell for used. Maybe I can get one for $100 range used?

This is assuming apple is not doing any magic by blending the picture from the two lenses together.
 

Lawnboy77

AzB Silver Member
Silver Member
Looking good! That i-phone 11 is very impressive, it's amazing how fast our phones are advancing. Thanks for sharing!
 

iusedtoberich

AzB Silver Member
Silver Member

iusedtoberich

AzB Silver Member
Silver Member
I made a lot of progress over the past couple of days. I'll fill you all in later as it will take a while to make the post.

In the mean time, I had to play some pool:) I practiced with the new LED lights in place, and the projection pro billiards system. You can see my practice session in the video below. Its sped up 5x for "my" short attention span;)

https://www.youtube.com/watch?v=_Gh8d9DMbFg&feature=youtu.be
 
Last edited:

Cardigan Kid

AzB Silver Member
Silver Member
I made a lot of progress over the past couple of days. I'll fill you all in later as it will take a while to make the post.

In the mean time, I had to play some pool:) I practiced with the new LED lights in place, and the projection pro billiards system. You can see my practice session in the video below. Its sped up 5x for "my" shot attention span;)

https://www.youtube.com/watch?v=_Gh8d9DMbFg&feature=youtu.be

This is absolutely cool and very generous of you to share with us all the details.
I’m assuming you are already experiencing the benefits of video assisted training in that you get more set-up patterns in a wide variety, ease of repeated set-ups, and training stays fresh and motivating.
For those of us who can only get in 1 to 2 hours a day, the time is a premium and can not afford to be wasted.

I’m hoping to work in video projection eventually after the kids are a bit older and I can get in some dedicated practice times.

A quick question...does the program allow for the projector to be mounted at the center of the table instead of the end and the video can adjust? The way my home tables are set up, finding space to mount mid table is easier.
 

iusedtoberich

AzB Silver Member
Silver Member
This is absolutely cool and very generous of you to share with us all the details.
I’m assuming you are already experiencing the benefits of video assisted training in that you get more set-up patterns in a wide variety, ease of repeated set-ups, and training stays fresh and motivating.
For those of us who can only get in 1 to 2 hours a day, the time is a premium and can not afford to be wasted.

I’m hoping to work in video projection eventually after the kids are a bit older and I can get in some dedicated practice times.

A quick question...does the program allow for the projector to be mounted at the center of the table instead of the end and the video can adjust? The way my home tables are set up, finding space to mount mid table is easier.

I will answer fully when I update the post with pictures. Short answer is the projector can be:
1) Pointing at the end rail of the table about 6' away, on the ceiling or high up on the wall. (like the typical fixed camera view during streams).

2) It can be overhead of the table, centered on the side pockets, on the ceiling pointing straight down, but outside of the long rail about 1 foot. This is the best.

3) It can be overhead of the table, directly in the middle (center spot of the table), mounted on the ceiling. To go here, you have to angle the projector and then adjust the keystone for the picture to look good. The problem with adjusting the keystone is it makes the picture smaller, and not enough to cover the whole table. If you have a 9' table, and 9' ceilings, the projector won't be high enough. If you have an 8' or smaller table, or higher ceilings, then it should work.

There might be other configurations, but these are the ones I tried.
 

Cardigan Kid

AzB Silver Member
Silver Member
I will answer fully when I update the post with pictures. Short answer is the projector can be:
1) Pointing at the end rail of the table about 6' away, on the ceiling or high up on the wall. (like the typical fixed camera view during streams).

2) It can be overhead of the table, centered on the side pockets, on the ceiling pointing straight down, but outside of the long rail about 1 foot. This is the best.

3) It can be overhead of the table, directly in the middle (center spot of the table), mounted on the ceiling. To go here, you have to angle the projector and then adjust the keystone for the picture to look good. The problem with adjusting the keystone is it makes the picture smaller, and not enough to cover the whole table. If you have a 9' table, and 9' ceilings, the projector won't be high enough. If you have an 8' or smaller table, or higher ceilings, then it should work.

There might be other configurations, but these are the ones I tried.

Yes, option 2 seems like the perfect setup for my basement. Good to know it can be done.
Thanks for the response—look forward to hearing more and your thoughts on how practice has evolved for you. I know you are a drill hound like myself and I’m guessing the program has a ton of them for you.
 

fastone371

Certifiable
Silver Member
Thank you for making all of this info available. I was also thinking about getting a billiards projection system.
 

iusedtoberich

AzB Silver Member
Silver Member
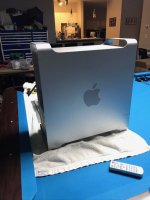
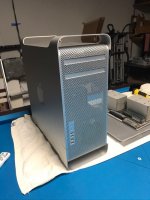
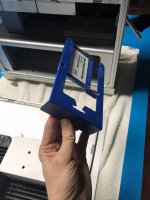
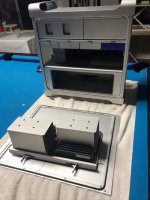
There are lots of moving parts to this project. I decided to update my video recording setup. Right now I have a used 2013 model iMac that uses a portable thunderbolt HDMI capture device to get the video from the camcorder to the computer. I had bought the computer used from eBay, and updated the memory and changed the hard drive to an ssd. It has performed well. But, I saw the new Mac Pro unboxing videos a few days ago, and was sick with how beautiful they were, and how powerful. (I'm a long time apple fanboy;)). However, I'm not going to spend 6K on one!, so I did the next best thing. I bought a used Mac Pro from eBay, for $350! This is a 2009 model! I'm so excited. I'm going to upgrede the processor, memory, graphics card, and put ssd's in it. I'll be at about $650 I think when all done. It will absolute fly, and run circles around all my other computers. Plus, its beautiful:) I plan on buying the new, $6k Mac Pro, in 10 years on eBay:)

Below are the pictures as received from eBay. It actually came with an SSD, someone before me upgraded it.

IMG_4236.jpg

IMG_4237.jpg

IMG_4238.jpg

IMG_4239.jpg

IMG_4241.jpg
 

iusedtoberich

AzB Silver Member
Silver Member
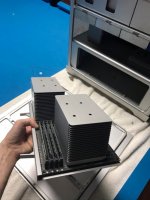
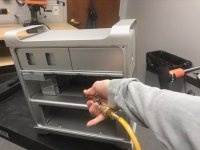
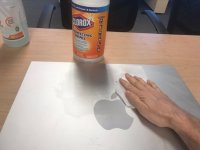
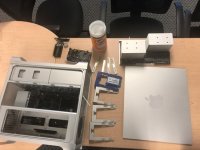
I took it to the office today and spent the day cleaning it. I blew off 10 years of dust with an air compressor, and scrubbed every surface. My memory upgrade came in. It came from eBay with 10GB of memory. I bought 64 GB of used memory for $65. That would have probably been a $3000 upgrade in 2009. The iMac it will replace has 8GB of memory. It can fit up to 128GB. The last picture is everything cleaned before I put it back together.


IMG_4274.jpg

IMG_4285.jpg

IMG_4323.jpg

IMG_4324.jpg
 
Top