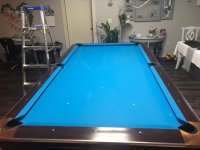
Designing new light, projector mount, and camera for table

Oh, right now I record at 720P. I will switch to 1080P with this new setup once its all ironed out. It would also have the horsepower to do 4K, but that requires a new (not used) camera, and new (not used) capture cards, and lots more storage (which I can fit TONS of drive internally in this machine). Those items would add considerable expense to the project, and not worth it for another 5 years before their price falls on eBay used:)
 
Last edited:
Back to the projector:

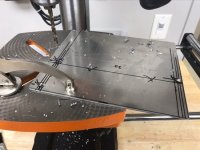
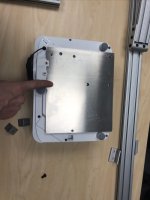
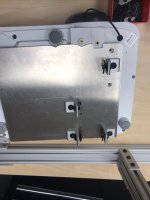
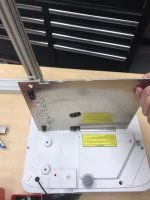
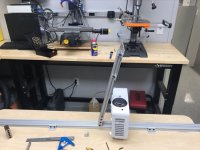
When I was standing on the table and holding the projector in my hands over my head, I saw there were several positions that might work very well. So I needed to design a mounting system that could be easily adjustable to accommodate all these positions. Once I found the right one, I'd redesign it to only work with that (so its smaller and prettier). The table is in my living room. I needed it to move severel feet sideways, up and down, and tilt. This is what I came up with. It was free as I had all the pieces already at my dayjob. BTW I think my day job is ending Dec 31. We are a startup, and have run out of money after 1.5 years. This job was awesome, and I had built the shop from scratch and I was the only one who used it, so the tools were always organized:)

IMG_4167.jpg

IMG_4168.jpg

IMG_4169.jpg

IMG_4170.jpg

IMG_4171.jpg
 
Below you can see how the mount works:

Screen Shot 2019-12-20 at 2.09.44 AM.jpg
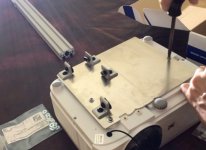
Plate for projector


IMG_4194.jpg
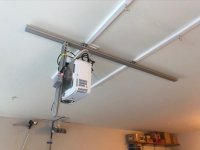
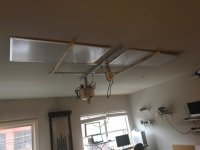
Mounted on ceiling. Those two wood strips were from the mounting of the old light. They came in super handy! They go right into the ceiling joists.


IMG_4197.jpg
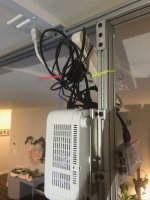
Closeup. You can also see the blueberry or blackberry or raspberry whatever its called. ha ha. This is what the projection pro billiards company sends you. That's all you need to plug into the projector.
 
Last edited:
Here is one mounting position:

Screen Shot 2019-12-20 at 12.59.41 AM.jpg
If you look carefully at the projector, and the long rail of the table, the camera is about 1 foot outbound of the rail, and perpendicular to the ceiling. I'll have a short video that shows its position better later.

IMG_4187.jpg
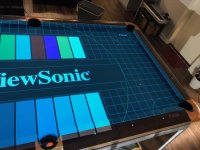
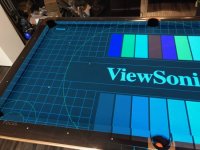
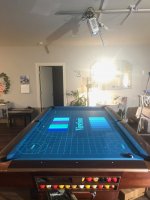
With the camera in that position, it covers the table perfectly. This is a picture from my iPhone 7. There was zero adjustment to the keystone of the projector. This is a huge advantage to having the projector in this position. It makes all areas of the table surface look the same as far as brightness and resolution go.

IMG_4188.jpg
If you look carefully, you can see that the edge of the light on the end rails ends on the cushion. And the edge of the light on the long rails goes on the floor a hair, past the table (I will have a short video for this view later). That means there is very little "wasted" light with this projector location. So you get as much possible light onto the table, to make the practice drills clearer to see.
 
https://www.youtube.com/watch?v=_TT96KT9ct4&feature=youtu.be

Here is a 1 min long video of the projector in the position from the above post, and what the playing surface looks like. The last part of the video I walk around the table and carefully show where the light of the projector falls. So you can clearly see almost all the light is landing on the table and not being wasted. This is with zero keystone correction.
 
Oh, btw, I gave away the old light for free. I had no takers here (for free), so I put it on craigslist for free. I had about 10 emails in 1 hr of the post, all wanting to come get it. I could not believe there were so many people that 1) have a pool table, 2) need a light, 3) saw the free section in craigslist at the same time. The person who showed up saw my setup, asked if I was a professional, and told me he used to win a lot of money playing pool in college. You know the drill! I just smiled at him and said wow, that's awesome:) Anyway we had a nice chat and maybe I'll get him over one day to play a friendly game.


IMG_4219 (1).jpg

IMG_4181.jpg
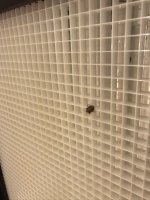
ps, there was a friendly bug in the light. I threw it outside with a piece of paper. I told my gf, and she was so impressed I didn't kill it. BTW, she is visiting her family in Taiwan for the holidays, so I'm doing all this stuff while she's gone. ha ha ha ha.
 
https://www.youtube.com/watch?v=_TT96KT9ct4&feature=youtu.be

Here is a 1 min long video of the projector in the position from the above post, and what the playing surface looks like. The last part of the video I walk around the table and carefully show where the light of the projector falls. So you can clearly see almost all the light is landing on the table and not being wasted. This is with zero keystone correction.

That’s eye opening to see the projector is mounted perpendicular to hit the table at that angle. I was assuming it would have to be mounted horizontally at a 30 deg downward angle.
I read you have 9 foot ceilings...how far down is that center mount vertical projector, like a foot? And is it high enough to be out of the way?

Great updates. I also try not to kill the bugs, they have it tough enough as it is, why not let them a have a punchers chance at life and toss them outside.

Yeah, I was surprised too but it makes perfect sense. These projectors are designed to be mounted upside down on a ceiling, or right side up on a table, and projected onto a screen or a wall. So in that as-designed scenario, you would want all the light to be offset from the lens, not centered about the lens.

I'll have full dimensions later from the bed of the table for height, and the long rail of the table for horizontal location. But, its completely out of the way. No issues even if you were to jump up and down while under the projector after successfully riding the cheese;)
 
Last edited:
This is absolutely cool and very generous of you to share with us all the details.
I’m assuming you are already experiencing the benefits of video assisted training in that you get more set-up patterns in a wide variety, ease of repeated set-ups, and training stays fresh and motivating.
For those of us who can only get in 1 to 2 hours a day, the time is a premium and can not afford to be wasted.
[snip...]

Thanks for posting. You look like Tor in the video, making the outs look so simple! Enjoy, Steve


I'm really liking it so far. The last pattern on the sped up video was one I started a year or maybe year and a half ago. I was trying a new to me technique, of trying to get a perfect 7-0 ghost score of a random layout. I had broken 9 ball, made 2 balls, and this layout remained. I marked all the positions with donuts, and went to it. I think the best score I ever got was 7-2 early on. I probably shot that layout hundreds of times. I know every single way to get from one ball to the next. That was my goal with this practice method. To figure out the best pattern to take that had the highest margin for error. Anyway, I really wanted to score 7-0, but life got in the way, and I couldn't devote much time to it, yet I didn't want to remove the donuts so I could get back to it when I could. So for over one year the donuts were one the table. They'd pop off occasionally, and I'd find the mark they left behind and put a new one on. The very first thing I did when I got the projector was mark this layout:) I'm so happy to have it stored now, donuts off the table, and able to get to it any time.

You can also see the first two layouts in the video were 4 ball patterns that I did live by throwing 4 balls and marking the locations. I did that to show how marking the balls works. The first 4 ball pattern turned out to be pretty.easy, and the method I chose to run it I think would yield very high results. Did you notice I also showed how to mirror that pattern?

The second 4 ball pattern turned out to be much tougher. The 8 ball was a really big ball, and took away a lot of good options. I'd like to go back to this layout, because I don't feel like I found the best way to run it. That is the great value in this system. You can go back to an exact layout anytime you like.
 
Last edited:
I'll also add that setting up the balls in the projected circles is much faster than placing the balls in the donuts (once the donuts are already on the table). With the donuts, I always felt like the ball had to settle perfectly in the hole. That took a split second longer and a gentle touch.

With the projected circles, there is no way to get it super super precise. I'd say plus/minus 1/4" can be expected, as its a touch tricky to get the ball perfectly within the light circle.

What this has done for me, is relaxed my brain from trying to place them "exact", and allows me to just plop them down super fast roughly centered in the light circle. It really has made a difference in the "pleasure" of setting up a pattern over and over.
 
My aesthetic goal when I had started the projector overhead of the table was to have it contained within the light box, so the box would hide it, and it would look ok in my living room. It turns out that will not work in my situation.

IMG_4199.jpg
Here you can see what it takes to make it work within the bounds of where the light would be. It needs to be tilted quite a bit, and as high up as possible. The keystone also has to be adjusted quite a bit (which it did not in the earlier setup). What I discovered with adjusting the keystone, is that it makes the projected size of the light signifincaly smaller. You can see that with the keystone adjusted properly, the picture is not big enough for a 9' table with 9' ceilings, (and the table 5" higher than normal). Even with the projector about a foot higher than before, the keystone adjustment cuts out a ton of the picture. You can also see now why I needed the temporary mount to have a tilt provision and a very large horizontal adjustment provision.


IMG_4200.jpg
Foot end of table. Notice the light is not big enough to cover the end rail cushion. But it does overlap the long rail cushion. Notice also the picture is slightly dimmer on the right side. This did not happen with the projector in the earlier setup, outbound of the table and perpendicular to the ceiling. Still pretty good though.


IMG_4201.jpg
Head end of the table. Same thing.


IMG_4204.jpg
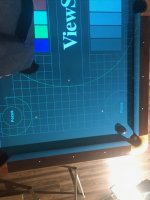
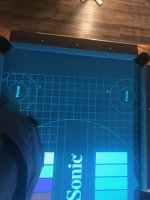
This picture shows the software setup for the projection pro billiards setup. You put those grid points on the intersection of the diamonds 1 diamond away in both directions from the 4 corners. Note, I measured with a ruler how far the light is from the end rail cushion. It was close enough that this projector arrangement would work with a pro-8' or smaller table. Or, if the ceiling was about a foot higher (I think), it would work with a 9' table.


IMG_4205.jpg


Below is a 30 sec video link of what I showed in the pictures in this post.
https://www.youtube.com/watch?v=rLtZotgOjIo&feature=youtu.be
 
Last edited:
Thank you

Great thread, thank you for showing all the work!! Now I really want a projector lol.
 
Yes, thank you for showing us your setup.

I'm going to be in a similar situation in a couple of weeks when my house is finished. I already have a short-throw projector and projection pro billiards software/computer, I was just wondering about the best way to mount it with a 9' ceiling.

Your timing could not have been better. Thanks again!!
 
I'm pretty set with the location of the projector.

Now switching gears to the light. I have to see what works from a lighting standpoint, and then figure out the mounting, wire management, and if/how to integrate the light mounting with the projector mounting. First, the lighting aspect of the LED panels.


IMG_4208.jpg
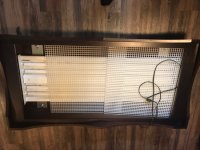
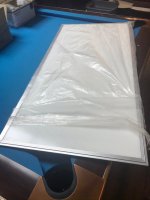
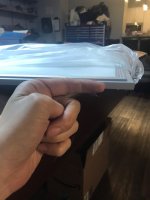
I bought these LED panels 5 years ago on eBay. I think they were about $170 shipped, for two panels. I had intended to put them inside the Brunswick light. Well, I hated them. I had tried just one panel hanging from the ceiling hooks with kite string (temporary), and they were blinding my eyes. I don't know if I was overly sensitive, or they were too low, or what. But I packed them up, put them in the closet, and they have been sitting there since. Until this week, I decided to try them again. I also decided to try them with a dimmer, incase they bothered me again.Oh, the first time around 5 years ago, I held the grate from the Brunswick light in front of these panels with my hand, and it made a world of difference, and did not bother my eyes. So, I figured if they still bothered me, I'd incorporate a grate in the light box and a dimmer. Home Depot sells them pretty cheap.


IMG_4206.jpg


IMG_4207.jpg
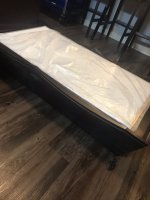
Its amazing how thin these things are.
 
IMG_4212 (1).jpg
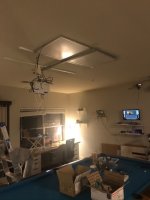
Here is one panel temporarily hung.


IMG_4211 (1).jpg
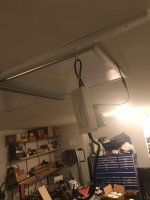
I got super lucky and the panel actually fit under the aluminum channel I was using for the temp projector mount. That was not planned:) You can just see the dimmer switch peeking out behind the power supply in this picture. I had bought this dimmer switch 5 years ago to use with strip lighting. (I was going to make a strip light setup around a camera in the middle of the table. Well, the camera lens never worked out, and the strip lights didn't work out either, so in the closet they went;))


IMG_4210 (1).jpg
Turned on. I don't know why its different this time around than 5 years ago, but the light did not bother my eyes. Even on full brightness with no dimmer. I'm happy about that, that means less work for me in trying to incorporate a grate. I may still try to wire in a dimmer for the hell of it, especially since this is the main light for the living room.


IMG_4213.jpg
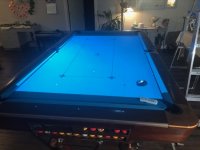
How it looks on the table. You can never tell with a picture due to the camera white balance issues, but it looks fabulous in person. Brighter and more even than the Brunswick light from before, which was even about a foot lower.


IMG_4215.jpg
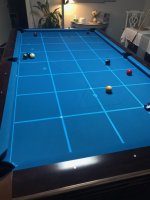
Here you can see the lines from the projector pro billiards show up great. I actually wasn't sure how well they would show up, and that was one other reason I wanted to keep the dimmer option.
 
Now that we know it works great with one LED panel, lets try 2!


IMG_4245.jpg
I had some scrap wood to make it work with 2 panels.


IMG_4246.jpg
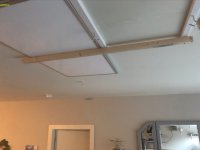
These original strips from the original light install 7 years ago were so helpful throughout this upgrade exploration! PS, I hit my head on those eye hooks several times:( I had left them on, thinking I might need to hang something off of them during this exploration.


IMG_4244.jpg
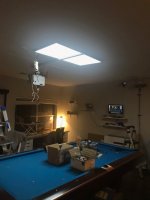
With two light, at full brightness, they did not bother my eyes. I'm super happy about that.


IMG_4247.jpg
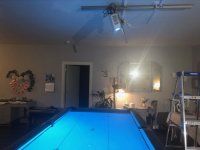
This is how it lights the table. Again, you really can't tell from a picture. But it looks great in person. Its an improvement over one light, but I really think that anyone would be happy with a single light. But for the price, you might as well put two, ha ha. I'd rate them like this: My old Brunswick 2x4 tube light is a 6. Brunswick commercial GC light in pool halls with 8' long tubes is a 7. LED 2x4 single panel is an 8, LED 2x4 dual panel is a 10. The video I posted of me actually playing a couple of days ago was with both LED's installed as in this post at full brightness (I actually recorded that immediately after hanging both).
 
Last edited:
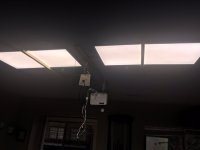
I actually really like how the lights are flush with the ceiling, and only sticking down .5". They really seam out of the way, and much better looking IMO than a traditional pool table light box hanging down lower.

That said, its not really practical to mount them this way. They have wires coming out, and unless I bury the power supply in the ceiling or put it besides the light, I will need more depth.

If you look in the various pictures, there are lots of wires and things hanging down. There is a power supply and cord for each light, dimmer, cord for projector, cord for raspberry, hdmi cable, and the power outlet. I have to figure out what to do with all of that, and whether I should make a very shallow frame about 2" deep to mount the lights and hide all the wires, or do something else.

Also to mount the lights, I need to either make a box to put them into, or get some channel that can grip the edges and screw the light to the ceiling. I want it to look as low profile as possible.
 
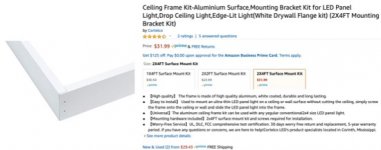
I shopped around at my favorite store in the whole world, Amazon, to see what was available for mounting the LED panels. I decided to get two sets of these. They are aluminum painted white, and will have (I hope) just enough depth to put the LED power supply above the light. I figured this would be much easier and simpler and probably look better than trying to make a frame out of wood or some sort of aluminum channel from Home Depot. They will get delivered sometime next week, while I will be in Philly visiting home. I'll get back to Atl where I live Jan 1, and will see if I can hang them then. IDK what I will do with the other cords yet, I'll play it by ear then.

Amazon link:
https://www.amazon.com/gp/product/B07C7WSJP9/ref=ppx_yo_dt_b_asin_title_o01_s00?ie=UTF8&psc=1

Screen Shot 2019-12-20 at 9.06.55 PM.jpg
 
Back to the camera, I made a spreadsheet of all the old Canon SLR cameras, to see what features I need, and which was the cheapest. The 2 features I absolutely need is record in 1080P, and HDMI out. The feature that is worth the extra cost given this installation is a view screen that can be flipped around so I can see the picture when the camera is on the ceiling. The cheapest camera that all three of these features is the Rebel T3i (also known as the Canon 600D internationally). Its a 2011 model year camera, that is currently going on eBay for about $125 body only to about $200 with a cheap lens and some standard accessories. I have a few on my watch list and hope to grab one in the next few days.

The lens I need is the Canon EF-S 10-18mm. This is going for $250 new on Amazon, or $100 to $175 used on eBay. I have a few coals in the fire and will try to get it on the lower end used on eBay.

Hopefully both will be won and delivered by Jan 1, so they will be waiting for me when I get back home. I'm not going to worry about mounting the camera yet. First, I will just stand on the table and hold it over my head, to see if it even looks good. If its anything like the iPhone 11 was, then I think we'll be in business. At that point, I will figure out a mounting scheme.

If it doesn't look good, I will then try it where my current Panasonic camcorder is. I have a feeling it will work much better than that camera, because the lens is bigger, and I will have full manual control of the settings to get the best picture.

If both locations work, I may have both cameras feeding into my computer and then I can pick whichever source (or both simultaneously) I'd like to record while practicing. The extra horsepower of the 2009 Mac Pro will make this very possible.
 
Last edited:
Yes, thank you for showing us your setup.

I'm going to be in a similar situation in a couple of weeks when my house is finished. I already have a short-throw projector and projection pro billiards software/computer, I was just wondering about the best way to mount it with a 9' ceiling.

Your timing could not have been better. Thanks again!!

Great, glad to be of help. Please share your setup when you get to it:)
 
Back
Top