Good afternoon,
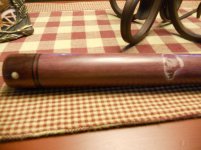
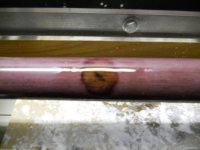
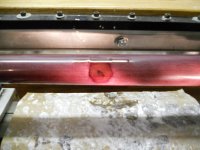
I was buffing this cue when it grabbed the wheel and threw it into the chuck. I see 2 issues, the finish lifting and repairing the gash. My thoughts were I'm going to need to remove the finish so no lifting is present. Can I use some super glue and some purpleheart sawdust or some type of sliver of purpleheart in to the gash.
This was a cue bought as a sneaky pete and all I did were the rings, butt cap & inlay. I did not do any finish work down to the wood up that high. I may have blended it when sanding etc.
Thanks in advance
Killer,
Here is my procedure for a cosmetic repair like you are facing:
Sand the finish down a bit with 220 ( not to bare wood ) and blend out the bad area.
Clean out and scrape the dent with a knife to remove dented fiber then 100 grit sand and fill it with high modulus slow set epoxy.
Block sand the entire cue flat with 220.
Apply epoxy substrate to entire cue, let cure and sand flat with block sanding at 220. Wipe clean with isopropyl alcohol.
Using translucent acrylic paint, mix colors to match base color of wood, carefully air brush to blend the base color with very light paint whisking on to the surface. Do not apply it thick.
Using slightly other darker colors overlay very light streaks to simulate grain imperfection patterns. If it don't look good, wipe it off with lacquer thinner and start over. When it looks the way you want take black and brown India ink and apply tiny wood grain small marks with a tooth pic to match imperfections in the parent wood pattern if required.
Let dry and whisk spray 3 very light coats of rattle can lacquer over the area from about 1 foot away. Let each coat dry for 20 minutes before re coat. Do not use polyurethane. It must be lacquer and very thin dusting each coat.
Wipe the entire cue down with a towel with just a little lacquer on it, do not soak the rag. At this point you can epoxy again or go straight to clear coat.
Before adding additional epoxy or spraying your clear coat take a brand new scotch bright pad and lightly wipe the repaired surface north and south to scuff the lacquer. Do not spin the cue to do this.
Blow off the cue with air, tac cloth and apply your clear coat as usual.
This sounds like a lot of work but other that the waiting between the lacquer coat you would be surprised how easy this is to do and how fast you can do it. As I said if it don't look good wipe it off and start over.
I have repaired many big clunks this way and like everything in cue making the more you do, the better a faster you get at a skill set.
Nature creates hap hazard patterns in wood grain. It is not hard at all to do hap hazard.
Go for it and you will find it very easy to do most any thing once you get the base color mixed right.
When faced with a problem like this you must be resourceful and go for it and jump in with both feet. With a little practice on a scrap house cue, I am sure you will figure it out within a few sample experiments. It is a very easy thing to do.
Good luck,
Rick