hightower deluxe lathe

Good Point Chris !

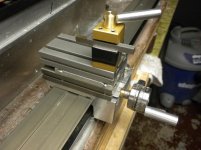
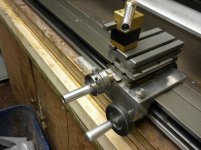
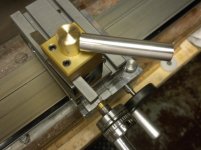
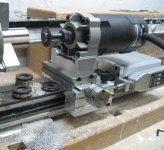
I tried to imply that it only works perfect for one diameter. But I maybe was a bit vague. But, I got past that problem by doing a compound cut on my jaws. I cut it for the shaft size first, then made a second bore for the 1 3/8 bushing size! The larger bore is just enough to true up the outer corners of the jaws, these will grip the bushings true without any fear of damage to the cue since they only grip the bushing. So one gets a "two fer" out of the jaws! And I have a full set of aluminum jaws completely bored to 35mm a full 1.5 inches deep for my metal lathe, That is my accurate chuck!
And I just want to say again: Chris you make a heck of a lathe, the benchmark for others to try to match. I could never ever appreciate that lathe until I actually got one for myself. I had three metal lathes in my shop before I got a CueSmith. Those metal lathes are accurate as one can ask, but for versatility to do cue making tasks, right out of the box, yours is dah bomb ! Thank you.
 
I've been reading these forums for awhile and not had much to add. So I figured I'd share one of the mods I did on my Hightower lathe.

I had a problem controlling the auto-feed speed, so I added a variable resistor to the gearbox motor. I used a 10 twist, 2k ohm variable resistor (VR). This allows me to slow down the auto-feed to a point where there's hardly any sanding needed.

From the power supply, the positive lead attaches to the wiper (#2) on the VR. From the VR, the motor (technically, the switch) attaches to #3 connection (#1 to reverse direction depending on whether the VR is clockwise or counter-clockwise).

The VR I used is really overkill considering that I only need a few ohms to completely stop the motor - but I like it because it is rated to handle the wattage (12VDC times 1.5 amp = 18 watts). The VR I used is supposedly rated at 25 watts...so sayeth the electrical engineer at work...but it's not listed on the VR. Either way, it hasn't blown up...yet.

I saw in the past that Hightower lathes came with a universal power supply that let an operator reduce the voltage and thereby the speed...but Radio Shack said those no longer exist. I'm not sure if that's true, but adding a VR does give you more speed control than the larger step down of the universal power supply, IMO.

I don't know how this will be received, but so far it's worked great for me. Time will tell if it holds up over the long haul.

Pics below are the VR in the home-made bracket w/ faceplate and a piece of wood it cut (without any sanding done on the lathe...just a few light passes by hand).

-Jason.

http://i1182.photobucket.com/albums/x449/nakedcues/100_3915.jpg
http://i1182.photobucket.com/albums/x449/nakedcues/100_3916.jpg
 
selling?

I just was asking Chris about how to do the 3rd taper bar today. I need to get a sharper angle for shorter points. Good Idea... I take it that the 3rd taper bar is a 3/4 aluminum angle???

I am including a couple pics.

One is a holder for a spur driver. I drilled and bored the 1 in hex aluminum to receive the spur driver and hold it with a 1/4 20 set screw. There is a ***** punch mark on the hex aluminum and a matching one on the chuck jaw. There are 2 file marks on spur driver. I can break down the set up for points or butterflies and use the lathe for other operations then put it back the same way it was.

The other pic is a smaller diameter taper bar follower. It has 4 rc car wheel bearings. 7mm id and 11mm od. It lets me get more angle on the short taper bar. I put the bearings on a the shank of a 3/8 bolt turned down to just under 7mm.

Kim

Are you selling these?
 
Tool Post Handle

Just a couple of easy modifications to make things a little easier to remove and operate.

A revolving handle on the crosslide, less than $5 to make.
Quick release tool post screw, less than $5 to make.
 

Attachments

  • DSCN1007.jpg
    DSCN1007.jpg
    92.9 KB · Views: 882
  • DSCN1008.jpg
    DSCN1008.jpg
    94 KB · Views: 855
  • DSCN1009.jpg
    DSCN1009.jpg
    79.7 KB · Views: 855
V block for PC router mount on its own carriage & cross slide. Zero set up time. On the back side I added an indicator mount to my house cue extension clamp to dial in the ring thickness.
 

Attachments

  • Stitch ring 1 - Copy.JPG
    Stitch ring 1 - Copy.JPG
    96.5 KB · Views: 872
Back
Top