Most Accurate Subrail Angle

TableTek

New member
Silver Member
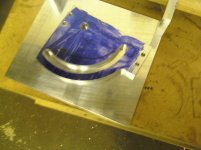
Here is the latest tooling in my full-service shop. I will post more pictures if you like, but this will get you the idea. The fixture is 6" high and 61" long made out of reinforced channel. I machined it to slide in the T-slot of the 10x54 Milling machine since it only has 32" of travel with the dro's installed. The fixture accepts all styles of rails including T rails for antiques, all rails bolt to the fixture in the same manner as the installation on the slate. The same stresses are on the rail so a warped rail can be cut perfectly. There is some alignment on GC style rails with the floating nut plate design, but you have 2 accurate faces to measure off for parallel. Let me know what you think!
Rob

PS; this is far more accurate than how the factory does it.. though it takes about 1.5 hours to do a set
1021090850.jpg
 
Here is the latest tooling in my full-service shop. I will post more pictures if you like, but this will get you the idea. The fixture is 6" high and 61" long made out of reinforced channel. I machined it to slide in the T-slot of the 10x54 Milling machine since it only has 32" of travel with the dro's installed. The fixture accepts all styles of rails including T rails for antiques, all rails bolt to the fixture in the same manner as the installation on the slate. The same stresses are on the rail so a warped rail can be cut perfectly. There is some alignment on GC style rails with the floating nut plate design, but you have 2 accurate faces to measure off for parallel. Let me know what you think!
Rob

PS; this is far more accurate than how the factory does it.. though it takes about 1.5 hours to do a set
View attachment 113339

I think Diamond would dissagree with you on how accurate the bevel is when doing it this way compared to the way they do theirs:D as their rails are ran through a molder starting with the wood in blanks, coming out the exit end completely moulded, and I can guarantee you, there is NO movement of the rails as they're passing throught the moulder being cut to the final spec's;) not knocking your process, as it's a nice set up, but better than factory?...which factory?:D:D:D

Glen
 
Good idea not everyone has room for a molder that does it all.But if you want one I have it.
 
yup, still more accurate

The whole point is that the molding process is pretty accurate to start with for dimensional tolerance of the cross section. Then when the rail is machined for hardware and rails you have the tolerance of the molding plus the tolerance of the machining processes add together. This is the main concept of geometric tolerance which is used in all critical manufacturing techniques (especially aerospace). In layman terms it means the maximum total of error is limited on all 3 axis, not just a error limit in a single plane. With Diamondwyd rails you probably won't have much twisting down the road, but that accuracy is from the material and not the process. For those of you that have built a performance engine, when you bore and hone the cylinders you use a torque plate which puts the same pressure on the bores as when the head is on, this is the same principle. The rail will straighten the same way under the bolt pressure on the fixture as it will be on the table, therefore it doesn't matter if it is warped. I do understand the difference from production and prototype work from my time in the industry. Just because the material is wood and not metal just means you have more worries with moisture and less with cutter wear. Let me know if this doesn't make sense to you, I will break it down more if needed.
Rob
 
cutting subrail angle everytime?

Hi Donny,
I missed your first question there, no I don't cut it generally unless it needs it. I trimmed a few from nice condition rails recently just to see how the factory cut was even though the angle was accurate (within 30 seconds), what I found was that even though the angle was in tolerance, the subrail angle was at one end of tolerance near the pockets while going to the other end of tolerance in the middle. So what you have is a 22.5deg angle near the pockets and a 23.5 deg angle by the center. You wouldn't notice this under playing conditions but the point is to take that away (mostly for antiques is why I built it) where the whole rail can get a twist to it. This is only a step in the right direction as I am working on faster methods with nearly the same accuracy. Stay posted, working on a portable subrail facing/pocket facing workbench currently.
Rob
 
Nice, I may have you do a set for me next time I take apart my Gandy table, I visit the S.Jersey area several times a year.
 
Gandy for mech/play

Glad to help anytime, just let me know when. Hopefully I will have my mobile workstation done by then.
Rob
 
Well it's about time someone else started sharing. Awesome unit, love to come see it sometime. Great work! Love new things and bet you have a few more tricks

well done
 
subrail facing fixture

Thanks for the good words OTLB, you are welcome to stop by anytime if you are coming down near Philadelphia. I am working more and more in the shop and spending less time out in the field. What part of CT are you in?
Rob
215-622-8899

plenty of new stuff coming, just have a backlog of some 60 projects so the going is a little slow..
 
as time now permits I am making a trip to the TT workshop. Going to bring some antique rails to see first hand how his tooling works. Should be fun and will post pics later over the weekend. R+D is great and even better when you get a chance to see how other people do it. This is an invitation I appreciate and now can finally take advantage of.

Thanks Rob
 
Bump, as they would say.

Nice day yesterday visiting a fellow inventor. Many neat things in Rob's shop and since it's Rob shop I won't mention everything.

But as I said we did run a set of antique rails through and they came out awesome. Perhaps not practical for all mechs but certainly this one. Being able to see and control a process is most important. This method can not be much better IMO.

Look forward to another visit as my schedule permits,

thanks John
 
Visit to shop

Thanks for the visit John, you gave me some good ideas to play with! I really enjoy meeting other people with a mindset for constant improving. There is no limit, who knows where it will end up if you keep working at it? Now I just need to get a pair of them 27" levels. Looking forward to the Super Billiards Expo.
Rob
 
there may be another way to do these bevel cuts, thanks for inspiring me on this topic.

if I only had more time. Really though there may be an easier method but would it be as controlled an accurate as your machine. Now where am I going to put one of those damn machines hahhahha
 
John,
You probably figured this out from our meeting, there is always a better and faster way. Now, keeping a tolerance is something that needs to be taken into account. The way I am doing it now relies on eye measurement with my height gauge to the radius center which is doubtfully any better than +- 0.010. Once I get around to making full profile gauges accounting for rail height, profile and nose height than we can see whats what. My project lists keeps growing, just when I start making headway work gets jammed. Let me know when you get a design, if you can blueprint it the making of it is quick. I have been designing as I go, which I admit is a horrible way to build stuff. Talk to you later
Rob
 
Rob.. I have subrails that need reworked from a Gandy 10x5 snooker as they are crowned and warped. Maybe your machine can help me out..

What would you charge? I don't see shipping to be to horribly expensive as i can send regular ups ground, for $30.00 each, probably two boxes.
 
Back
Top