Ring cutting question

Dave38

theemperorhasnoclotheson
Silver Member
I am wondering if anyone has found a reliable and powerful enough power tool for cutting rings on the Deluxe Besides the normal routers? I have used a dremel with success on smaller dia. rings but it creates too much heat and boggs down on large dia. hardwoods. I also have used a variety of laminate trimmers, but I don't care to use them, they tend to be bulky and not friendly to attach to the cross slide and seem to vibrate stuff out of wack every time I use it.(my deluxe is around 15-20 years old and doesn't like vibes)
Has anyone found a unit that size wise is in between but has plenty of torque and is mount friendly?
Thanks,
Dave
 
A foredom tool is not cheap with a heavier duty 1/4" collet hand piece and is not real easy to mount, but that is the best choice I know of other than a laminate trimmer. It turns slower than a router also, but will solve your vibration issues.
 
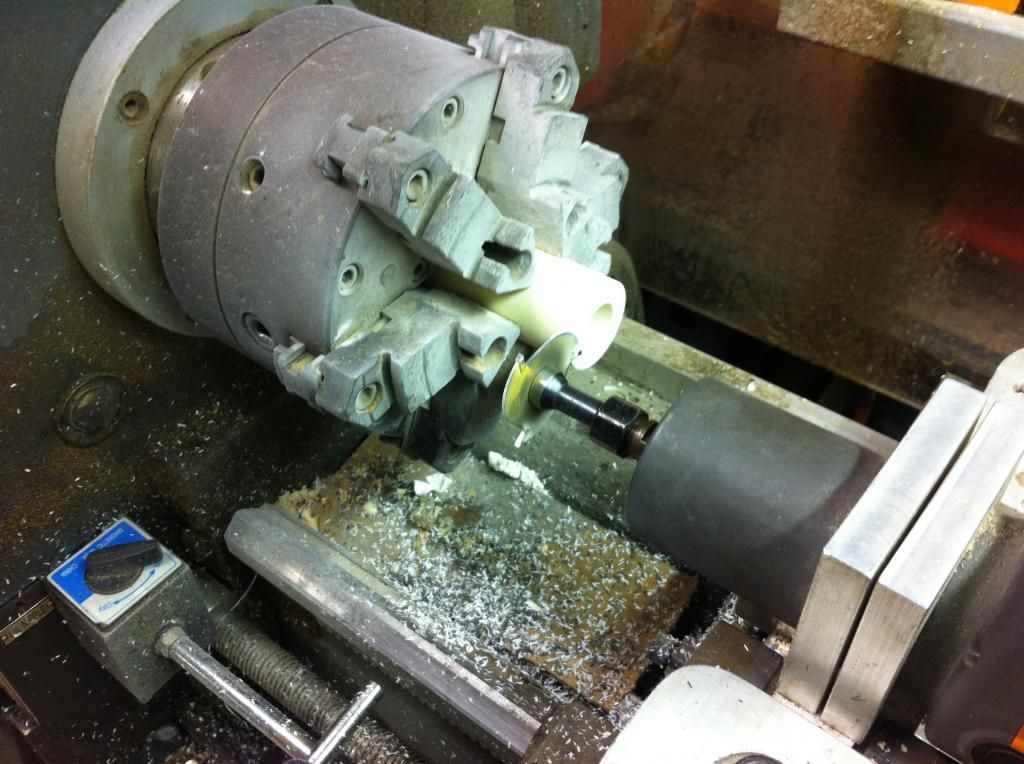
Dave, I take it you are asking about parting the rings from a piece of ring billet. I have had very good results with the Dremel style cutters once they are lined up perfectly square and use the right diameter and kerf saw. The heat is usually caused by friction that is usually a result of the blade not being square to the lathe bed. I also find it helpful to slow everything down (the spindle, the dremel, feed in rate) and of course reverse the spindle rotation. I have an extra cross slide and once I got the dremel mounted square I left it mounted and use it only for parting rings. I hope this is helpful.
 
Dave, I take it you are asking about parting the rings from a piece of ring billet. I have had very good results with the Dremel style cutters once they are lined up perfectly square and use the right diameter and kerf saw. The heat is usually caused by friction that is usually a result of the blade not being square to the lathe bed. I also find it helpful to slow everything down (the spindle, the dremel, feed in rate) and of course reverse the spindle rotation. I have an extra cross slide and once I got the dremel mounted square I left it mounted and use it only for parting rings. I hope this is helpful.

I stopped using the saws because I never could align it square. It always heated and burned the side of the ring. The real problem was the fact that the saw teeth did not cut a kerf that was wider than the blade and it always was rubbing on the sides of the slot it was cutting.

I changed to a 1/16 3 wing slot cutter. It works perfectly every time with no heating or burning. The carbide teeth on the cutter are wider than the body of the cutter .... no friction and no heating...

Kim
I agree with you Kim, no kerf creates heat.....

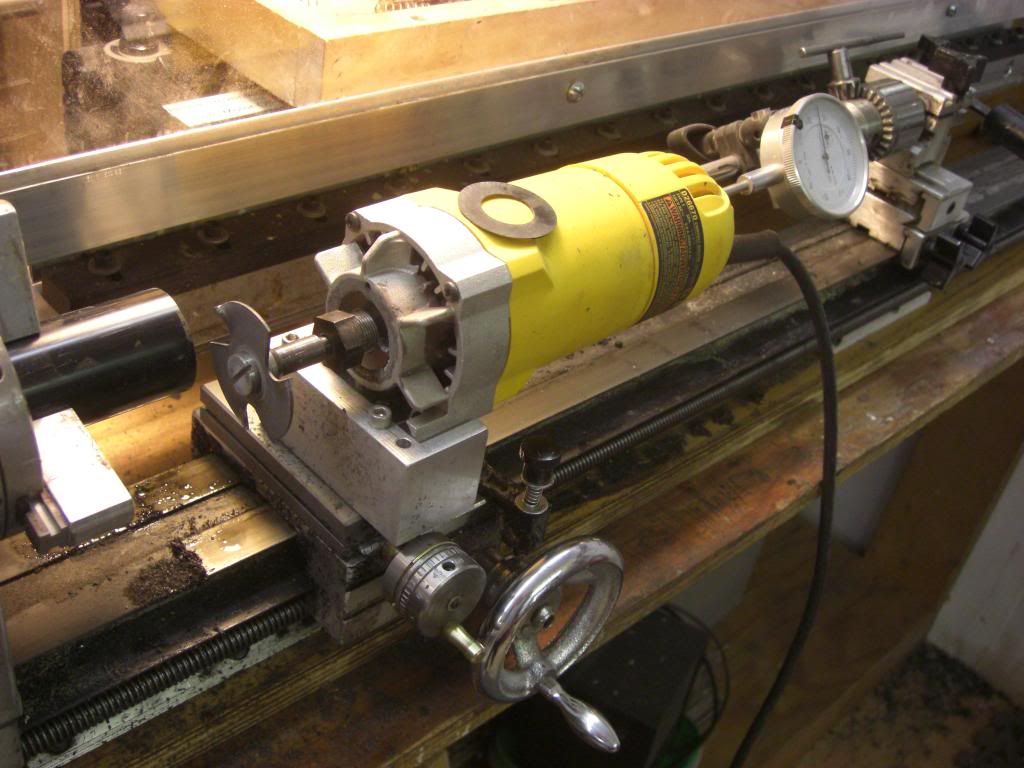
The first picture is the dremel setup with a piece of purpleheart and it cut it fine. I then cut some .030" rings from a maple billet with purpleheart stiches, it was joint size, and they cut like butter no problem. The problem came when I tried it with a larger billet that was similiar. It bogged down about halfway then I noticed the ring was fine, but missing halve the stiches in it. I used West 206 to glue it with, but I think the heat melted it.

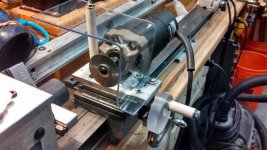
I will be trying the wing cutter again tomorrow. Tried it before, but today I did a lot of work for mounting my PC much sturdier.....even though it still has more vibes than I care for it is better now. I mounted it to a piece of aluminum and then put it on a spare cross slide and squared it up. it cut the phenolic pretty good, but that blade spinning is scary so I custom bent a piece of lexan as a cover/guard, which actually helps to channel the dust to the pipe in the rear. More to do tomorrow, but it's getting better.. I also made a larger handle for the cross slide...
Thanks guys,
Dave

second setup.jpg

ROUTER SETUP.jpg


This is my setup. It is permanently mounted on a separate cross slide. I Take off the usual cross slide and put on the ring cutter.... it takes 30 seconds to set up.

Ki,
 
So when you cut your rings off your stock do you cut them to size or address that after? I've been cutting them then sizing them after cut by themselves or after glued on the piece.

Sent from my XT901 using Tapatalk 2
 
So when you cut your rings off your stock do you cut them to size or address that after? I've been cutting them then sizing them after cut by themselves or after glued on the piece.

Sent from my XT901 using Tapatalk 2

I try a couple and cut them about .005 over and sand them flat to size.

I move the cutter the width of the ring I want plus the width of the cutter plus .010.

I tried cutting them to size after gluing but .......... you can't accurately measure them when they are glued up and if you cut too much off, you cut the whole ring off and start over.

Kim
 
Have you guys tried dialing in your router spindle? If you put a 1/4" rod in your router spindle you can set up a dial and make sure it is running on axis. If your router is off by the least it will cause your tool to rub the material and create excessive heat.
 
Just got done playing around with it this morning and it's cutting well with the blade in the picture. No scorch marks etc. still missing some stiches though. I believe it may have been a two-fold problem....bad setup AND glue starved stiches...my bad. I'll make some more up and try again this weekend. Thanks for all the assistance guys.
Dave
 
A foredom tool is not cheap with a heavier duty 1/4" collet hand piece and is not real easy to mount, but that is the best choice I know of other than a laminate trimmer. It turns slower than a router also, but will solve your vibration issues.

Holy crap those aren't cheap.... wow. They do look like a simple solution, but ouch on the price. Thanks Chris.
Dave
 
Love the hi tech parts catcher, and part puller.


Yep. Hardware cloth for the basket, and delrin for the bar puller.

The basket actually rides on a grid that I attached to the carriage. This old machine is an "oil" machine. It pumps oil on the ways every 10 minutes or so. The grid holds the basket up off the bed so all the parts stay nice and clean.

I have several of the bar pullers in different diameters. I make them all the same length, so I just have one tool offset that works for all of them. They do wear out eventually, but I just can't see spending several hundred bucks on something I can make out of $2 worth of delrin. The other good thing about delrin versus the steel ones you buy are the delrin ones will break when you crash them. Let's face it, you will always crash one sometime! lol.

I'd love to have a newer machine, but for the price I paid for this one, I'd take a couple more if I could get the same deal.

I just finished setting up the second turret with all the tools for the butt end of the cue. It faces to length, bores all the holes for the bumper and such, drills 7.5" deep for the weight bolt, and then taps it all the way down. All in a couple of minutes.


Royce

You and Ryan T and all your toys....... :thumbup:

Scott
 
Have you guys tried dialing in your router spindle? If you put a 1/4" rod in your router spindle you can set up a dial and make sure it is running on axis. If your router is off by the least it will cause your tool to rub the material and create excessive heat.

Tap, Tap & here, here. This is key.
I can't stress enough how critical a good, true set-up is.
If the saw is entering the work at an angle, ANY ANGLE other than square,
of course you'll be generating heat. You're side-loading the saw.
If it's square and true it's like out the way and let the big dog eat.

KJ
 
I agree, KJ, but what he's saying is if the spindle is off, say by .015"TIR,,Dial it in. Even if the blade is square to the material, at rest, no power,...if it still has .015" TIR rotated by hand, how does one 'dial' it in? It is basically rotating off axis thru the full rotation, (which, I believe amounts to about .030" off total? maybe wrong..it's late). How would one compensate for that? In this unit, I have already changed the bearings about a year ago and haven't really used it until now. I also custom made the arbor yesterday for the PC, so I know it's not off there.
I am of the belief now it was too small of blade with too small of teeth for the size billet, and a dremel tool as the power. Using my Porter Cable router today with a larger blade with larger teeth and much more power behind it, and using the same methods to square it up... it worked fine on the end of the billet where most of the epoxy had squeezed to....it did loose some stiches on the first few tries, but didn't have the scorch marks and went solid at the end of the billet.... IDK
The first 2 on the left was made by the dremel yesterday and had the same scorch marks on both sides. The last one was with the porter cable today, big difference. These are .030" thick BTW.
Dave
 

Attachments

  • IMG_20130920_120016_758[1].jpg
    IMG_20130920_120016_758[1].jpg
    95.3 KB · Views: 312
Last edited:
Hi,

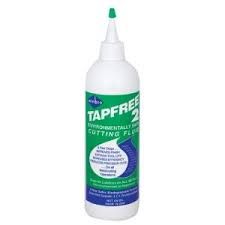
When cutting most rings, I touch off on the OD with a 1/32nd carbide wing cutter to create a small slot channel. Then I squirt in a little Tap Free or Tap Clean environmentally safe cutting fluid in that slot then plunge in to cut off.

Tap Free does not contain oils or silicone and wood will not burn or scorch and stitches stay cooler thus the epoxy does not become compromised from pin point heat incursion. I started using this stuff 2 years ago and have not lost one stitch on a billet even on the very thin cut offs.

When the cut off dries, I just lightly lap the rings on my granite plate with 220. With plain Juma, I just go dry because it machines so freaking well.

Also I have learned that it is imperative that the fixture that holds the router to the lathe is super rock solid and built "overkill" to prevent any excessive vibration. Darrin Hill engineered and built my fixture to install directly to the T Slot and lock down to the cross slide saddle. He over built the hell out of it to what he calls "NASCAR Quality". Before that, I used a less beefy fixture that mounted to my tool post. The difference is night and day as the router transfers the vibrations to the set up. The foundation basis of the router makes a big difference to the final product. With Darrin's mounting gizmo, all of my rings measure within .001 parallelity when measured with a caliper in thousands before lapping.

I have also observed that thin carbide wing cutters reduce the residual heat compared to slitting saws because there is less surface interface within the curf's side walls.

Heat is not your friend and anything that you can do to reduce it is well worth it concerning the final product integrity and accuracy.

JMO

Rick


Cutting Juma Dry
 
Last edited:
Back
Top