Shop Safety- Table Saw

ELBeau

AzB Silver Member
Silver Member
When I see photos like these I'm reminded of how lucky I am, having pushed my luck a time or two when I didn't know any better. If this post helps one person work smarter then it was worth it.

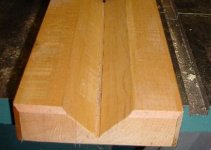
These photos are representative of what not to do when working with a table saw.

Notice how in the second picture there isn't enough square surface left to safely keep the wood flat against the table and the fence.

Here are a few safety tips:
1- The area between the two miter slots on the saw is the "danger zone." Keep your body to the left or right of that zone to avoid being impaled by a kickback.
2- Use a push stick on rip cuts less than 6" in width.
3- The blade should only extend about 1/2 tooth out of the wood on a through cut.
4- The safety guard or riving knife help prevent kickbacks.


All that said, there's a better tool for this job- the bandsaw. If that isn't an option, I think a router table with feather boards would be safer.

Failing that, a table saw sled with a V-groove cut into it for the workpiece to ride in would be safer than this.

Again, this is an example of what not to do. Please work as safe as possible, friends. If any of you have any other tips to share, please do.

Google "table saw safety" or "Table saw accidents' for more info. The search can and should be customized for any power tool that you may not be familiar with.
 

Attachments

  • TS safety 1.gif
    TS safety 1.gif
    38.5 KB · Views: 709
  • TS safety 2.gif
    TS safety 2.gif
    79.6 KB · Views: 697
Last edited:
right you are.....

I hate my table saw, I have seen too many pictures of accidents..... I would rather make a fixture to hold the piece and use the band saw..... still dangerous but more forgiving...

Kim
 
The first thing I notice is the blade is sticking out a long ways past where it needs to be to make the cut. This makes it less safe for sure.
 
My late mentor fed his left hand to the table saw blade doing exactly what the pics show.
He was pushing a purpleheart square and it tumbled.
 
Maybe it's been a while since I last was told about proper table saw safety procedures, but nothing mentioned so far to me screams safe. Make a damn jig to hold the piece of of wood and use the slide grooves on the table saw to guide the wood. **** the fence, it's only problematic. And run the blade vertical and tip the piece in the jig. Safer all around. Can't find a good pic of the type of jig I'm talking about, but I'll attach when I do.
 
Setup

Actually that is the right tool wrong set up. The blade should be tilted into a sacrificial fence and the blade buried in the stock ..........You don't even need to cut all the way through, leave a bit and snap the scrap off ...........A table saw is a great tool. I've been a cabinet maker and furniture builder for over 30 years and if there's one thing I've learned it's the setup that's important ......Oh and a great pair of safety glasses.........Ray Weeks
 
Yep, been there, done that, recently - here's a link for the morbidly curious
http://forums.azbilliards.com/showthread.php?t=358626
I'm happy to say fingers have now healed up nicely.
At the time Joey had suggested and I had previously seen this:
http://www.woodcraft.com/Product/2004393/8909/Micro-Jig-GRR-Ripper-System-Model-GR200.aspx
It works great! Now that doesn't mean you can throw caution to the wind, but this gripper works as advertised.
My 2 cents,
Gary

i'll second the GR-200 recomendation. i have had one for quite a while...money well spent
 
Personally don't remeber the last time I used my table saw except when doing carpentry. Bandsaw all the way. Table saw and cue blanks don't mix
 
I think it is a good thing to post safety items. We all at some point become complacent if we are not reminded on a regular basis.
I shudder just seeing these pics. 1st that comes to mind is , why is he sawing off the corners if the stock is going to become round. And then lots of other thoughts come to mind. I have 2 sticks for my saw, one has the funny cut out for end pushing and applying down pressure, the other has an area just relieved to make 2 points of contact onto the top piece. This is to replace fingers that could otherwise be cut or go missing.
A great timely reminder that is for sure.
 
Yep, been there, done that, recently - here's a link for the morbidly curious
http://forums.azbilliards.com/showthread.php?t=358626
I'm happy to say fingers have now healed up nicely.
At the time Joey had suggested and I had previously seen this:
http://www.woodcraft.com/Product/2004393/8909/Micro-Jig-GRR-Ripper-System-Model-GR200.aspx
It works great! Now that doesn't mean you can throw caution to the wind, but this gripper works as advertised.
My 2 cents,
Gary
I use this jig from woodcraft every time I do a rip on the tablesaw. Great jig.

Alan
 
My father has run his hand through the table saw twice.
And clipped his thumb with the chop saw.
Still can't figure how he did that one.
Any way my brother and I got him a sawstop.
Best investment we ever made according to mom.
New blade and aluminum dog are nothing compared to an ER Bill and PT.
 
About the only time we fire up the tablesaw any more is when I'm building a new machine and need to cut some jig plate.

Of course, I'm the only one who is allowed to do this, but everyone stops to watch. It's pretty interesting watching a guy push a 1" thick aluminum plate through the table saw!

It's loud, and make a mess, but it works really well. You just have to really be able to feel the cut so you can back off when it's starting to act funny. If not, it will bind up and that's when bad things happen.


Royce
 
Thanks for the replies. I like to do that operation on my bandsaw. No fear of kickbacks,etc. I use a 14" Grizzly G0555 and I use a $20 2-3TPI Timberwolf blade from Grizzly for it. It really eats through the exotics.

In my opinion, if you have to use a tablesaw, making a sled for the workpiece with a couple of hold-down clamps would be safer than feeding by hand. The easiest way is to hold the workpiece flat and tilt the blade at a 45. However, it is more secure to cut a V groove in the jig to hold the workpiece and use the blade at a 90. Again, by using the hold-downs and a sled you can keep away from "the danger zone."

That's the type of jig I've been trying to find a picture of. Can't find exactly the correct jig online. But with the sled basically can be used on either side of the blade, your hand is over 6" away from the blade.
 
One could adapt the principles from this photo:
Trim the left side flush when you cut the edges of the workpiece off.
Extend the right side significantly for stability.
Add a couple top clamps on the right to secure the workpiece to the sled.
 

Attachments

  • jig.jpg
    jig.jpg
    37.8 KB · Views: 177
That's the type of jig I've been trying to find a picture of. Can't find exactly the correct jig online. But with the sled basically can be used on either side of the blade, your hand is over 6" away from the blade.

This may be more what you were looking for- A jig for rounding turning squares from Wood Magazine

"Before turning narrow pieces, such as chess pieces or dowels, between centers, it's easier on the workpiece (and the woodworker) to knock off the four corners, making the square spindle into an octagon. This simple guide clamps to your bandsaw table to do the job."
—Franklin Zia and Arthur Mendel, Richmond, Calif.

With a few modifications, one could use it as a sled, following either the fence or the table's miter slot.

m_roundturn1.jpg

p_roundturn2.jpg
 
Back
Top