Spraying Gold Crown Skirts

Rachel74557

New member
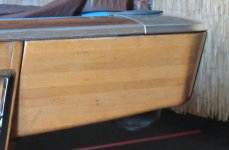
Just finishing a large spraying project and plan to do my GC skirts next. When I looked at primers I found that there are 7 or 8 types of plastics out there and I am told that the choice of primer depends on the type of plastic so does anyone know the specific type of plastic the skirts were molded from? Or, alternatively, maybe recommend a primer that you have used on the skirts? I would prefer using my spray guns to rattle cans. Either way can be costly as I found out at the automotive paint store thinking a primer for plastic bumpers.
 
Just finishing a large spraying project and plan to do my GC skirts next. When I looked at primers I found that there are 7 or 8 types of plastics out there and I am told that the choice of primer depends on the type of plastic so does anyone know the specific type of plastic the skirts were molded from? Or, alternatively, maybe recommend a primer that you have used on the skirts? I would prefer using my spray guns to rattle cans. Either way can be costly as I found out at the automotive paint store thinking a primer for plastic bumpers.

The plastic skirts on my gci are fiberglass. I used summit brand urethane high build primer. Great for the price.

I also sprayed my Formica with it, no chipping had occurred in three years with plenty of balls bouncing on it.
 
Just finishing a large spraying project and plan to do my GC skirts next. When I looked at primers I found that there are 7 or 8 types of plastics out there and I am told that the choice of primer depends on the type of plastic so does anyone know the specific type of plastic the skirts were molded from? Or, alternatively, maybe recommend a primer that you have used on the skirts? I would prefer using my spray guns to rattle cans. Either way can be costly as I found out at the automotive paint store thinking a primer for plastic bumpers.
Which GC? 1 2 3?
The whole underframe and aprons take less than an hr to strip (corn blaster).

Here's what they look like, and you can then stain em the color of choice. Then clear coat em, 2 layers for hm, 3 for commercial.
 

Attachments

  • apron.JPG
    apron.JPG
    118 KB · Views: 51
Aren't they maple?

Ask in the table mechanic forum.

The skirts are fiberglass and are located below the apron. On many tables they were removed and on later models tables they were not provided as part of the build.
 
Last edited:
The OP has a GCI, I believe (see the other posts). There are plastic pieces below the wood skirts. The wood on mine was not maple, alder, I believe.
The pic I have is a GCI. Layered poplar wood aprons.
I remember those plastic/art deco/60's/pastel colored under skirting that was below the aprons.
I think there were 3 different colors at that time.
 
That's probably the word, because they were on ball return tables.
I played Varner in the 69 Midwest 14.1 finals at the bowling alley with these exact same tables.
I especially remember this.
The cloth was reddish orange and one of women players chest was so large (not a fat woman) that she had to use the rake ''Allot''.
No table light and bowling balls and lanes right next to us.
Brunswick was looking to dress the GCI girl up for the Public eye, and make her impressive & increase play just by her looks. :)
 
Last edited:
Just finishing a large spraying project and plan to do my GC skirts next. When I looked at primers I found that there are 7 or 8 types of plastics out there and I am told that the choice of primer depends on the type of plastic so does anyone know the specific type of plastic the skirts were molded from? Or, alternatively, maybe recommend a primer that you have used on the skirts? I would prefer using my spray guns to rattle cans. Either way can be costly as I found out at the automotive paint store thinking a primer for plastic bumpers.
I used Sherwin Williams Bonding Primer Aerosol and top coated with Sherwin Williams Emerald Urethane Trim Enamel. No issues 6 years later.

I cleaned them with soap and water, allowed them to dry then scuffed them up lightly with the abrasive side of a kitchen sponge. I ran a tack cloth over them before I sprayed.

Here they are primed:
58657024338__85138848-7440-47EF-B953-A04C67409675.JPG


Some close ups after the top coat of Sherwin Williams Emerald Urethane Trim Enamel.
59077986237__42F4520D-A175-46C3-9C4F-67CFBCA633E8.JPG


IMG_2903.jpg


IMG_2905.jpg
 
Last edited:
I used Sherwin Williams Bonding Primer Aerosol and top coated with Sherwin Williams Emerald Urethane Trim Enamel. No issues 6 years later.

I cleaned them with soap and water, allowed them to dry then scuffed them up lightly with the abrasive side of a kitchen sponge. I ran a tack cloth over them before I sprayed.

Here they are primed:
View attachment 836262

Some close ups after the top coat of Sherwin Williams Emerald Urethane Trim Enamel.
View attachment 836263

View attachment 836264

View attachment 836265
Those look spectacular. Exactly the finish I am going for. I do have to do a plastic welding repair on one corner. My pieces are definitely plastic and not fiberglass. I hope I am using the correct terminology in thinking the skirt is composed of plastic pieces used to hide the ball returns and sits below the aprons composed of the wood panels which I will be staining to match the finish on my rail formica.
 
Those look spectacular. Exactly the finish I am going for. I do have to do a plastic welding repair on one corner. My pieces are definitely plastic and not fiberglass. I hope I am using the correct terminology in thinking the skirt is composed of plastic pieces used to hide the ball returns and sits below the aprons composed of the wood panels which I will be staining to match the finish on my rail formica.

Fiberglass is technically 'glass fiber reinforced plastic'. They cast them in a white resin, but all of them I've seen are fiberglass. They didn't have many other plastic options for parts like that in the sixties.
 
Those look spectacular. Exactly the finish I am going for. I do have to do a plastic welding repair on one corner. My pieces are definitely plastic and not fiberglass. I hope I am using the correct terminology in thinking the skirt is composed of plastic pieces used to hide the ball returns and sits below the aprons composed of the wood panels which I will be staining to match the finish on my rail formica.
I can't remember where, but somewhere on here someone posted paint codes that matched the OEM colors. Hopefully someone with better search or memory than me can post them if you're wanting to match original.

EDIT: Found them:

 
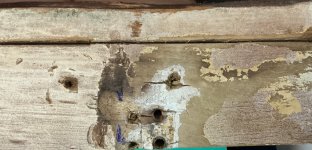
Resolving issue with ball return box and rack/triangle holder. The lower front face and the first underside board where the rack holder attaches required new wood. Although it is not stock I came up with a fix to preclude having the holder being torn off the box in the future.
I cut tongue and grooves for the replacement pieces and am using a Forstner bit to allow me to insert aluminum discs into the upper side of the board being replaced on the box bottom. The discs will be drilled and tapped so that the attaching machine screws will pass through the bottom board and thread into the discs so the screws will not be threaded into the wood. Once installed the discs will be hidden by the rubber lining I will install and and the discs will not be seen from the underside as they will sit about 1/4" above the bottom board's face.
 

Attachments

  • IMG_1848.jpg
    IMG_1848.jpg
    204.2 KB · Views: 24
  • IMG_1852.jpg
    IMG_1852.jpg
    71.7 KB · Views: 22
  • IMG_1851.jpg
    IMG_1851.jpg
    71 KB · Views: 21
Why not drill out the holes and epoxy in some dowels? Once finished and retapped, it's ready for another 70 years. Heck, I didn't even put the rack holder back on my table. The ball return box tends to get beat up by people returning the rack to the holder. I use a template rack anyway with the mechanical rack on top of my light. It seems like an awful lot of surgery for a non structural item. Here are some pics of the dowel method on my ball return box.

Screen Shot 2021-11-27 at 2.59.02 PM copy.png
 
Last edited:
Why not drill out the holes and epoxy in some dowels? Once finished and retapped, it's ready for another 70 years. Heck, I didn't even put the rack holder back on my table. The ball return box tends to get beat up by people returning the rack to the holder. I use a template rack anyway with the mechanical rack on top of my light. It seems like an awful lot of surgery for a non structural item. Here are some pics of the dowel method on my ball return box.

View attachment 837050
I did use the dowel method on the upper L-bracket holes and a micro version using toothpicks for the dome-head nail holes for the U-shaped aluminum trim. I had to do surgery on the lower front face board anyway as about one third of the board was worn away like someone spent hours on it with a wire brush. Looked just like the damage a dog does to a wooden door scratching to get out. I had the aluminum stock and I figured I could make the attachment pretty much indestructible using the aluminum inserts. If some knucklehead decides to bring his foot down on it now it will probably tear out the L-brackets at the top.
I see your trim has small Philips head screws. Don't know what period the used the dome head nails (they look like a small brad with a tiny round ball for the head) but the screws look perfect.
The damage to the bottom of the ball box is most likely from people jamming the rack in there.

I decided to countersink the holes in the trim and use #2 screws vs the nails so there’s less opportunity for the balls to get scratched or nicked.
 
Back
Top