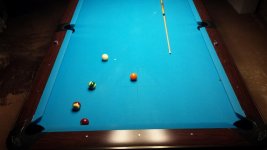
So the situation is that you've got a nice little run going and you want to create something out of this mess. I can tell you that the 14 - 15 combination is nearly a straight shot on the 14. The 7 is touching the rail. The 14 does not pass by the 15. Edit: the 14 sits a little lower than where the bottom row of balls in the rack will be... too low for a break ball as is.
One of the things I was interested in was acousticguru's idea that you should take the easier path and let the chips fall where they may. I hope I'm getting the context of that concept right. I'd like to see how that approach fits into this kind of end run. I'm not sure I followed that advice.
I'd be interested to hear opinions on this layout and how you would plan for your next break ball. I'll post my choice and results in Part 2.
Thanks!
Attachments
Last edited:
")