I thought this might be a great thread since there has been some recent questions on bob cad and mach 3 it will give the new posters a chance to see some inlay work and get them excited and get there juices flowing so to speak
You are using an out of date browser. It may not display this or other websites correctly.
You should upgrade or use an alternative browser.
You should upgrade or use an alternative browser.
Cuemakers please post your inlay pictures
- Thread starter brianna187
- Start date
any pictures out there?
Lee,any pictures out there?
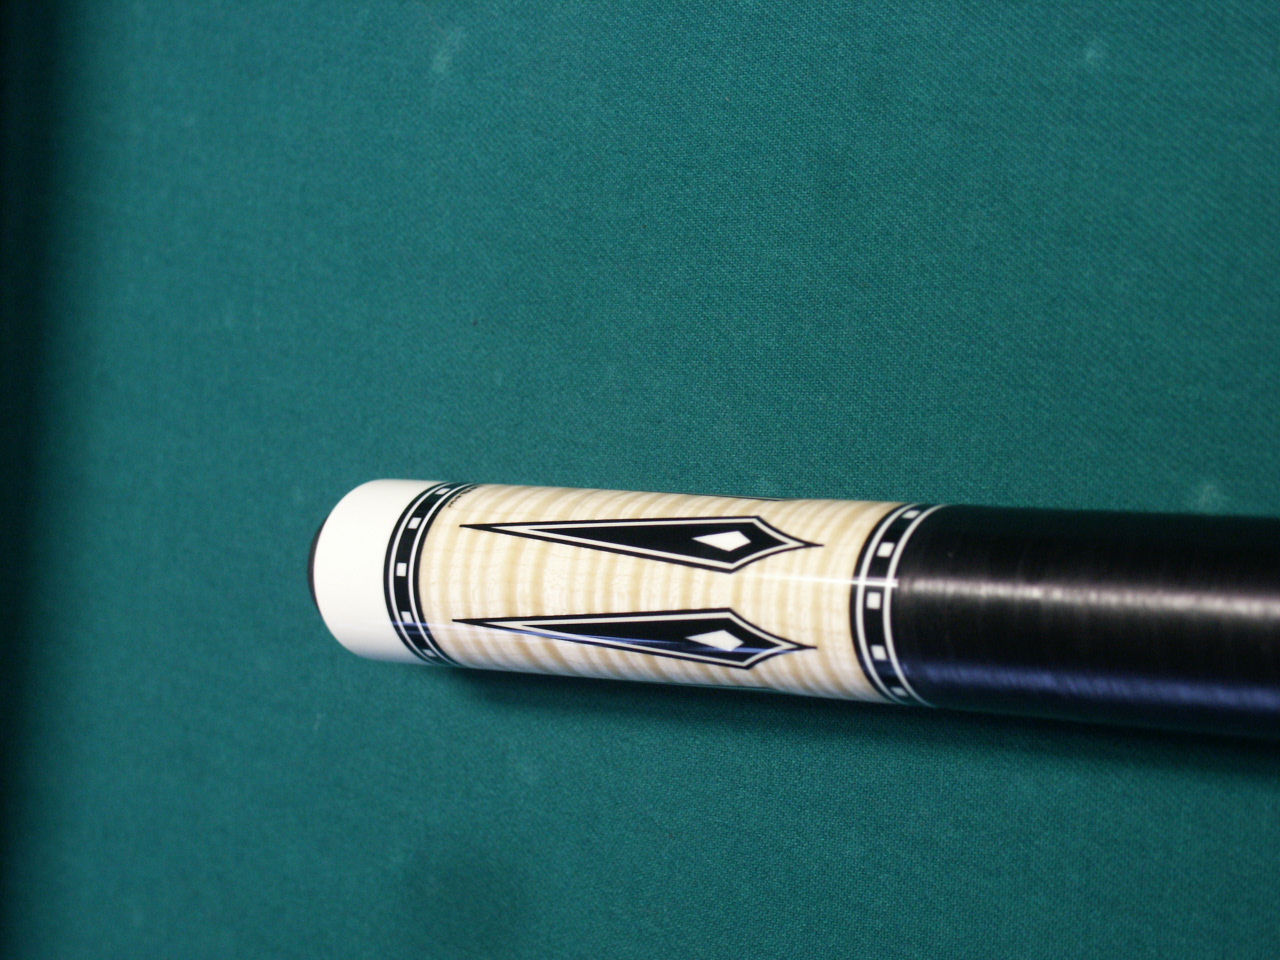
Are you wanting pictures of inlay work in progress or of finished cues with inlays???
Sheldon,
Nice Execution and Creativity!!!!
Rick G
Nice Execution and Creativity!!!!
Rick G
Sheldon...what size radius you dealing with here?
Thanks
Thanks
Just kidding around Sheldon.
Anyone that wants any of my cnc inlay designs are welcome also.
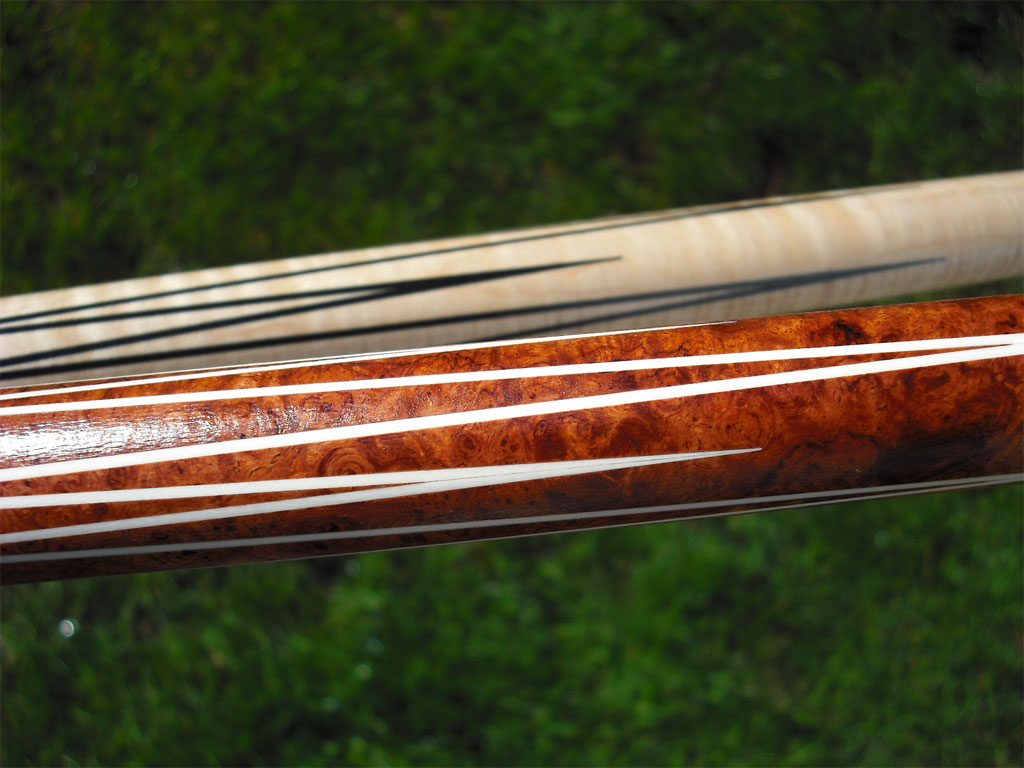
You did a wonderful job of getting the black point centered in the white one.
It shows in the tail end of the white points.
I have a lot of trouble getting them exact ... dont think I ever have got anything centered so precisely as the ones you posted.
Anyone that wants any of my cnc inlay designs are welcome also.
You did a wonderful job of getting the black point centered in the white one.
It shows in the tail end of the white points.
I have a lot of trouble getting them exact ... dont think I ever have got anything centered so precisely as the ones you posted.
Last edited:
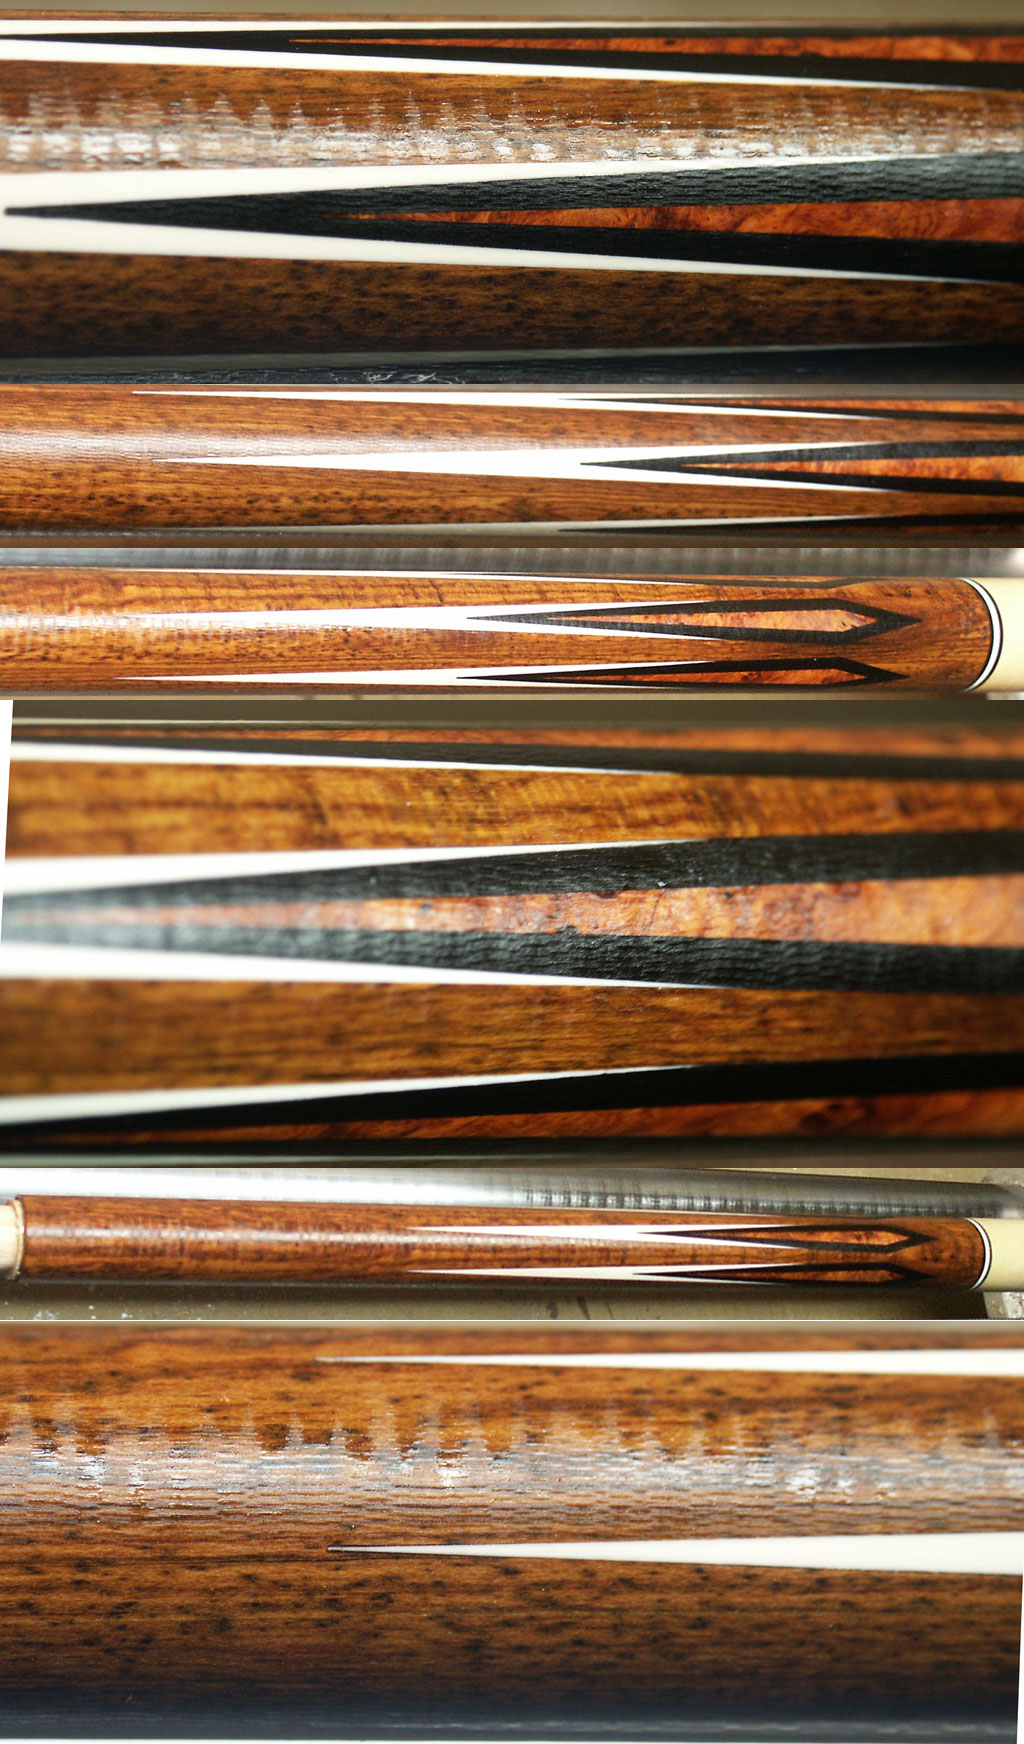
Here are the pockets I cut today. Obviously, these are blown up quite a bit. I roughed the pockets with a .0156" and cleaned them up with a .10.
The ring pocket is cut at the same time as the point pocket, to insure proper alignment. The ring pockets are done 100% with a .010" cutter.
Each point is re-indexed to make sure it is centered properly. In my opinion, one of the most difficult jobs is making sure that you are exactly in the center of the point. I sometimes spend over 30 minutes on the point alignment and I still always doubt myself when I start cutting. The ring locations between the points are also re-indexed to make sure that they are centered between the points.
Last edited:
I've only used CNC in metalworking, not cues. Do you guys have to program lead-in and lead-out moves to prevent dwell marks? I have to do this in metal or I will get them there. Just curious if the same is necessary in wood. Thanks.
I've only used CNC in metalworking, not cues. Do you guys have to program lead-in and lead-out moves to prevent dwell marks? I have to do this in metal or I will get them there. Just curious if the same is necessary in wood. Thanks.
Yes you do.
Wow, roughing with a .015?Here are the pockets I cut today. Obviously, these are blown up quite a bit. I roughed the pockets with a .0156" and cleaned them up with a .10.
The ring pocket is cut at the same time as the point pocket, to insure proper alignment. The ring pockets are done 100% with a .010" cutter.
Each point is re-indexed to make sure it is centered properly. In my opinion, one of the most difficult jobs is making sure that you are exactly in the center of the point. I sometimes spend over 30 minutes on the point alignment and I still always doubt myself when I start cutting. The ring locations between the points are also re-indexed to make sure that they are centered between the points.
 I would have probably done an extra tool change and used a .02 or .03 for the roughing.
6 of one half-dozen of another though.... the results look great.
If I'm having trouble lining up on the center of the points, I'll put a 60 degree index cutter in, so that I can really get close when lining things up.
I'll sometimes put the cutter on one side, zero out the Y axis, put the cutter on the other edge, (effectively measuring the width of the inlay area) then reset your Y to exactly half of the number you get. That should center you up nicely. If you have a fourth axis, you can do the same with the A axis instead.
On my machine, I have an exact number from the hard stop for zero along my Y, so I can alway find center that way... I just have to dial in the A if I reset the cue.


good to see some replies and great looking work i am hoping to do some myself soon
Very cool. Boxes with notched diamonds.

Oooops, sorry Lee, I thought you said Inlaw Pictures.
I figured I'd share my technique for centering inlays.
It's simple. Position the spindle over the point you want the inlay. Don't spend much time centering perfect because it's never perfect. Start the spindle and slowly lower so it cuts a tiny hole (.010" works great). Move the spindle to allow enough room to measure from the hole to the edge of the point wood. Zero the caliper and measure the opposite side. Divide that measurement by 2 and you know how far you need to move your spindle and what direction. I move the spindle forward a tiny bit and make a second hole to double check it's perfect and make sure I didn't adjust it the wrong direction. This system works for centering on rings or when an inlay needs replacing. Center the spindle over the inlay as best as possible. Cut the tiny hole in the center of the inlay and measure forward/backward and left/right. Move each axis the appropriate amount. It's simple and takes the guess work out of centering. Works everywhere.
It's simple. Position the spindle over the point you want the inlay. Don't spend much time centering perfect because it's never perfect. Start the spindle and slowly lower so it cuts a tiny hole (.010" works great). Move the spindle to allow enough room to measure from the hole to the edge of the point wood. Zero the caliper and measure the opposite side. Divide that measurement by 2 and you know how far you need to move your spindle and what direction. I move the spindle forward a tiny bit and make a second hole to double check it's perfect and make sure I didn't adjust it the wrong direction. This system works for centering on rings or when an inlay needs replacing. Center the spindle over the inlay as best as possible. Cut the tiny hole in the center of the inlay and measure forward/backward and left/right. Move each axis the appropriate amount. It's simple and takes the guess work out of centering. Works everywhere.
Last edited: