

You are using an out of date browser. It may not display this or other websites correctly.
You should upgrade or use an alternative browser.
You should upgrade or use an alternative browser.
To core or not to core
- Thread starter Guerra Cues
- Start date

I am 90% self-taught, and I never even considered putting parts together that were way oversized. I also never understood putting a joint pin in a cue before it was at finished size.
My method is really similar to above, handles get installed with the forearm 10-20 thou. oversized. I've seen plenty of cues with off-center joint pins, A-Joint pins, etc. All a result of assembling parts too soon.
NOTHING PERSONAL , JUST A QUESTION?
What is wrong with having the pin already install, parts are oversize 100 thou. . Using the joint pin center and center for butt sleeve? I have heard of cue makers do it that way.

Hi,
I put in my pin early on my floating point CNC cues and it works great. On my point veneer cues I install the pin at finished dimension.
Everyone has their own bend to the brim and that's ok.
Rick G
I put in my pin early on my floating point CNC cues and it works great. On my point veneer cues I install the pin at finished dimension.
Everyone has their own bend to the brim and that's ok.
Rick G
NOTHING PERSONAL , JUST A QUESTION?
What is wrong with having the pin already install, parts are oversize 100 thou. . Using the joint pin center and center for butt sleeve? I have heard of cue makers do it that way.
Not to answer for Sheldon but I can tell you why I wouldn't do it that way. First of all the cue can still move at 100 thou over & if it does, you joint pin will no longer be centered. You can make another cut to straighten the cue and the tip of the pin will be centered again, but where the pin enters the cue will not be, meaning wobbly pin.
Secondly, if you do not get the pin dead nuts centered in the first place, then your cue will never be right. The cue has to be centered dead nuts in the machine when you drill & bore for the pin hole, then you have to get the pin in that hole dead nuts on center, or else you'll be turning your cue off of an incorrect center & in the end the tip of the pin will be dead on but where the pin enters the cue will be off, just like with the first scenario except that it's your fault instead of the wood's fault.
Doing it like that 'can' be done with good results. Lots of folks do it from what I understand. I don't know why, but they do. Myself, i'd rather put the pin in last so that I can ensure it's perfect. I have a tapered ID collet that the cue fits into and allows 1/2" or so of the joint end to stick out. From there I can dial it in to run perfect, at finish size, and then drill & bore for my pin. Put the pin in & check for alignment and adjust if needed but usually it's dead nuts and it's done at finish size so there's never a chance it'll come off. Not only is it centered at the tip but more importantly it's dead centered to the center line of the cue & not cock-eyed like the above scenarios. Yes, you can put the pin in early & turn off of it but why? There's so much that could go wrong & it requires the same accuracy as doing it at size. The only reason I could think of to install the pin early to use as a center would be to ensure the tip of the pin is on center at the end of the build, and I would only do that if I felt I was too incompetent to put the pin in accurately at the end. I'm not saying that's why anybody does it, just that it's the only reason I could see for myself doing it. Maybe somebody who does it could share their reasons.

Not to answer for Sheldon but I can tell you why I wouldn't do it that way. First of all the cue can still move at 100 thou over & if it does, you joint pin will no longer be centered. You can make another cut to straighten the cue and the tip of the pin will be centered again, but where the pin enters the cue will not be, meaning wobbly pin.
Secondly, if you do not get the pin dead nuts centered in the first place, then your cue will never be right. The cue has to be centered dead nuts in the machine when you drill & bore for the pin hole, then you have to get the pin in that hole dead nuts on center, or else you'll be turning your cue off of an incorrect center & in the end the tip of the pin will be dead on but where the pin enters the cue will be off, just like with the first scenario except that it's your fault instead of the wood's fault.
Doing it like that 'can' be done with good results. Lots of folks do it from what I understand. I don't know why, but they do. Myself, i'd rather put the pin in last so that I can ensure it's perfect. I have a tapered ID collet that the cue fits into and allows 1/2" or so of the joint end to stick out. From there I can dial it in to run perfect, at finish size, and then drill & bore for my pin. Put the pin in & check for alignment and adjust if needed but usually it's dead nuts and it's done at finish size so there's never a chance it'll come off. Not only is it centered at the tip but more importantly it's dead centered to the center line of the cue & not cock-eyed like the above scenarios. Yes, you can put the pin in early & turn off of it but why? There's so much that could go wrong & it requires the same accuracy as doing it at size. The only reason I could think of to install the pin early to use as a center would be to ensure the tip of the pin is on center at the end of the build, and I would only do that if I felt I was too incompetent to put the pin in accurately at the end. I'm not saying that's why anybody does it, just that it's the only reason I could see for myself doing it. Maybe somebody who does it could share their reasons.
Tap, Tap,.,.

At .090" over is much better.
NOTHING PERSONAL , JUST A QUESTION?
What is wrong with having the pin already install, parts are oversize 100 thou. . Using the joint pin center and center for butt sleeve? I have heard of cue makers do it that way.

The mandrels were made so you can install the pin at .002" to .003" oversized IMHO.
I know one popular maker who installs his pins early. With points even.
Not .100 over though.
You'll laugh but he uses a pencil in the toolpost as indicator.
Re-centers the rear if needed.
The forearm cannot move though. If it does, it's hosed.
But, imo installing last with indicating the collar and A-j area is da way to go.

Installing joint pin early on
I install my pins on the full length PH cores when the core is turned to 7/8"
with the final size being 3/4". I use just as much care doing it then as I would if the cue was finished. Now for why. I want my pin hole to be solid--that is to be filled with either the pin or the epoxy I use to hold it. This is what I do to achieve that: After drilling and taping the pin hole I drill a 1/16" hole is drilled at 90 degrees to the pin hole and tangent to the bottom of said hole. Two wraps of masking tape are wrapped around the core covering the hole. The tape acts as a pressure relief for the epoxy. I also make two relief grooves alongside the pin. The hole is partially filled with epoxy, the pin inserted and the excess epoxy is forced out the 1/16" relief hole assuring a solid cavity at the bottom of the pin hole. The two channels on the pin do not act as relief grooves as a threaded teflon washer 1/2" thick is threaded on the pin and locked in place with two nuts. This keeps the epoxy from escaping past the pin once the teflon washer is seated on the end of the core. Before using this method I would periodically hydrauliclly split a piece of PH core material. I find it easier to install the
pin early on and get that operation out-of-the-way. I do not see any downside to doing it this way. For me, turning between final centers is the
way to go. Oh, the forearm covers the hole.
Maybe somebody who does it could share their reasons.
I install my pins on the full length PH cores when the core is turned to 7/8"
with the final size being 3/4". I use just as much care doing it then as I would if the cue was finished. Now for why. I want my pin hole to be solid--that is to be filled with either the pin or the epoxy I use to hold it. This is what I do to achieve that: After drilling and taping the pin hole I drill a 1/16" hole is drilled at 90 degrees to the pin hole and tangent to the bottom of said hole. Two wraps of masking tape are wrapped around the core covering the hole. The tape acts as a pressure relief for the epoxy. I also make two relief grooves alongside the pin. The hole is partially filled with epoxy, the pin inserted and the excess epoxy is forced out the 1/16" relief hole assuring a solid cavity at the bottom of the pin hole. The two channels on the pin do not act as relief grooves as a threaded teflon washer 1/2" thick is threaded on the pin and locked in place with two nuts. This keeps the epoxy from escaping past the pin once the teflon washer is seated on the end of the core. Before using this method I would periodically hydrauliclly split a piece of PH core material. I find it easier to install the
pin early on and get that operation out-of-the-way. I do not see any downside to doing it this way. For me, turning between final centers is the
way to go. Oh, the forearm covers the hole.
Not to answer for Sheldon but I can tell you why I wouldn't do it that way. First of all the cue can still move at 100 thou over & if it does, you joint pin will no longer be centered. You can make another cut to straighten the cue and the tip of the pin will be centered again, but where the pin enters the cue will not be, meaning wobbly pin.
Secondly, if you do not get the pin dead nuts centered in the first place, then your cue will never be right. The cue has to be centered dead nuts in the machine when you drill & bore for the pin hole, then you have to get the pin in that hole dead nuts on center, or else you'll be turning your cue off of an incorrect center & in the end the tip of the pin will be dead on but where the pin enters the cue will be off, just like with the first scenario except that it's your fault instead of the wood's fault.
Doing it like that 'can' be done with good results. Lots of folks do it from what I understand. I don't know why, but they do. Myself, i'd rather put the pin in last so that I can ensure it's perfect. I have a tapered ID collet that the cue fits into and allows 1/2" or so of the joint end to stick out. From there I can dial it in to run perfect, at finish size, and then drill & bore for my pin. Put the pin in & check for alignment and adjust if needed but usually it's dead nuts and it's done at finish size so there's never a chance it'll come off. Not only is it centered at the tip but more importantly it's dead centered to the center line of the cue & not cock-eyed like the above scenarios. Yes, you can put the pin in early & turn off of it but why? There's so much that could go wrong & it requires the same accuracy as doing it at size. The only reason I could think of to install the pin early to use as a center would be to ensure the tip of the pin is on center at the end of the build, and I would only do that if I felt I was too incompetent to put the pin in accurately at the end. I'm not saying that's why anybody does it, just that it's the only reason I could see for myself doing it. Maybe somebody who does it could share their reasons.
Hi,
Tap for the tapered collets.
I use 4" long collets that I bored my taper geometry inside. Since making these collets I shit canned all of my split collets because they are garbage compared to the tapered ones.
After the tapered collets, life is good!
Rick G
Hi,
Tap for the tapered collets.
I use 4" long collets that I bored my taper geometry inside. Since making these collets I shit canned all of my split collets because they are garbage compared to the tapered ones.
After the tapered collets, life is good!
Rick G
Is the inside taper of that collet parabolic as well, Rick?
That would be interesting if it is ( how it's bored ).
Is the inside taper of that collet parabolic as well, Rick?
That would be interesting if it is ( how it's bored ).
Joey,
I have a 32" adjustable straight taper bar on my lathe. For boring the inside taper on the Phenolic tube I remove the springs on my cross slide and install my roller bearing guide on the back side of my taper bar. Then I just bore that puppy to a smooth RMS finish ID.
I have found that the 4" units gives me a lot of surface area on the cue with high accuracy for pin and A-Joint work. I also made 2 for the boring and drilling work required for the butt end of the cue. All of my pins are now indicating less than 1/2 thousand total run out and A-Joints that are made with these collets come out with super accurate alignment when I place them between centers.
Before these collets I had to shim the center on the nose to make my points behave then re center them ( time consuming ). Now the points stay aligned because they are pretty much dead on from the start and I only remove .035 of stock after an A-Joint is installed. I only use A-Joints on 4 point cues. Most of my cues now are 5 pointers and are built on the the forearm that is glued on a 30" core so I am not doing many A-Joints anymore.
Changing to these collets completely changed my cue making procedures, has saved me a huge amount of time, and has also given me a higher level of accuracy with complete repeatability. I had over 20 split style collets in different sizes that we made which are now in a box.
My parabolic taper bar is on my table saw shaft tapering machine. I don't need collets on my shafts when I drill and tap at .950. I just grip them hard, face and then drill and tap. My centering pins with the 60 degree center establishes a perfect taper around the axial centerline with concentricity at the joint. My butts also have a less pronounced parabolic taper on them from the butt end to about 18" into the cue and are cut on a separate saw tapering machine. The front half of the cue is a straight taper where I use the collets for pin install or A-Joint work. As has been pointed out to me here by the taper police, my tapers are not true parabolic tapers from end to end but a compound taper that are parabolic and then transition to a straight taper on the butt and a pro style taper on the shafts for a very stiff hit.
Here is my taper bar being used in the conventional way. By installing the roller bearing guide on the back side and reversing the springs on the cross slide I can bore to the desired taper geometry.
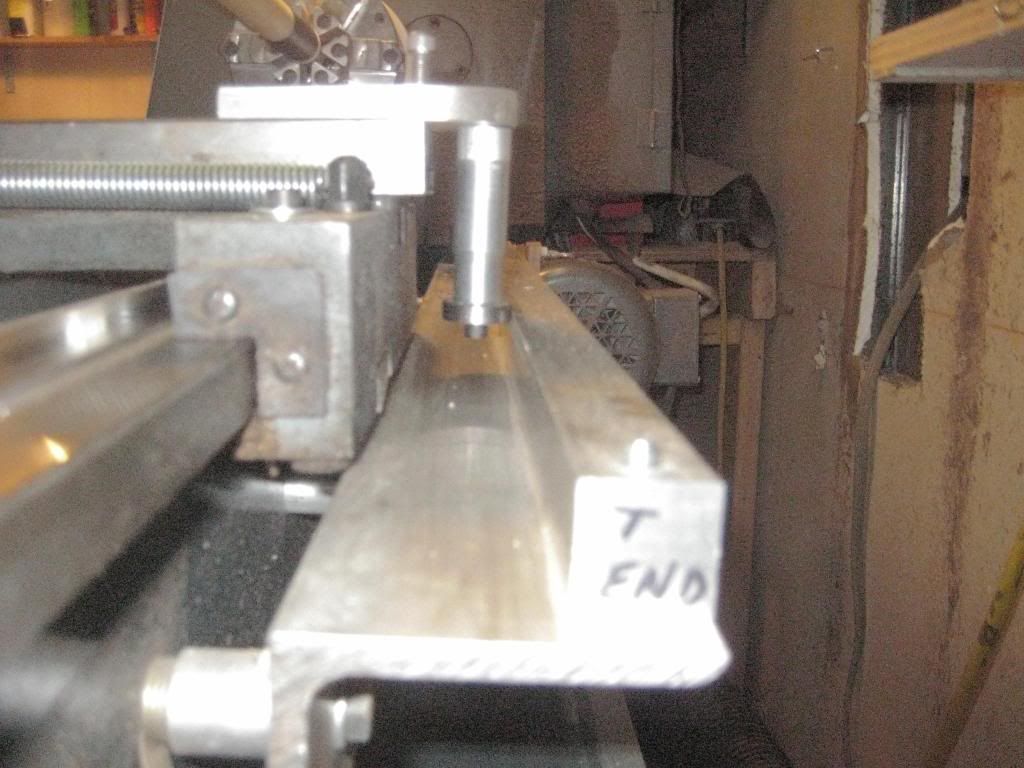
Table saw tapering machine for compound tapered butts:
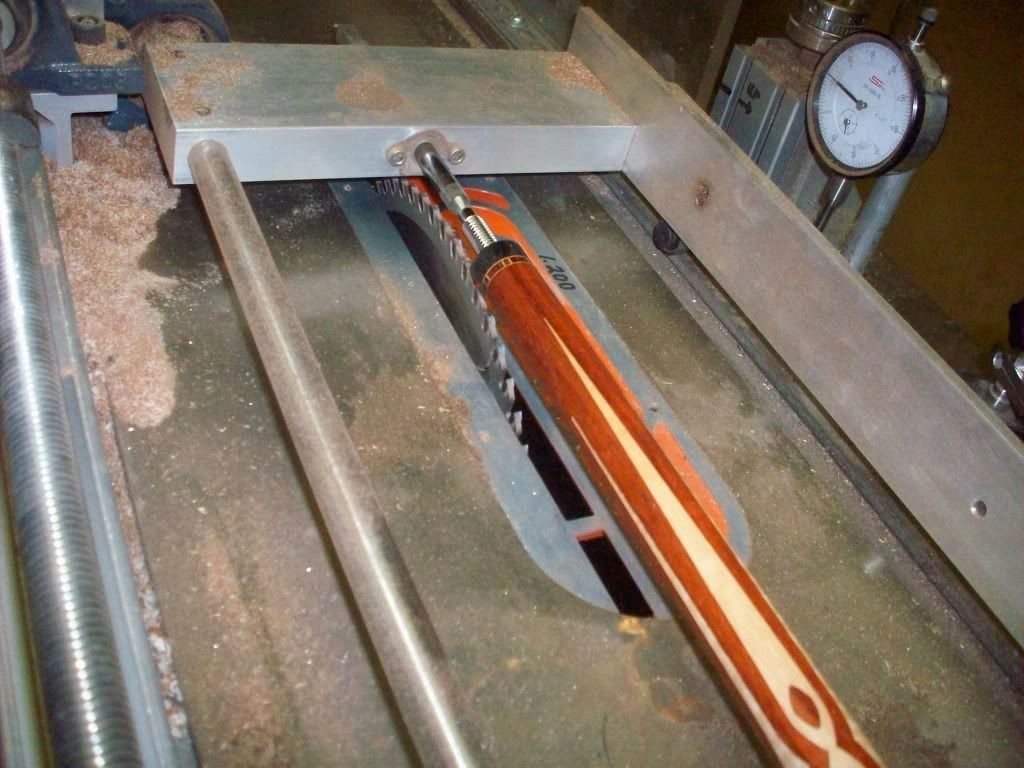
Table saw tapering machine for parabolic tapered shafts:
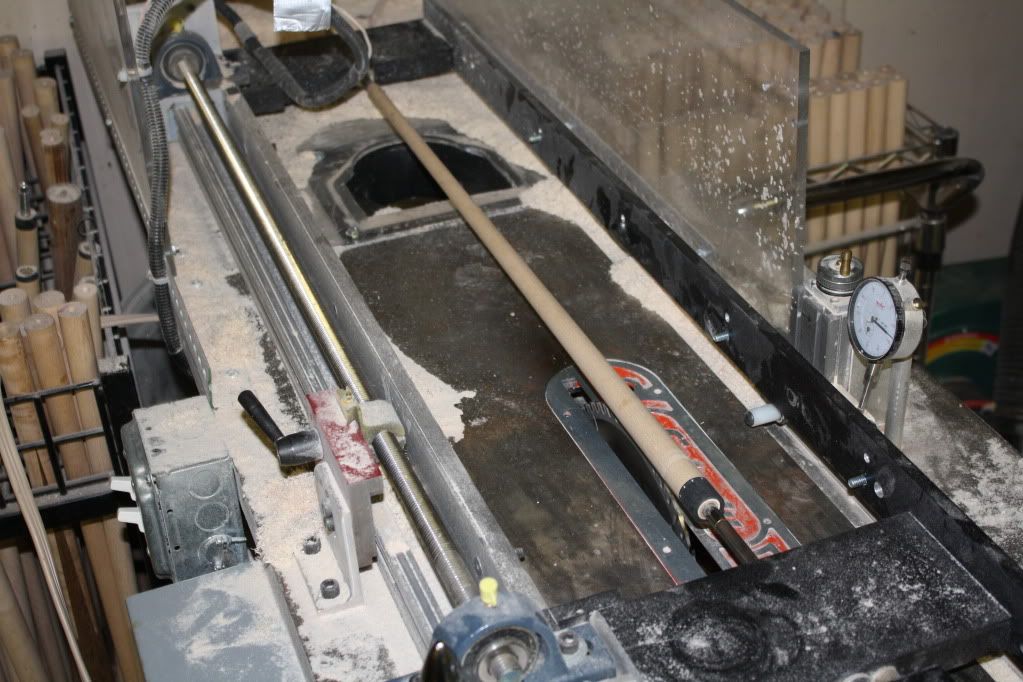
No collets required on the shaft:
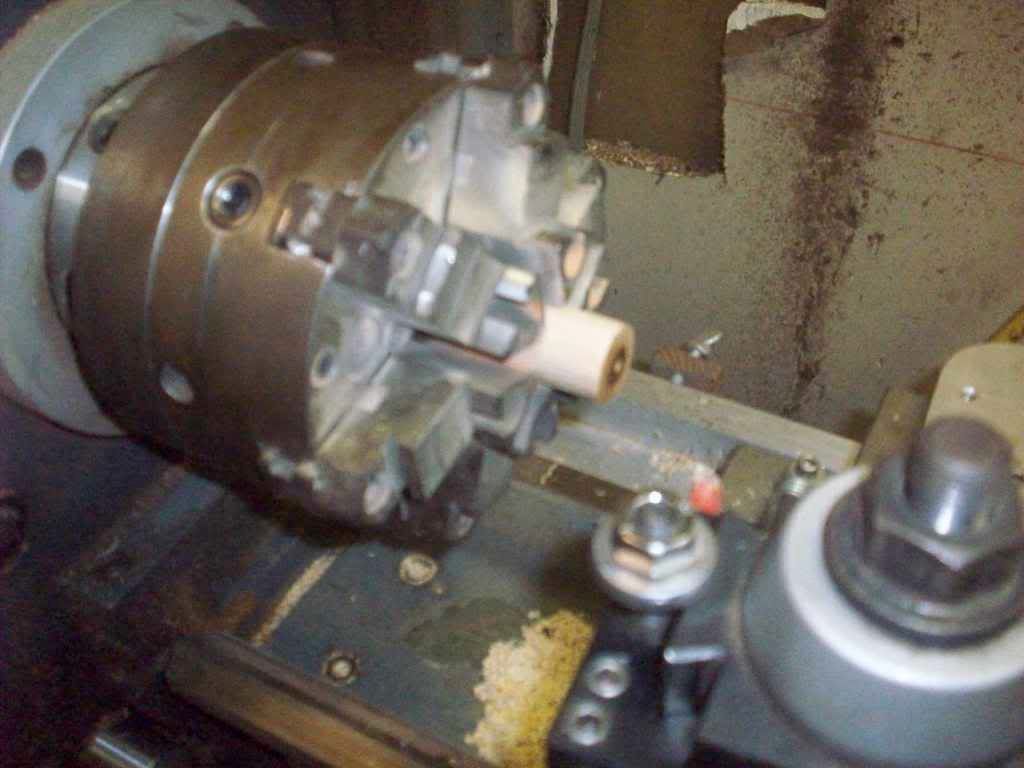

Our shafts with Parabolic taper in to a pro style tapered end for a very stiff hit:
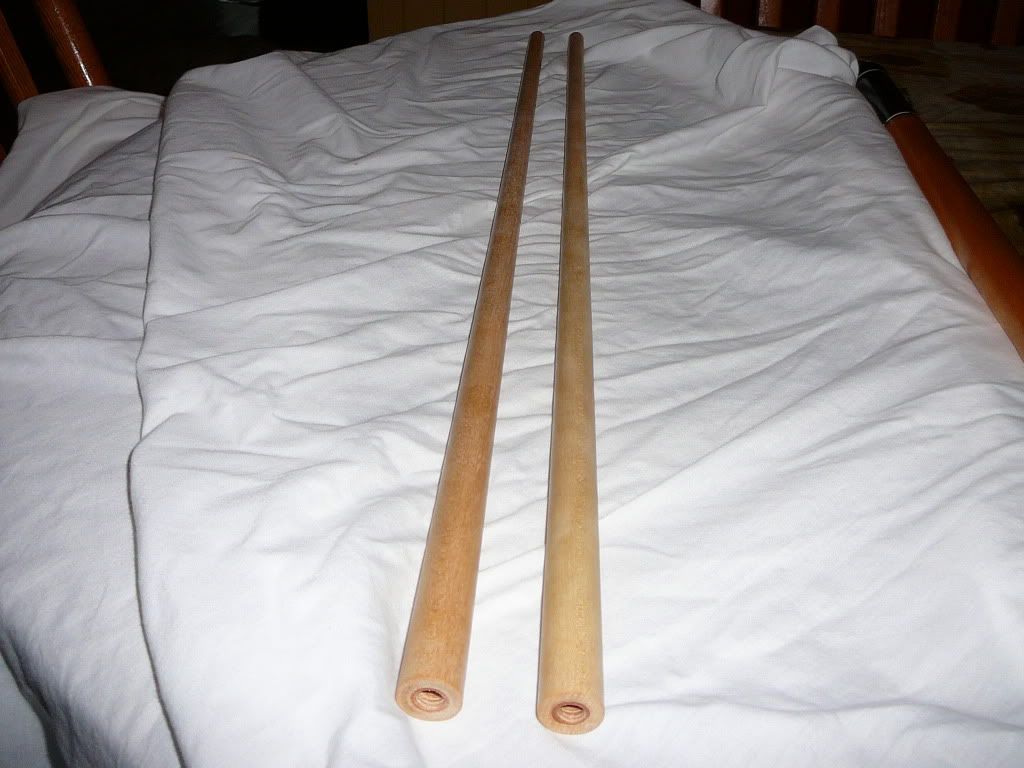
Shafts hot off the machine before sanding and finishing destined for 2 Omega DPK restorations:
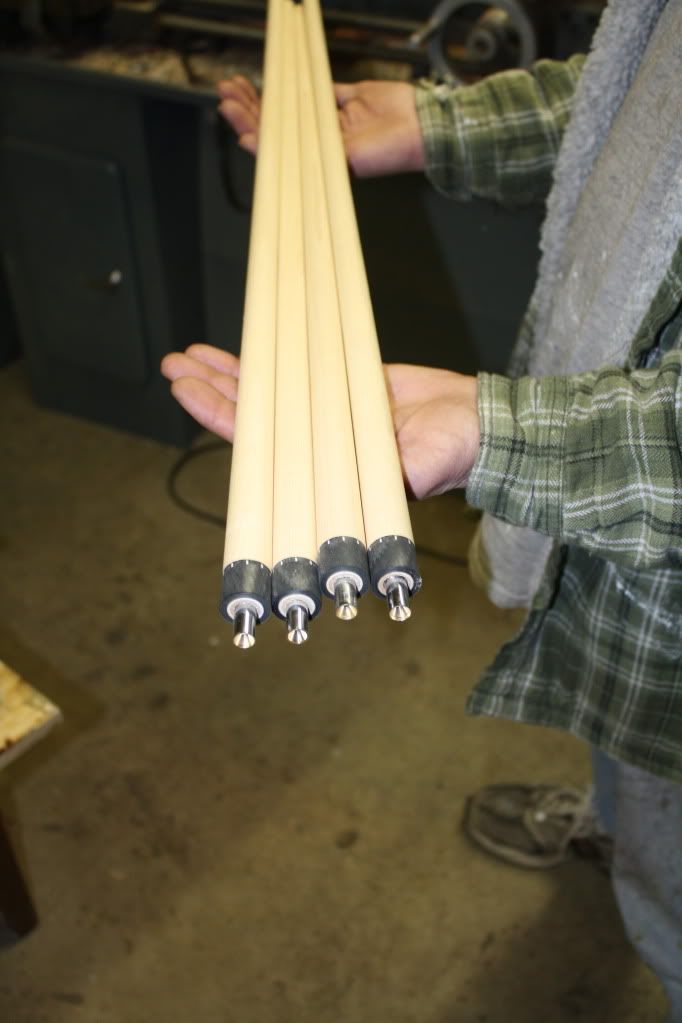
Jimmy Dill making dust and multi tasking two tapering machines while his inlays are being cut on the CNC machine - how productive is that?:

Last edited:
I have a 32" adjustable straight taper bar on my lathe. For boring the inside taper on the Phenolic tube I remove the springs on my cross slide and install my roller bearing guide on the back side of my taper bar. Then I just bore that puppy to a smooth RMS finish ID.
Great tip.
Thanks.
Great tip.
Thanks.
I have a 32" adjustable straight taper bar on my lathe. For boring the inside taper on the Phenolic tube I remove the springs on my cross slide and install my roller bearing guide on the back side of my taper bar. Then I just bore that puppy to a smooth RMS finish ID.
Great tip.
Thanks.
Joe,
I always get the best and most informative info from your posts and have heeded your advice in many ways in my cue build and finishing. Sharing and getting info and experience is why we are all hear.
Rick
Last edited: