Taig based lathe mods and addons

Baba

Registered
Hi all,

I just wanted to show you my modifications done to a taig based lathe and want to here what can be changed or done better. Would be also cool to see what others did.
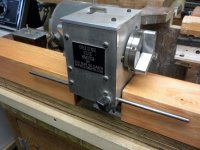
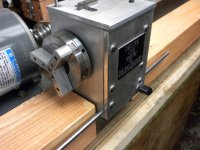
My first addon is a threading attachment which you can see here
http://forums.azbilliards.com/showthread.php?t=285866

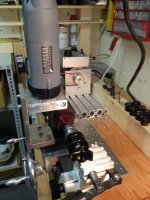
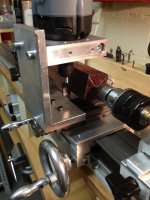
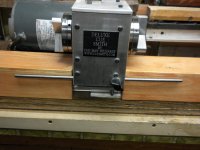
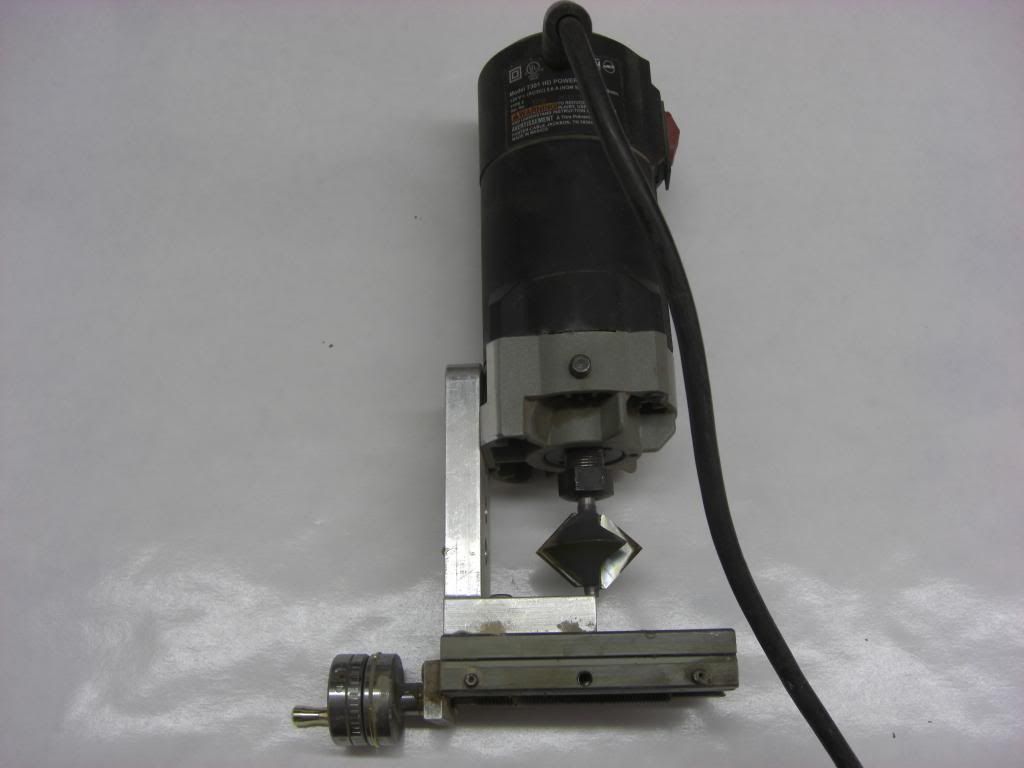
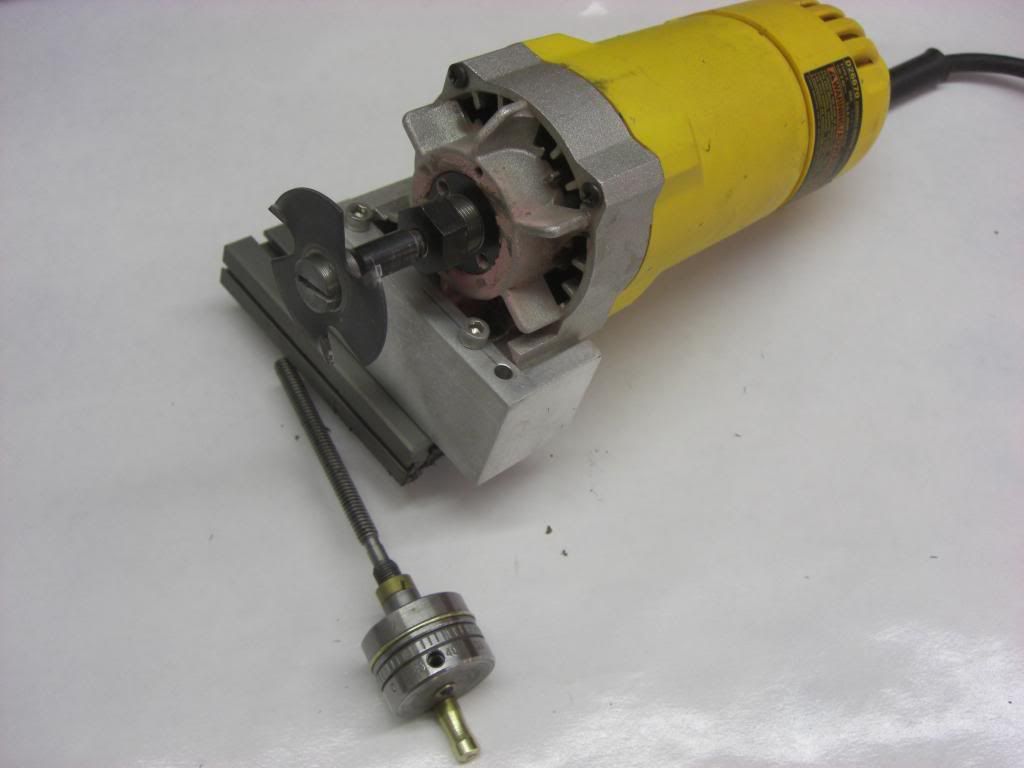
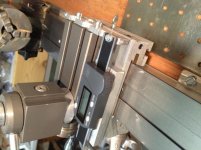
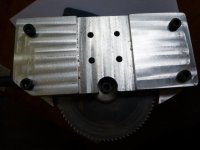
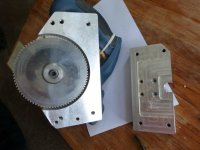
On these pictures you see my router mount (kress). This is completely done by myself, so it's not dead perfect
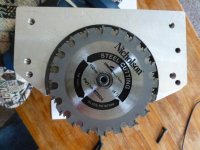
In the background you see my motor replacement. I replaced the motor with a 850Watt DC motor together with a completely new motor control (Minarik Board).
Next is to add a X-Axis DRO.

Hope you find it useful or at least interesting :wink:

Michael
 

Attachments

  • Router1.jpg
    Router1.jpg
    94.9 KB · Views: 4,602
  • Router2.jpg
    Router2.jpg
    92.4 KB · Views: 3,621
When you get ready to set-up your DRO let me know and I'll post some pics of how I did the DRO on both my slide and cross-slide, maybe it will help you get some ideas.
 
I want to see, i want to see!

LOL, at your request sir.........

To make a DRO for the slide itself (I ain't smart enough to know if that is the X-Axis or the Y-Axis,lol), I bought a spare riser block from Todd and attached it to the riser block. The digital unit itself is just a simple tire tread depth indicator. I work at a car dealership and all our service advisors use them in the service lane to measure the tread on tires so we had tons of them laying around, so the digital unit was free to me but they are pretty cheap if you have to buy one.

To attach it to the riser block, I had to flip the riser block upside down and drill a 10-32 (I THINK it was a 10-32, it's been awhile) in between the inner v-channel that slides on the bed and the outer u-channel that a t-nut would slide into. no room for error with very small meat so it had to be perfect.
013.jpg


Here is a pic of the riser block after the hole was drilled and tapped on the bottom.
014.jpg


Here is a pic of the DRO bolted to the riser block.........
015.jpg


I had to take some stiff pieces of cardboard and shim the back side between the DRO and the riser block to make sure the DRO unit had no flex to it when pushing any buttons.
017.jpg


Here is a pic of the completed unit..........
016.jpg


And here is a pic of it bolted up to the lathe. You can put it on and take it off in a matter of seconds...........
018.jpg
 
And here is a pic of the DRO set-up on my cross-slide. The mounting and the way it works is pretty self explainatory............
P1030413.jpg


And here is a pic with both units attached up to the lathe..........
P1030414.jpg
 
And here is a pic of the DRO set-up on my cross-slide. The mounting and the way it works is pretty self explainatory............
P1030413.jpg


And here is a pic with both units attached up to the lathe..........
P1030414.jpg

Hey...... great idea for the main carriage. I can use that for cutting rings. I see those depth gauges on sale on Ebay for $23.

Kim
 
Hey...... great idea for the main carriage. I can use that for cutting rings. I see those depth gauges on sale on Ebay for $23.

Kim


Thanks Kim. I FINALLY contributed something to the forum instead of my endlesss questions.


Lee


Kewell - very slick setup.

Dale(who is almost green with the envy)

Thanks Dale. Only "almost"..... ah well, I tried:wink:


Lee
 
I added a stop to my Deluxe, it really makes things a lot easier for repeatability.
 

Attachments

  • DSCN1092.jpg
    DSCN1092.jpg
    94 KB · Views: 4,869
  • DSCN1093.jpg
    DSCN1093.jpg
    91.6 KB · Views: 3,223
  • DSCN1094.jpg
    DSCN1094.jpg
    93.2 KB · Views: 3,280
Ok ... here are a few things I have done to my Deluxe to save time and aggravation.

I keep a router set up for points. I bought another top slide to mount it on. No more fiddling with the height and trying to make the cutter even with the dead center. It takes 30 seconds to set up to cut points.

CIMG1160_zpsf4b7d832.jpg


The next aggravation was squaring up the cutter to cut rings off billets. I bought a taig slide and screw to set up the router to cut rings. I just remove everything off the carriage. I take the router all set up out of the drawer and slap it on the carriage. Cut rings........... takes about 1 minute to set up.

CIMG1163_zpsfed76535.jpg


Kim
 
leave slide set up

Ok ... here are a few things I have done to my Deluxe to save time and aggravation.

I keep a router set up for points. I bought another top slide to mount it on. No more fiddling with the height and trying to make the cutter even with the dead center. It takes 30 seconds to set up to cut points.

CIMG1160_zpsf4b7d832.jpg


The next aggravation was squaring up the cutter to cut rings off billets. I bought a taig slide and screw to set up the router to cut rings. I just remove everything off the carriage. I take the router all set up out of the drawer and slap it on the carriage. Cut rings........... takes about 1 minute to set up.

CIMG1163_zpsfed76535.jpg


Kim

I love leaving the slide setup..I'm going to buy a couple more myself.
 
Ok ... here are a few things I have done to my Deluxe to save time and aggravation.


The next aggravation was squaring up the cutter to cut rings off billets. I bought a taig slide and screw to set up the router to cut rings. I just remove everything off the carriage. I take the router all set up out of the drawer and slap it on the carriage. Cut rings........... takes about 1 minute to set up.

CIMG1163_zpsfed76535.jpg


Kim

Kim

Where did you get the aluminum block that the router bolts to ?? I haven't had much luck on finding a way to mount a router in the horizontal position on my Taig lathe.

Lee
 
Kim

Where did you get the aluminum block that the router bolts to ?? I haven't had much luck on finding a way to mount a router in the horizontal position on my Taig lathe.

Lee

There was a fellow on the forum at one time that made a few of the mounts but I have no idea what his name was. I got mine from K2CNC.COM about 4 years ago but they no longer make them. They were pricey but a good mount.

Maybe someone on here will have better information. Good luck.
 
This is my solution to a DRO. After setting it up for half an hour it's dead accurate (0,01mm).

Michael
 

Attachments

  • image.jpg
    image.jpg
    94.8 KB · Views: 2,213
Kim

Where did you get the aluminum block that the router bolts to ?? I haven't had much luck on finding a way to mount a router in the horizontal position on my Taig lathe.

Lee

Check the post from busbeecue above..... they are no longer made...... They are different and really work but you can't have the taper slide on the Hightower deluxe. You have to remove everything and pretend that it is just a taig lathe carriage.

Kim
 
Here is one of my saw machines for the lathe. Made from a cheap circular saw with the bottom bearing being replaced for a better bearing.I looked for a saw with a max rpm of less than 4k.
Made a new bottom housing for the blade, and is attached with a steel plate adapter onto the Taig crosslide. There are 2 different adapters, depending on the blade thickness to get it to centerline.I also made new spacer washer for the screw for each thickness of blade and to suite the blade centre hole.
 

Attachments

  • P1020571.jpg
    P1020571.jpg
    78.3 KB · Views: 1,391
  • P1020572.jpg
    P1020572.jpg
    95.8 KB · Views: 1,447
  • P1020574.jpg
    P1020574.jpg
    99.6 KB · Views: 1,522
Here is one of my saw machines for the lathe. Made from a cheap circular saw with the bottom bearing being replaced for a better bearing.I looked for a saw with a max rpm of less than 4k.
Made a new bottom housing for the blade, and is attached with a steel plate adapter onto the Taig crosslide. There are 2 different adapters, depending on the blade thickness to get it to centerline.I also made new spacer washer for the screw for each thickness of blade and to suite the blade centre hole.

Could we see that thing mounted on the lathe....??? Having a little bit of a hard time picturing it. Thanks

Jim Notestine
 
Back
Top