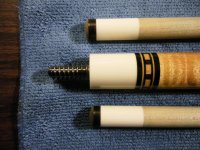
As i do have a lathe to do tip changes, I have been experimenting with different ways of doing it fast, simple and to make the result the best I can. A short list of steps that I have found to work the best:
- Cut off the old tip, about 0.5mm from the ferrule to make sure you dont touch it with a box cutter.
- Wrap some packaging plastic around the shaft, leave 10cm from the ferrule exposed.
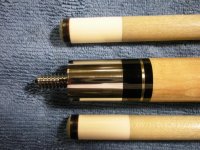
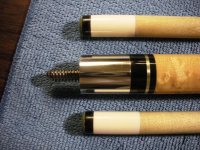
- Pick an approperiate plastic bushing to match the size of your ferrule. I have found that the best way to make sure no dings or "ghosts" of the chuck jaws is to use an exactly right sized bushing, I have them machined every 0.2mm or so, since I am a machinist myself. I don't like to cut them, instead I leave them round and in 1 piece. About 2-2.5mm wall thickness works well.
- Make sure that the shaft is securely attached, and that the end of the shaft fits snuggly to the spindles backend. (dont know the right english word for this :frown
")
- Check that the ferrule is spinning straight and is not wobbling.
- Cut the old tip away, and take about a 0.1mm from the ferrule to make it straight.
- Take a piece of 600 sandpaper, and very gently swipe the end of the spinning ferrule, this seems to help with glue sticking securely on it.
- Wrap some tape around the ferrule if you are not 100% sure how much glue to use. If you haven't done many tip replacement, it's easy to use a lot more than needed.
- Prepare the new tip, I like to use a 320-400grit sandpaper for this, it seems to do the job fine. Slide the tips glue side on the paper placed on a flat surface, untill it's ready. Many tips have the word GLUE on them, and usually they are ready to be installed when the word is sanded away evenly. If installing a Kamui Clear, or other tips with plastic pad, I usually very gently sand them on 600grit, to make something for the glue to take a grip on.
- Make sure that the ferrule and tip are free from dirt and dust of any kind, I use a common household paper towel for this, just wipe away all dirt from them.
- Apply the right glue (I use Loctite Super Gel for leather, and Loctite 401 for Kamui Clear tips) You dont need that much, but always make sure that the glue gets all around the tip, and that a small amount of it comes out from all around the tips edges. Any spot without glue on it will give the cue a bad sound when hit, and it greatly increases the chance of popping a tip off.
- Center the tip to your ferrule, and apply some pressure on it. Using 14mm tips is the easy way here, as they are not that exact on centering the tip. Keep the pressure on for a minute or two when using fast setting super glues like the loctites.
- Turn the tip down near the diameter of your ferrule. The best way seems to be that you leave the tip a tad bit larger (about 0.1mm) in diameter than the ferrule, this makes sure that the ferrule is left untouched by your cutting tool. Having digitals is the easy way, if you dont have them, it's also pretty straight forward to just go down near the right diameter with about 0.2mm cuts, and then move closer to the ferrule in smaller cuts. For me it's pretty easy to see when the correct diameter is achieved, as I have a trained eye for this kind of stuff due to my day job :wink:
- After cutting the correct diameter, it's best to use a razor blade to cut the dime onthe tip. I turn my cutting tool 90 degrees, and use its backend as a backing plate to rest the blade on securely. This seems to be the way that puts the minimum amount of stress on the tip. I have tried all kinds of diamond sharpened tools ground to a dime, but they seem to apply excessive cutting force on the tip, compromising its structure. The sharp razor blade still works, atleast for me.
- Use a grit 600 - 1000 sandpaper to gently sand the tip to the exact diameter of the ferrule. Make sure not to touch the ferrule with sandpaper, it is too coarse for it and will leave chalk marks all over it very easily if scratched.
- If needed, you can use a microfilm, Nick's Edge for example, to very gently flatten the line between the tip and ferrule. I often come from the end of the ferrule towards the tip, making sure that the transition from ferrule to tip is flawless. The finest microfilms dont seem to hurt the ferrules, but go easy on it.
- Burnish the leather with whatever suits you the best. I use a small amount of spit on a dennish bill I found somewhere, it seems to do the job pretty well
Dont heat the tip with friction, it softens the glue usen on laminated tips. Some like to use leather creams and leather to burnish it's a matter of personal preferration I think.
- To finish a new tip, the last thing I like to do is to very gently swipe the dime with a 400-600grit sandpaper to flatten the surface of the tip and make a very small rounding to the edges of the dime, this seems to make them a bit more durable. For single layered tips a coarser paper can be used.
- Take your shaft out and wipe it down to remove any dust and dirt from it.
- Laminated tips seems to come out the best if they are given a bit of Gator Grip treatment, it really brings the fibres up and make the tip hold chalk pretty well. I just spin the shaft squeezing the tip gently on the Gator Grip, till it seems to be ready.
Cleaning the shaft is pretty straight forward IMO. I use Magic shaft cleaner, a Q-Wiz pad and Nick's Edge microfilms to buff out all dirt and chalk on the shaft and to polish it. Cue silk to finish 'em up. My shafts are always clean though, I cant stand the idea on playing with a blue or tacky shaft. They just must be clean and slick for me

The process takes about 10-20 minutes for me to do, and I am sure that there are more efficient ways and some other opinions on how it's done, but this is the way I do my own tips and a few others too, and it works well for me :embarrassed2: