Custom Pool Room

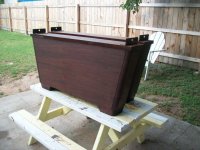
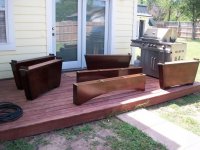
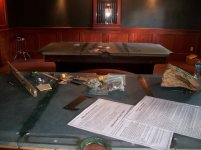
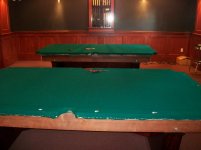
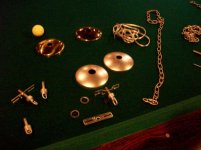
Here are other pieces of the tables. I'm concentrating on the lower portion of the tables first so I can start to set them up.
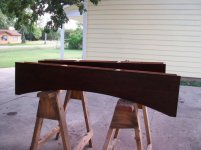
The side panels are solid Mahagony and these are coming out great! Can't wait to stain these and the corner pieces.

26.jpg
27.jpg
28.jpg

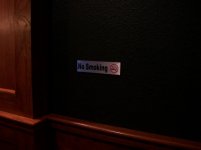
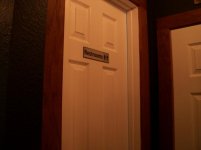
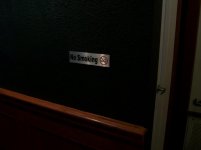
I also found time to finally take the bathroom, closet and ac doors down to paint.Well actually my son painted them and he did a pretty good job.

30.jpg
 
This is awesome, it should be on the show "Man Caves"!

We're considering adding a dedicated pool room onto our free standing two car garage, so this thread is a great find.
 
...It's gonna take alot of elbow grease to get these down to bare wood. I purchased a stripper to help speed the process.

I'm a BIG fan of the thread...and I know you're a VERY DEVOTED family man...but I can't resist pointing out this particular comment! :eek:
 
Just curious, when are you gonna start making pool cues?

I mean seriously, with your skill set, handicraft, perseverance to learn, perfectionist attitude i don't see why you won't make a great cue maker under some great mentors? I'm sure any great cue maker would be excited to teach you a thing or two if they saw how you're bringing this pool room to fruition. Talents always recognises Talents.
If you never thought about it and i'm the first to bring that up and has successfully evoked some interest in you then.... I Call Dibs on first cue!
 
Sign plates

I found these at Lowes. I didn't like idea of sticking them straight ot the wall, even though they're pretty thick I didn't want to take a chance of them contouring to the shape of the wall texture, so I found some black plastic 1/16 thick and stuck it to it thne used double sided tape. It worked out great!
 

Attachments

  • 1-signs-1 (1).jpg
    1-signs-1 (1).jpg
    41.9 KB · Views: 1,040
  • 1-signs-1 (2).jpg
    1-signs-1 (2).jpg
    45 KB · Views: 1,051
  • 1-signs-1 (3).jpg
    1-signs-1 (3).jpg
    43.3 KB · Views: 1,060
Well I gave the legs a final sand with 200 grit paper then stained them. The next day I gave the first coat of poly. Here are pics after the second coat was applied and set out to dry. I'm very pleased with the color and how they came out. Mahagony has a very nice grain.
 

Attachments

  • 1-stained (1).jpg
    1-stained (1).jpg
    96.1 KB · Views: 1,050
  • 1-stained (2).jpg
    1-stained (2).jpg
    91.3 KB · Views: 1,049
  • 1-stained (3).jpg
    1-stained (3).jpg
    96.3 KB · Views: 1,031
While I waited for the poly to dry I cut these braces to attach under the subfloor where the table legs were going to be. I had premarked them and just needed to sledge them into place. I also used a floor jack to squeeze them in.
 

Attachments

  • 1-scab (1).jpg
    1-scab (1).jpg
    97.7 KB · Views: 1,032
  • 1-scab (2).jpg
    1-scab (2).jpg
    78.1 KB · Views: 1,031
When the poly was completely dried (thanks to the hot Texas sun it didn't take long) I set the legs up taking my time measuring precisely where they needed to be. I centered them in reference with the wianscotting. I then dropped a string bob from the ceiling light location, both tables were perfectly centered! I couldn'e believe it. Situations like these give me goosebumps.

100_5261.jpg


After centering my son helped me set the frames into place. These were pretty heavy but he was able to do it.
100_5271.jpg


I then went to my Fathers and picked up the slates. Which he was very excited about. I had them stored at his house in his pool room he set up with the table I gave him. He was happy to have the extra space back.
Boy was I glad to have gotten this over with. Six pieces 2 tables! Them things are HEAVY, and my dad is 67 yrs old.
100_5305.jpg
100_5318.jpg
100_5331.jpg
 
Last edited:
WOW! It's really starting to look like a pool room now with the tables in there. I truely can't wait to see the finished product, fantastic work.

Just out of curiosity how much space do you have between the two tables?
 
Well done sir. Your new pool room and this thread should be in some hall of fame. Enjoy the fruits of your labors...
 
Saturday I set aside so I could level the slates. It took my Father and I about four hours. I think he was losing patience with me. Every time he thought the slate was level, I did the roll the ball the technique, if there was any kind of side motion I'd go back to readjusting each slate till I got it perfect or at least near perfect, because according to my Father it can't be perfect, but I darn well got close. I could have done this in half the time but I wasn't going to take short cuts on setting up the tables.
 

Attachments

  • 100_5337.jpg
    100_5337.jpg
    86.1 KB · Views: 1,460
Just out of curiosity how much space do you have between the two tables?

Gosh, I cant exactly remember but it's a tad over 4 feet. When shooting your hip or back side never even gets close to the oposite rail.

Too bad you will never be able to use the room...it is clearly haunted...by a little girl in a pink dress...

...and horror movies have clearly demonstrated that little girl ghosts are by far the most vindictive.

dld

lol, I didn't even notice that when I posted it.
 
Sunday after our Bible meeting I had to run to Wimberley to the Ace hardware to pick up the Rocktite for the table seems. Thats the only place that carries it.
My wife then helped me set the felt. Days earlier I was contemplating throwing them in the washer, I was hesitant and nervous. My Wife took a look at them and says "oh yeah, don't worry I'll take care these" Next day BOOM! Almost new felt. Plus the smoke smell was gone.
 

Attachments

  • 100_5344.jpg
    100_5344.jpg
    64.3 KB · Views: 1,508
  • 100_5345.jpg
    100_5345.jpg
    61.7 KB · Views: 1,518
are thoes 9'ters. and when you haveing a tar mach in that place my god i would be scared to go in there with my shoes on. GREAT work. looks like a great place to take all your friends money haha. JUST WOW!!!:D
 
I'm not surprised that you took all that time to level your tables. To do all this work with all of the amazing detail and precision, it would be a huge disappointment if the tables weren't level! I applaud your meticulous attention to detail!

You are truly a man proud of your work and I'm so thankful to you for letting us share in your journey.
 
I picked up the table pieces from the powder coater. I was a little dissapointed, they came out a little darker than I liked. Excuse the poor pic. Before installing the rails I polished then waxed them with a compound polisher then a finish wax. I was careful as to tape the rails with painters tape and not get any compound on the felt. They turned out nice.

100_5369.jpg
100_5372.jpg
100_5375.jpg
 
Last edited:
Tables PLAY AWESOME!!

Well we attached all of the rails to the corner pieces and before bolting them down I measured and squared them to the table. These Brunswick Medalist side rails are one huge piece of hard mahagony so there is no real adjustment, which makes it real easy to install. After bolting them down we dropped the pockets in and it was ready to test out. I couldn't believe how great they played! You can shoot and ride the ball down both rails with ease. The tables are completely straight, level and accurate. Of course we still had one more table to do which was hard to get done because the help I had (my son and dad) were to busy playing.
100_5389.jpg
shot detail.jpg
 
Last edited:
After setting up the tables I really wanted to play but the lighting was so bad in the room I could hardly see. The above pictures are decieving because I set the camera on night mode so it looks like the room is lit up. So the next thing to do was build the lights. I figured the side skirts can wait a few days.
Being on a budget I picked up the light canopy pieces at Habitat for a buck each (4). Lowes sells them for $14, saved $52. The satin chains I needed I also found there for a buck; Lowes ($12.97) (2) saved $24. I painted the canopy covers with the metalic paint I had and picked up a sheet of 1/2 oak plywood for $36. I had two strips of 6 socket light fixtures I picked up a long time ago for $3 a piece. Saved, alot.
Grand total for building the lights...... $48.

I installed the canopies hung the chains and wired the electrical, now, onto the lights..................
 

Attachments

  • light kits (1).jpg
    light kits (1).jpg
    96.4 KB · Views: 1,417
  • light kits (2).JPG
    light kits (2).JPG
    72.9 KB · Views: 1,451
Last edited:
I wanted to make these out of aluminum with wood frames on top and bottom but my metal fabricating buddy was delaying the process more than helping. I figured the compound miters and cut the pieces. I glued and brad nailed them with my Sons help. I installed loops to hook the chain and stained them using the same Red Mahogony stain I used for the tables.

100_5395.jpg

100_5401.jpg

100_5408.jpg

100_5418.jpg

100_5453.jpg
 
Last edited:
Back
Top