I really like your Idea. Looks like something to work with there. I haven't even begun to think about anything for coring, as I've only recently built My first full cored cue.
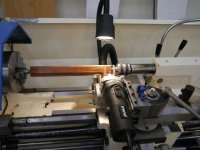
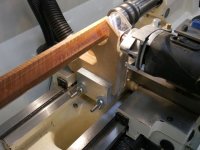
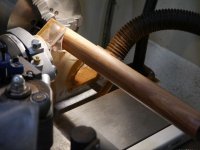
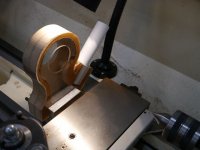
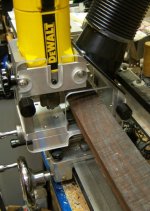
This was My first attempt a building an actual dust box instead of just using a bracket to hold a open hose end like I did for years.. It was originally intending for hogging squares to round, so I did not have tapering or coring in mind at the time, and was in a rush to use it, so I just built around the router, although I wish I had put more thought into that. It's big and bulky, but really cuts down on the dust. Due to the square holes, I do still get some fine stuff that comes through, so I need to even find something to seal It with, brushes that will fit or something, make new side plates with round holes, or both. I've just been using masking tape to fill in the gaps and that made a big difference. Actually there's a few changes to it that I need to make or remake. It's not suited for tapering due to being in the way of the roller bearing,and limited clearance, so I would like to make something different up for that. Seeing your prototypes gives me a few ideas, although I would have to go about It a little differently due to differences in the machine. I like the thinner profile though. I wonder if the smaller intake tube will increase suction, and how much effect that would have. That's the problem I see with a router. In my box it sucks most of It up, I mean it really cuts down on the saw dust pile created, but you can see the router kicking It around inside the fixture before the suction is able to get a hold of It.
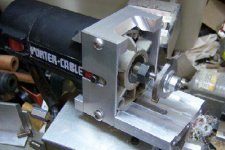
A couple of things that did turn out well for mine was the fixed design of the router mount makes removing and reattaching a router quick and easy. No fooling around with lining It up like with My old bracket. Also the whole dust box mounts to the T-slot on the carriage, so It all comes off as one unit. The router bracket It's self can be removed to and used without the box attached fairly easily. Like I mentioned though there were some disadvantageous too. It's definitely a huge improvement, but I'd like to try and make something a little more compact that will work as well, and improve upon what I learned by making a few other design changes. It would be much easier If I plunge cut because there would be more room for the chute, with the router in the way though, It really limits me on space up top to mount It. maybe a smaller chute would be an improvement, although a whole different design is coming to mind now. Thanks for sharing.
")
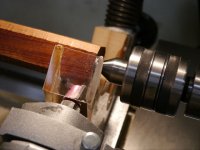
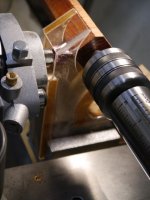

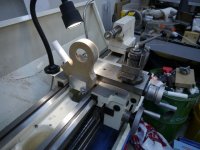
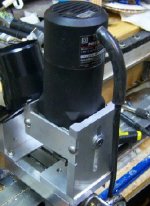
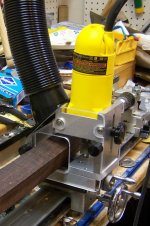
 This did help with that, It greatly reduced the pile, but like I mentioned I do have a few changes to make to better seal things up. I'm still looking for the perfect bristles to seal the sides against the wood, and I could have made the adjustment slot for the router mount a little shorter. I get a small amount of leakage at the bottom of that, Although It easily seals with a piece of masking tape. All I have to work with is a seig mini Mill, but It was enough to do what I needed. I did have to pull some clamping tricks to get some of the angles that needed milled, and due to My lack of proper tooling, for some of the tasks I had to improvise, and use some tooling in a manor that It was not intended for. I guess I had the will at the time so found a way with what I had. The only things I bought were the dust chute, and flex hose. Everything else I had on hand at the time. Even the little knock offs that hold the sides on were made from delrin and threaded rod, although the knockoff that holds the router on was premade, and one I had on hand. I think It was purchased at ace, but It can easily be made by hand as well.
