You are using an out of date browser. It may not display this or other websites correctly.
You should upgrade or use an alternative browser.
You should upgrade or use an alternative browser.
Wood Rack with Inlays (Pics). Work in Progress...
- Thread starter i4pool
- Start date
Most of the equipment and many of the things in my room are mahogany and gold (Gold Crown III table colors). Maybe if you consider the way in which the user decorated their room the rack could be made to compliment the user's scheme.
In my opinion the tape has been of much use. I have friends (I'm sure you do too) who do not rack very well: careless or ignorant of the game. The electrician's tape makes for a better night and I will always line my racks until something better comes along.
BTW the tape does deform or conform to the balls but at some point it stabilizes and tends to help get a good rack.
Last edited:
Hey, Joe.
I have some tape we use here that would work exceptionally well for you.
The problem is, it is a bit pricy- $50.27 a roll for 1.5" wide.
BUT it withstands long-term exposure to 400 degrees F! (because that is so important when lining a rack :wink")
It is (blue) silicone rubber on a fiberglass backing with silicone adhesive.
Soft, grippy, and thicker than electrical tape.
If you want a roll, let me know, and I'll contact our supplier (They are 36-yard rolls). No other colors (well, there's a red tape too, but it is thicker and more expensive).
I have some tape we use here that would work exceptionally well for you.
The problem is, it is a bit pricy- $50.27 a roll for 1.5" wide.
BUT it withstands long-term exposure to 400 degrees F! (because that is so important when lining a rack :wink
It is (blue) silicone rubber on a fiberglass backing with silicone adhesive.
Soft, grippy, and thicker than electrical tape.
If you want a roll, let me know, and I'll contact our supplier (They are 36-yard rolls). No other colors (well, there's a red tape too, but it is thicker and more expensive).
Honestly, I like the black and white, looks more simple and more appealing to me. That's my two cents though :-D
Thats the one I like too.
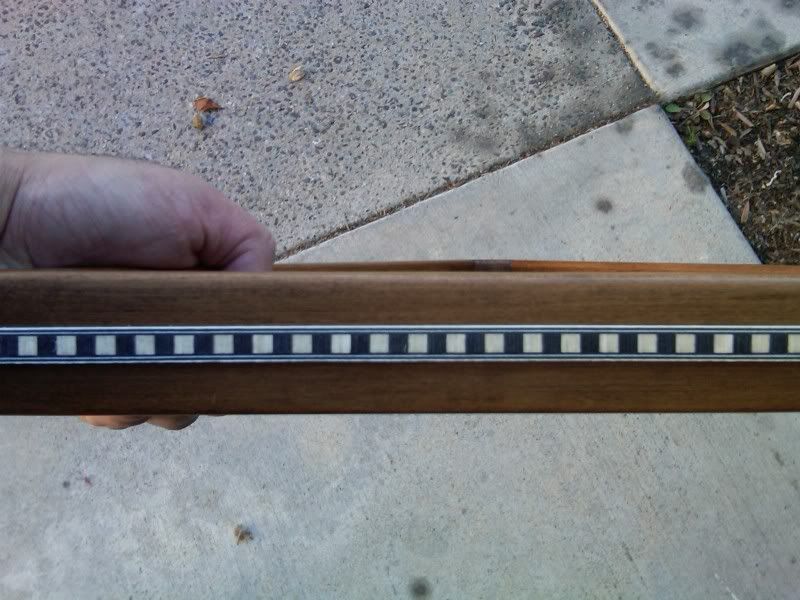
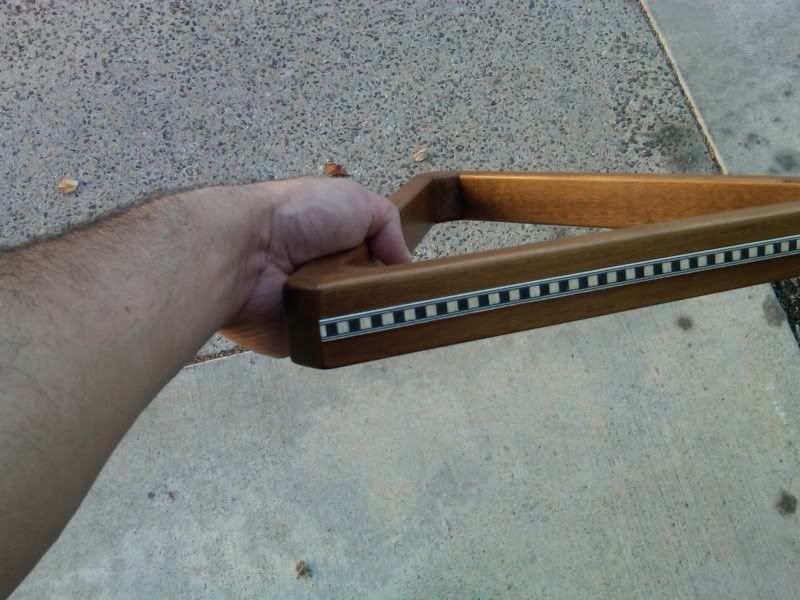
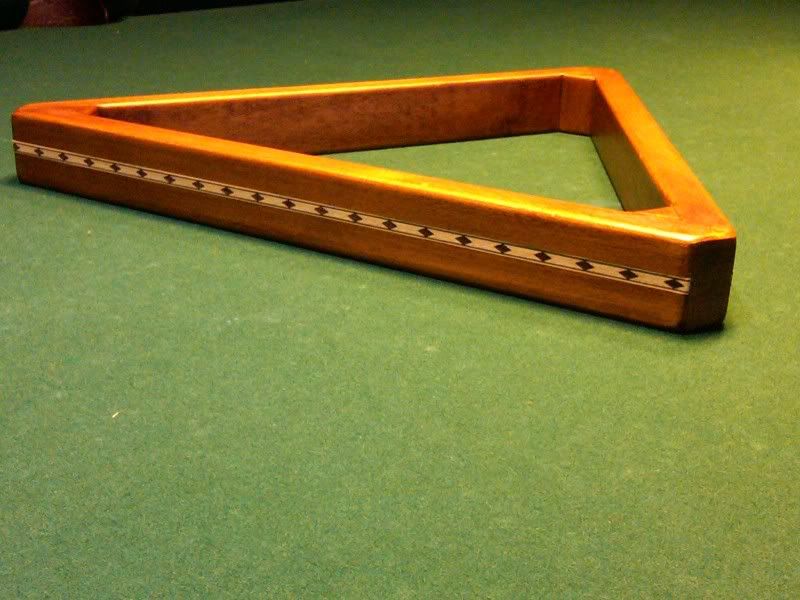
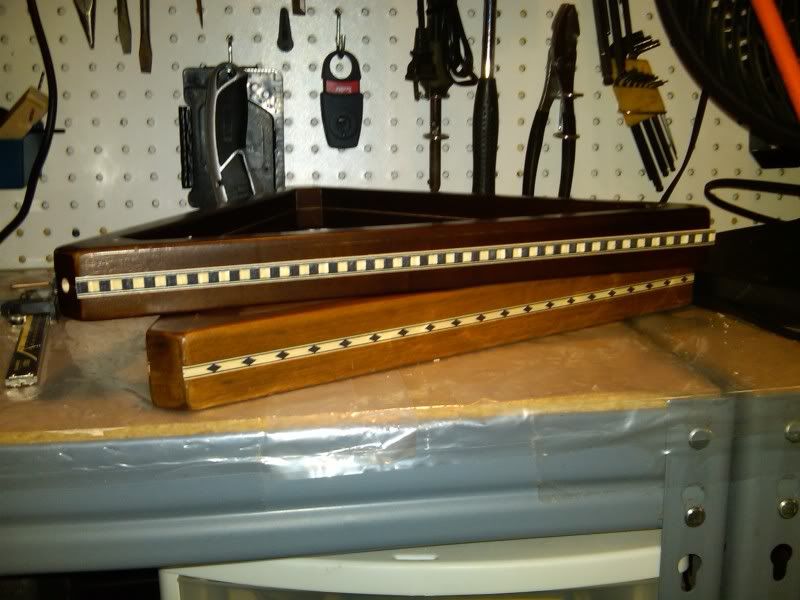
B/W on Rack pics
Here's pics of the B/W on the rack. (Just used tape to get a visual of how it would look.)
I can't wait until tomorrow so I can play some more! :grin::grin:
Regards,
Abe
Thats the one I like too.
Here's pics of the B/W on the rack. (Just used tape to get a visual of how it would look.)
I can't wait until tomorrow so I can play some more! :grin::grin:
Regards,
Abe

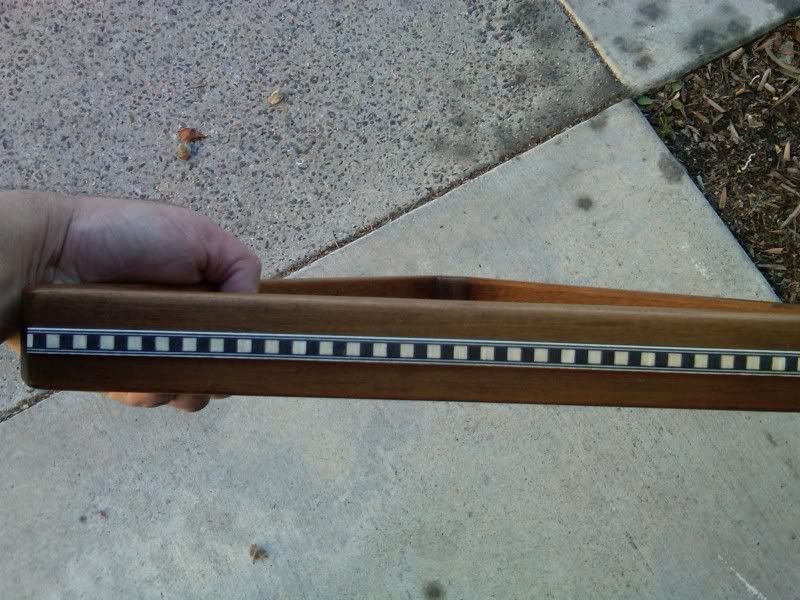
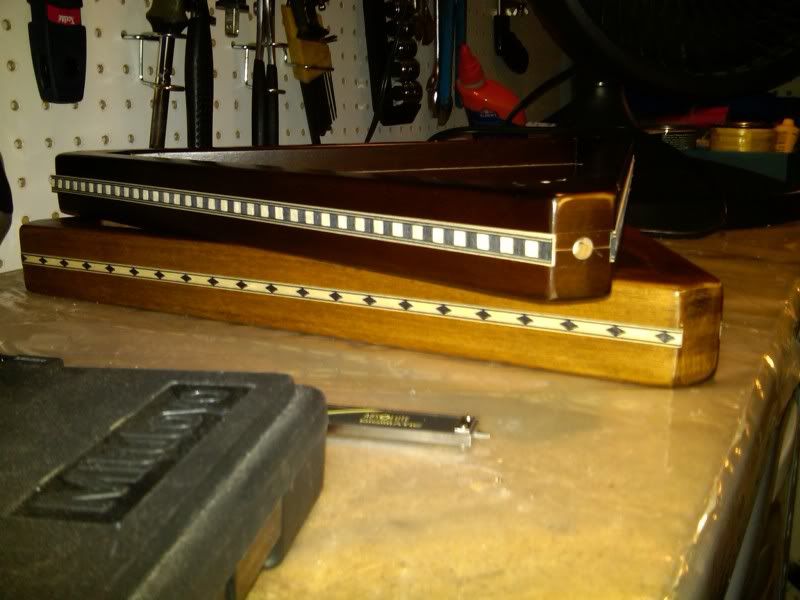
Hi All,
Don't post too often but do lurk quite a bit. Just wanted to share some fun...
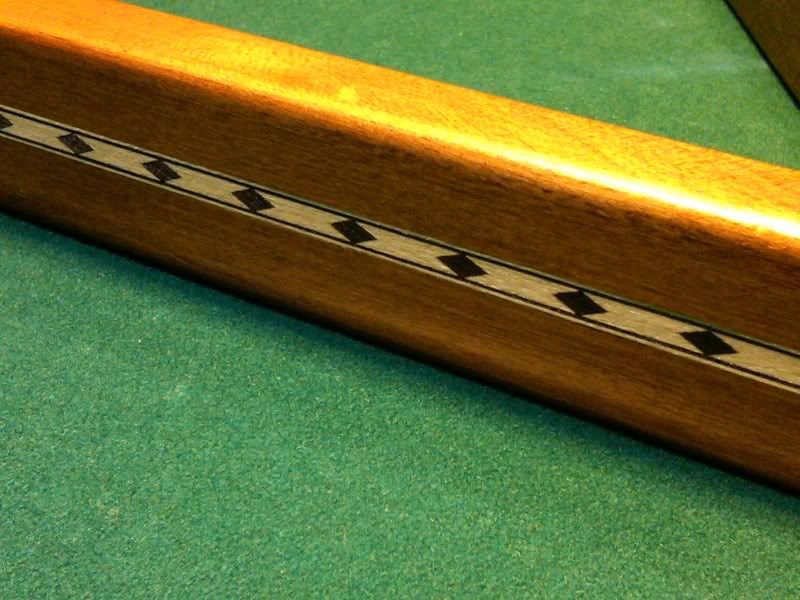
My buddy was looking for something a little fancier for his home table. So in the garage I came up with this. This is a work in progress and I will be adding more as time permits. What do you think?
Any additional ideas would be helpful and appreciated. Thanks!
I'll post more pics as I progress. Btw, this is the first time doing this sort of thing. I'm open to any and all criticism, positive or negative.
All the Best.
Regards,
Abe
i4pool@yahoo.com
Nice job buddy thanks for sharing.
Here's pics of the B/W on the rack. (Just used tape to get a visual of how it would look.)
I can't wait until tomorrow so I can play some more! :grin::grin:
Regards,
Abe
Looks nice, but I actually like the first one with the diamonds the best so far
NaturalEnglish
Banned
That looks like a good quality rack. Who makes that rack. I am so sick of cheap racks!
What do you think?
I think they're absolutely beautiful!! And, the nylon glide idea is nice, too.
Wish I had one like that!
That looks like a good quality rack. Who makes that rack. I am so sick of cheap racks!
You can find the plain jain rack from Mueller's.
I think they're absolutely beautiful!! And, the nylon glide idea is nice, too.
Wish I had one like that!
Thanks JesPiddlin! If enough people are interested, I may make more than just this one. Don't know yet...

That looks great!
Thanks Ponytail!
Regards,
Abe
i4pool@yahoo.com
...
5. On the table I mark the back rounded corners of the rack with a magic marker. Everyone seems to use these marks which if carefully scribed always yield a rack on the foot spot.
If your purpose is to accurately locate the rack, here's a way with almost no marking on the table.
Initial set-up:
1. Determine which of the three sides of the rack you want to face the person racking.
2. Draw two vertical lines on that side of the rack about six to ten inches apart. (Instead of drawing the lines, they can be saw kerfs.) The lines should be perpendicular to the table, i.e., 90 degrees to the edge of the rack.
3. Measuring carefully, place the rack on the table in exactly the correct spot for racking.
4. Mark two dots on the table cloth, one at the base of each line on the rack.
Now, all you have to do to rack quickly and accurately is align the base of the two lines with the two dots. The Laser Rack lists for about $179. This way is about $178.99 cheaper, and has all the accuracy anyone could ever need.
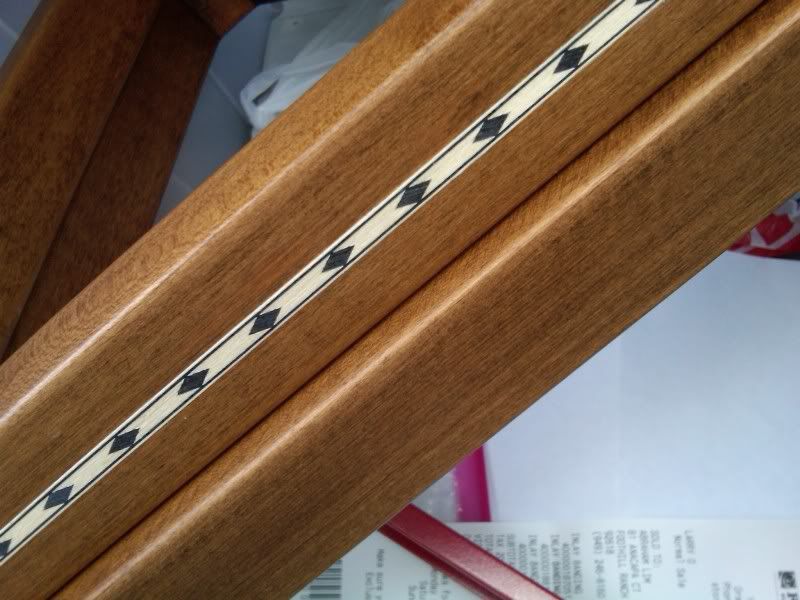
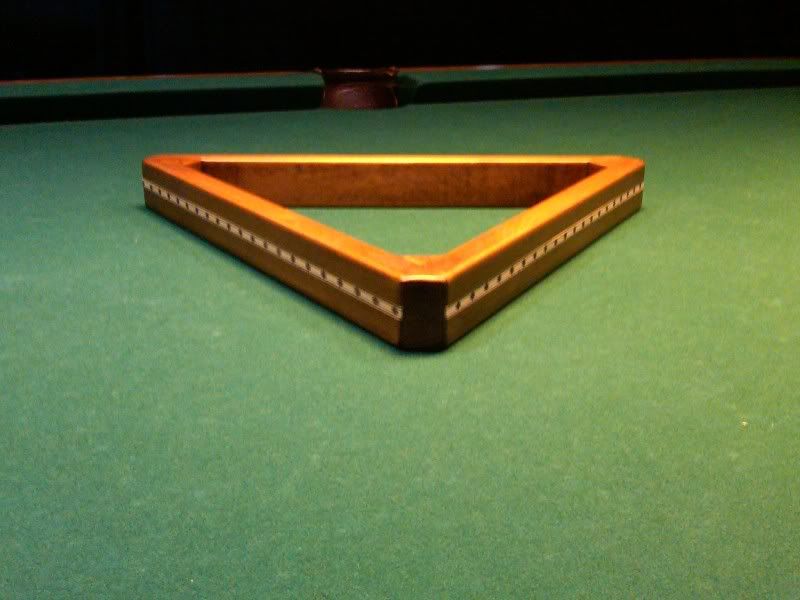
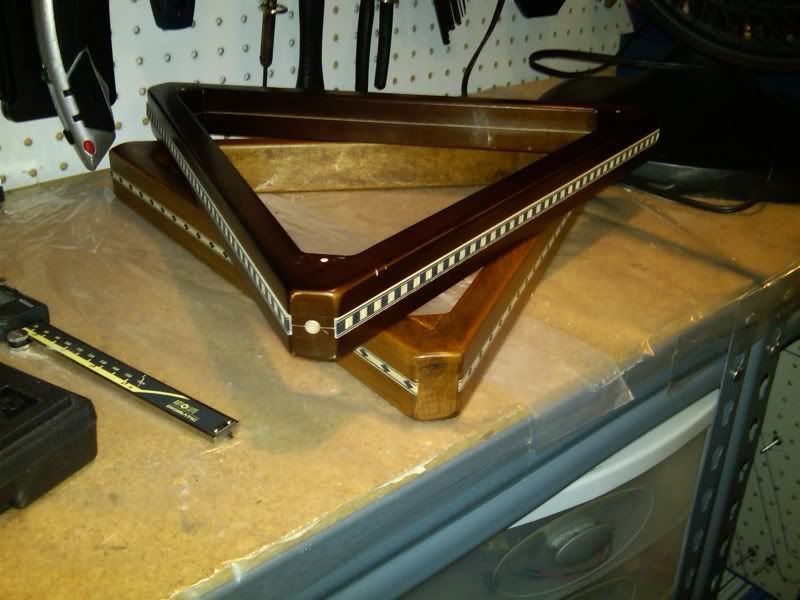
Black & White on Mahogany Stained
IIRC, the Sardo had alignment marks on the rack that would align to 2 dots. Very similar idea. Thanks for the input AtLarge.
Here are some pics of the black/white on a mahogany stained rack:
Regards,
Abe
...
4. Mark two dots on the table cloth, one at the base of each line on the rack.
IIRC, the Sardo had alignment marks on the rack that would align to 2 dots. Very similar idea. Thanks for the input AtLarge.
Here are some pics of the black/white on a mahogany stained rack:
Regards,
Abe
I want one!!!
Josh
Josh
I want one!!!
Josh
Stay tuned...
I'm kicking around the idea a custom wood rack program: 3 different colored racks to choose from and maybe 6-10 different inlays to choose from.
All the Best,
Abe
Off Subject
Sorry, I'm off the subject..But,
Abe, That is one mean looking bike in your avatar..
Came back to add that,
I should have mentioned the 1st.time,
That's the nicest racks I've ever seen..
A nice up-grade for any table owner..
Abe, I'm Alton..
Sorry, I'm off the subject..But,
Abe, That is one mean looking bike in your avatar..
Came back to add that,
I should have mentioned the 1st.time,
That's the nicest racks I've ever seen..
A nice up-grade for any table owner..
Abe, I'm Alton..
Last edited:
Sorry, I'm off the subject..But,
Abe, That is one mean looking bike in your avatar..
:grin: No probs. Thanks CueCaps!! I miss that bike. I had to let it go in July. Eventually, I'd like to get the same bike again. Btw, it's a Yamaha Roadstar Warrior, 1700cc V-twin.
Hi All,
Don't post too often but do lurk quite a bit. Just wanted to share some fun...
My buddy was looking for something a little fancier for his home table. So in the garage I came up with this. This is a work in progress and I will be adding more as time permits. What do you think?
Any additional ideas would be helpful and appreciated. Thanks!
I'll post more pics as I progress. Btw, this is the first time doing this sort of thing. I'm open to any and all criticism, positive or negative.
All the Best.
Regards,
Abe
i4pool@yahoo.com
It looks great.
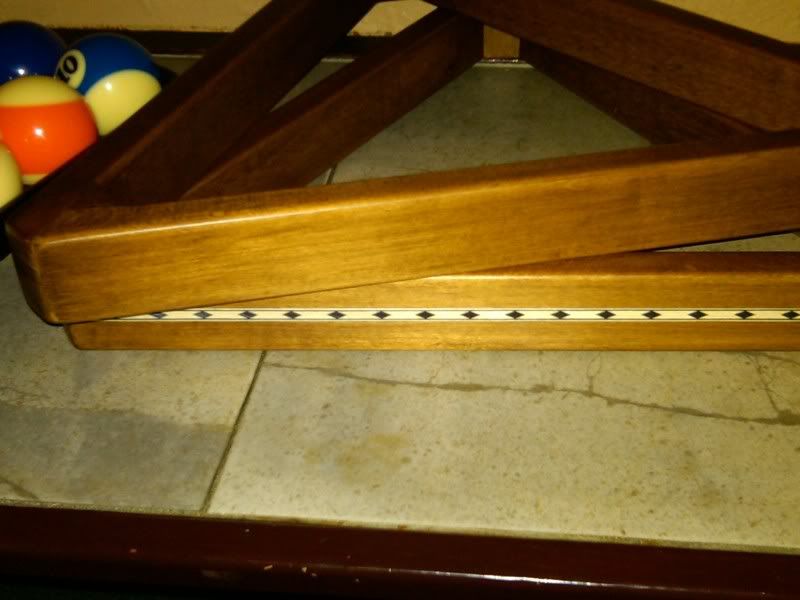
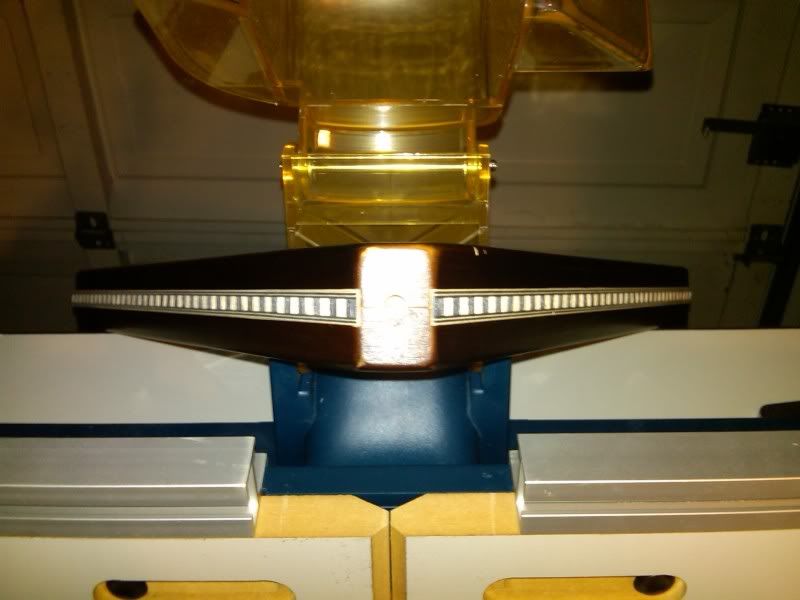
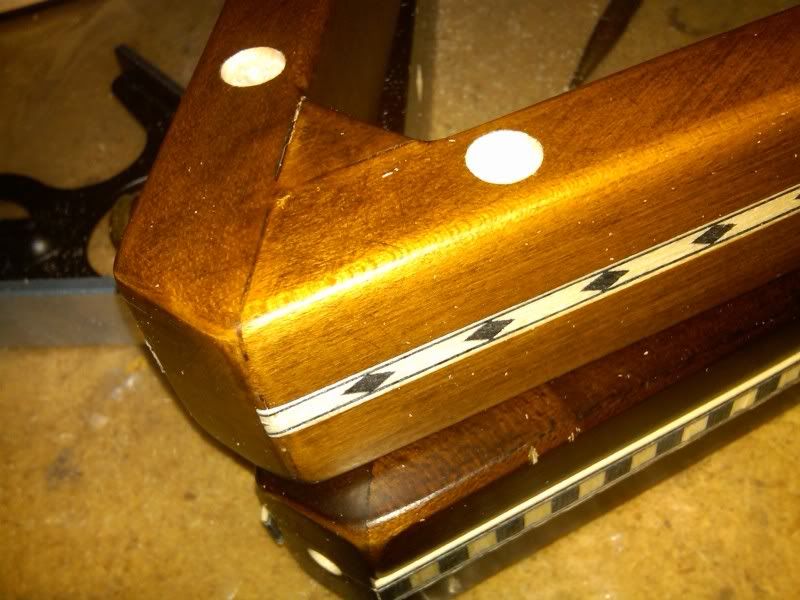
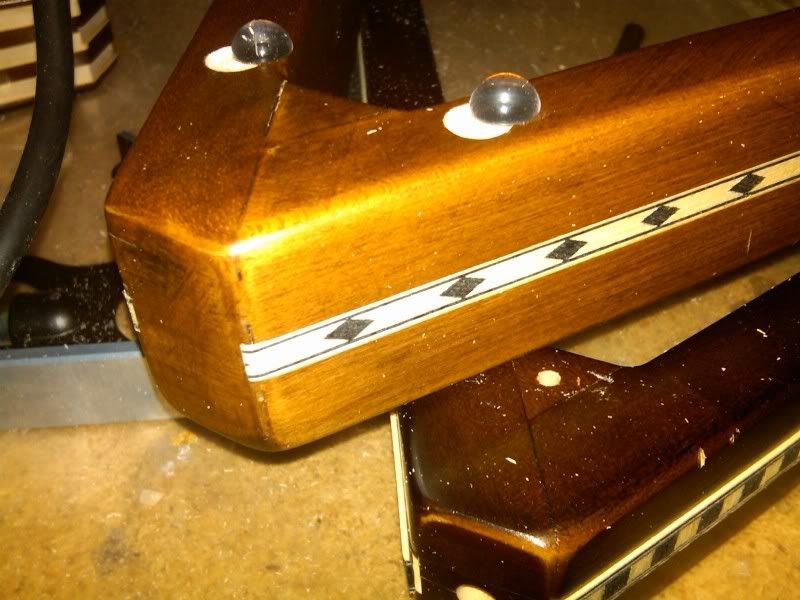
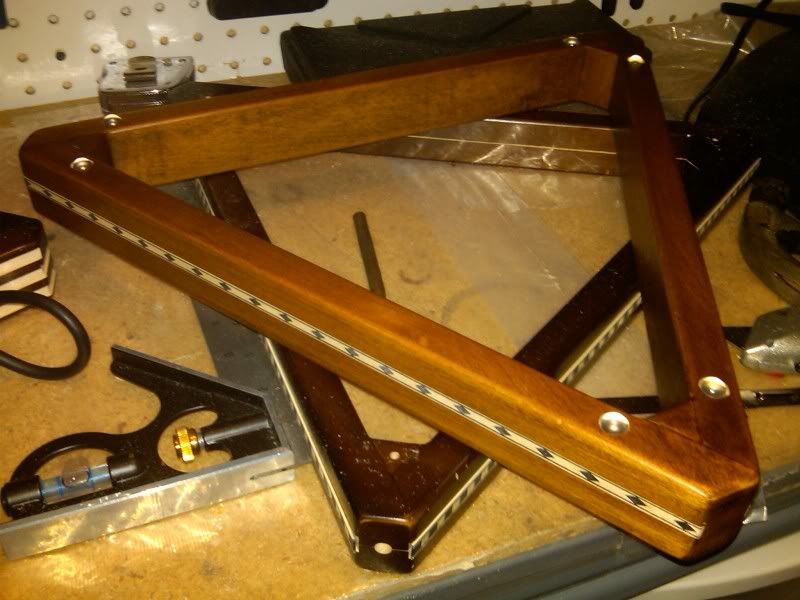
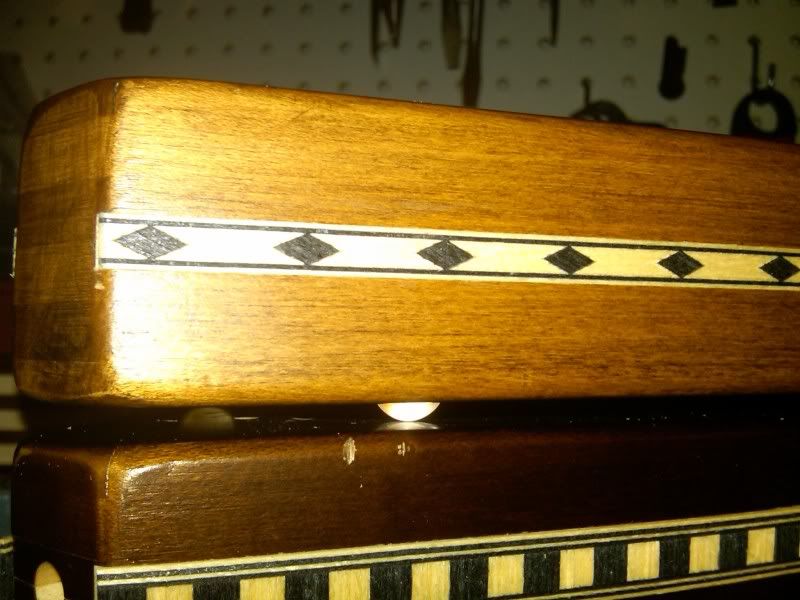
Added acrylic gliders (more pics)
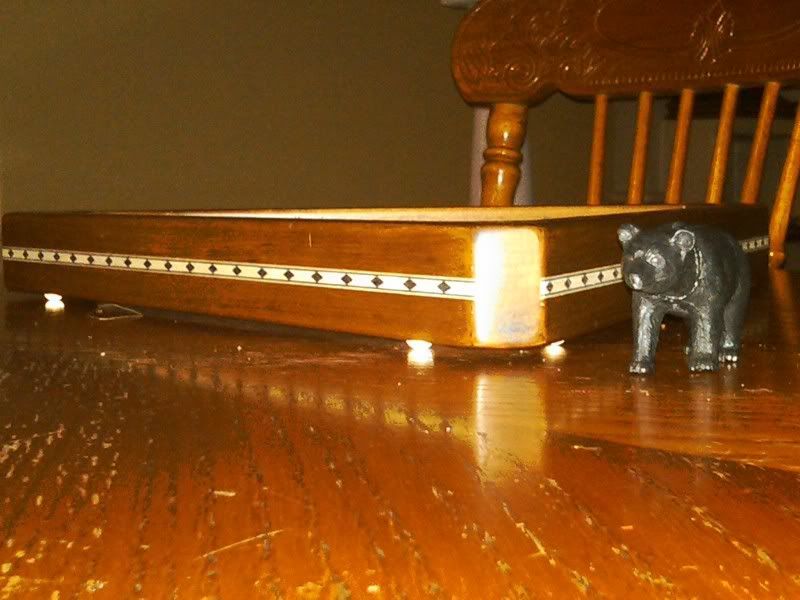
I incorporated the idea of using gliders to reduce table cloth wear and also to slightly raise the rack above the spot sticker so that it doesn't get pulled up over time. Thanks Tom In Cincy & Macguy!
Below are some pics. I will take it to a pool hall soon to see how it moves on felt. Will try to take pics as well.
PIC #1: holes to recess the 3/8" acrylic half-balls.
PIC #2: acrylic balls not in holes yet
PIC #3: all 6 balls in place glued down.
PIC #4: close up of one.
PIC #5: on the dining table, gliders down (Bear courtesy of Ryan... my 3 yr old).
I incorporated the idea of using gliders to reduce table cloth wear and also to slightly raise the rack above the spot sticker so that it doesn't get pulled up over time. Thanks Tom In Cincy & Macguy!
Below are some pics. I will take it to a pool hall soon to see how it moves on felt. Will try to take pics as well.
PIC #1: holes to recess the 3/8" acrylic half-balls.
PIC #2: acrylic balls not in holes yet
PIC #3: all 6 balls in place glued down.
PIC #4: close up of one.
PIC #5: on the dining table, gliders down (Bear courtesy of Ryan... my 3 yr old
).