Installing Tips

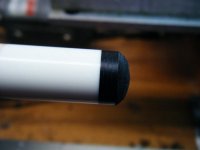
Here is a couple I just did.
Taken with a 100mm Canon macro lens.
2015-09-16%2014.35.17%202.jpg

2015-09-18%2002.29.37%202.jpg


The first picture is a Tiger tip, the second is a Zan Premium Soft with a clear acryllic pad.

My way:

- Face of the ferrule
- Clean the ferrule with fast orange hand cleaner
- Scuff the tip
- Center the shaft in the chuck
- Glue tip on with Loctite 401
- Leave on the lathe with slight pressure from the headstock about 15 minutes
- Take down about 50% of the excess tip overhang with sharp carbide bit
- Put a drop of water on the tip
- Use a sharp blade and trim the tip flush
- Shape the tip to dime or nickel shape with a sharp razor
- Sand the tip perfect with the ferrule 800, 1200, 2000grit
- Check tip diameter compared to ferrule diameter with a micrometer
- Burnish sides with wax or burnishing liquid
- Polish the ferrule with 3000 grit and then Mirka fine polish
 
Here is a couple I just did.
Taken with a 100mm Canon macro lens.
2015-09-16%2014.35.17%202.jpg

2015-09-18%2002.29.37%202.jpg


The first picture is a Tiger tip, the second is a Zan Premium Soft with a clear acryllic pad.

My way:

- Face of the ferrule
- Clean the ferrule with fast orange hand cleaner
- Scuff the tip
- Center the shaft in the chuck
- Glue tip on with Loctite 401
- Leave on the lathe with slight pressure from the tailstock about 15 minutes
- Take down about 50% of the excess tip overhang with sharp carbide bit
- Put a drop of water on the tip
- Use a sharp blade and trim the tip flush
- Shape the tip to dime or nickel shape with a sharp razor
- Sand the tip perfect with the ferrule 800, 1200, 2000grit
- Check tip diameter compared to ferrule diameter with a micrometer
- Burnish sides with wax or burnishing liquid
- Polish the ferrule with 3000 grit and then Mirka fine polish
Fixed it for ya. BTW, nice job!
 
I always clean the ferrule before doing anything. Then I cut the old tip off and face. I like to make sure no cleaner is on the ferrule face.
 
So to burnish the side of the tips, you simply use leather or back of sand paper, at high speed on the lathe? Do you need to apply lots of pressure or not too much?

and for approximatively how long?
 
I always clean the ferrule before doing anything. Then I cut the old tip off and face. I like to make sure no cleaner is on the ferrule face.

I do this as well. I've messed up many times, but I think I have it down pretty well now.

1. Clean ferrule well and polish
A. If I'm using a softer tip I will normally prep it with some Cyano while I'm doing the rest of this, otherwise I usually sand it a bit on a granite block with 600 and then wipe it.
2. Cut off old tip.
3. Face ferrule(I spin at 2k rpm)
4. Wipe it with clean paper towel
5 Put the tip in a holder. Holders are easily made with a piece of Delrin(acetal). I have a bunch of old 5/16th reamers, so I use those. Drill 5/16th hole through a piece of 5/8 Delrin that is a few inches long and then bore one end to match the tip diameter. You can load the tip, apply the glue, then slide it into the reamer. Reamer is already in a drill chuck in tailstock. This helps eliminate contamination because you won't be handling the tip anymore with your hands. It also make it very hard to screw up the mounting because it is going to be centered. 401 loctite. I'll put a couple drops on a paper towel and then blow on it. If it starts smoking, then I figure it's still good.
6. I wait at least 5 minutes now before cutting.
7. Cut toward chuck fairly flush with ferrule. Your cutting tool is most likely meant to cut in this direction, but the point is also to avoid any pulling away from the ferrule.
8. I no longer use razor blades to cut tips flush. Some guys use a Tina(?) blade, but I have found small planer blades to be foolproof(which is what I need). Paul at Carbide Saw gets credit for this. I was asking about what I could use and basically described a planer blade so he said "what about a planer blade?":thumbup: They are flat on one side, so you lay it down on the ferrule and it cuts perfectly flush every time. It doesn't take alot of practice either. Even if the ferrule isn't concentric it still works. I used a piece of aluminum rod mounted in the tool post to steady the blade.
9. Shape
10. 1000-1500 with some spit and then some compound. You will normally find that used shafts' ferrules are typically a bit larger in diameter than the shaft because of usage and shrinkage, so even sanding with more aggressive papers to remove gouges or scratches isn't a big deal if the customer is okay with it.
11. Scuff.
12. If you find that the shaft adjacent to the ferrule is now noticeably cleaner than the rest of the shaft you can use some spit and blend the dirt and chalk into that area.(credit Chris Hightower for this) It sounds kind of gross, but if you aren't cleaning the whole shaft then it is the solution.

That's what I've got. Feel free to tell me where I've gone wrong, but I've had good success with this.
 
So to burnish the side of the tips, you simply use leather or back of sand paper, at high speed on the lathe? Do you need to apply lots of pressure or not too much?

and for approximatively how long?

You don't need a lathe. IIRC, a dollar bill works. Too much heat will killed a layered tip.
 
Just a couple words from my personal experience...........

Burnishing the sides of the top and a little heat will not hurt anything or delaminate the tip.......... I have always burnished the tip until my fingers get hot.... no problem....

A pad under the tip will tend to soften the hit as will a capped ferrule............... if you want a crisp hit ............ no pad... no cap,,, and cut the tip down to about 1/8 at the shoulder.............


Kim

Depends what the pad or ferrule is made from, 90-d shore vs say 50-d-shore will dramatically change sound/feel of the hit
 
Just a couple words from my personal experience...........

Burnishing the sides of the top and a little heat will not hurt anything or delaminate the tip.......... I have always burnished the tip until my fingers get hot.... no problem....

A pad under the tip will tend to soften the hit as will a capped ferrule............... if you want a crisp hit ............ no pad... no cap,,, and cut the tip down to about 1/8 at the shoulder.............


Kim

I understand and agree with a little heat. I am conveying John Berton comments that heat, in general, will cause problems with laminations.
 
The point of over heating is in the 250 degree F range. If you cool a little even with light water and always use sharp cutters you will avoid this problem.

I have NEVER touched the face of the ferrule after facing off. You have a chance of oil from your fingers getting on the face which can pop it off.

I do not see a reason to tape the ferrule. One little oops and a very small piece of the tape can get under the tip.

palm ultraskin.jpg
 
The point of over heating is in the 250 degree F range. If you cool a little even with light water and always use sharp cutters you will avoid this problem.

I have NEVER touched the face of the ferrule after facing off. You have a chance of oil from your fingers getting on the face which can pop it off.

I do not see a reason to tape the ferrule. One little oops and a very small piece of the tape can get under the tip.

View attachment 422378

I put tape around the ferrule if it's a porous material like the melamine now.
They absorb too much CA and can be a PITA to take out.
I put tape around the ferrule and face off the ferrule. I use a very sharp insert ( .003" tip ). It ain't cheap.
Tape does not get under the tip.
The great thing about the tape too is, it serves as a marker for the ferrule.
Once your cutter hits it, you're close to the ferrule.
I cut the tip fast with a 4-flute carbide end-mill on a router .
Then I switch to the OLFA blade ( Cuejo was the first person I saw do this. ) to trim the wet sides.
 
Being an ole guy I can remember when Super Glue first came out. Some of the first TV commercials were of a guy hanging from a girder clutching his Hard Hat that was Super Glued (yes before Gel).

I would say better than 80% of my friends thought it was a con as they could not get it to work. I played around for half a day trying things until I got to the point, I get it.

I invited some friends over and we broke the handles of some of my mothers mugs etc Hope she never remembers that, a 91 year old woman can still hit pretty hard with a belt.

I had some of my nay sayer friends try to Super Glue, they failed. I took a mug handle, wiped it with paper towel at ends, checked for fit, mug on floor handle in hand. I than applied two drops to each end of handle and pushed it in (yes we did get some on the floor, another thing not to remind my mom of). My friends said okay lets see, I said, not yet. After 10 minutes I let go, a friend went to grab the mug and I said wait, I didn't touch yours. 20 - 30 minutes later I picked it up and tossed it to one of my friends. I told them the bond was now stronger than the mug, give it some taps until it breaks and the super glued part will remain. They did, it did.

The thing was and always will be, it was instant Super Glue, but that was not 100% true, just compared to other glues of the day.

I also learned, you get one shot at getting it right. This is why you make a tip center out of Delrin or what ever put it in the chuck and gently squeeze it home. If you try twirling the tip to get center you are twirling glue that is curing and rish a pop off.

Oh and per usual Joey is correct, if you face it off after tape then it will be flush and you don't risk getting a little bit of tape under. :)
 
Being an ole guy I can remember when Super Glue first came out. Some of the first TV commercials were of a guy hanging from a girder clutching his Hard Hat that was Super Glued (yes before Gel).
....

The history of CA started well before that commercial. I believe that Loctite 404 was the first commercially available CA glue and was first sold in the 1960s. Krazy Glue was introduced in 1973, they had the TV commercial with the hard hat guy. Super Glue, another competitor in the CA market, came out in the 1970s as well I believe.

Amazing stuff regardless.

Dave
 
I haven't used tape since before I had a lathe.

I sand the face of the ferrule with fresh 220 and wipe it off with denatured alcohol on a paper towel before I glue the tip on.

Predator ferrules and imports seem to be the only ones I need to use CA accelerator on.

My tip prep is done on 2 ground steel plates. One of them is covered on one side with adhesive backed 120,the other with 220. I do the initial leveling on the 120,then 220 after I seal the back with CA.

I also use a utility blade and scrape the sanding dust off the bottom of the tip after both sandings.

The modern CA glues are far beyond the old stuff as far as not going bad due to age. I used to throw it out and start fresh after just a month.

I've been using Loctite Professional for 6 years now,and have had a couple bottles last 6 months before the nozzle clogs up bad enough to ruin what's left.

Other than the times I've used it to experiment with CA finish techniques,I have yet to actually use an entire bottle of Pro before the nozzle goes bad.

I use my toolpost cutter to cut the diameter down the biggest part of the way,and finish with a utility blade. I plan on checking out these planer blades Randy recommends at some point,but the ceramic blade I bought a few months ago has probably done 25 tips and a dozen clear pads and it's still sharp enough I have to be careful with it. Tommy D.
 
Being an ole guy I can remember when Super Glue first came out. Some of the first TV commercials were of a guy hanging from a girder clutching his Hard Hat that was Super Glued (yes before Gel).

I would say better than 80% of my friends thought it was a con as they could not get it to work. I played around for half a day trying things until I got to the point, I get it.

I invited some friends over and we broke the handles of some of my mothers mugs etc Hope she never remembers that, a 91 year old woman can still hit pretty hard with a belt.

I had some of my nay sayer friends try to Super Glue, they failed. I took a mug handle, wiped it with paper towel at ends, checked for fit, mug on floor handle in hand. I than applied two drops to each end of handle and pushed it in (yes we did get some on the floor, another thing not to remind my mom of). My friends said okay lets see, I said, not yet. After 10 minutes I let go, a friend went to grab the mug and I said wait, I didn't touch yours. 20 - 30 minutes later I picked it up and tossed it to one of my friends. I told them the bond was now stronger than the mug, give it some taps until it breaks and the super glued part will remain. They did, it did.

The thing was and always will be, it was instant Super Glue, but that was not 100% true, just compared to other glues of the day.

I also learned, you get one shot at getting it right. This is why you make a tip center out of Delrin or what ever put it in the chuck and gently squeeze it home. If you try twirling the tip to get center you are twirling glue that is curing and rish a pop off.

Oh and per usual Joey is correct, if you face it off after tape then it will be flush and you don't risk getting a little bit of tape under. :)

I too am a believer of not moving the tip around much after mating. I worry about any curing that takes place after you deprive the glue of oxygen. I use a centering tool and I leave it chucked up for 6/8 minutes. Probably overkill but it works for me.
Tom, was the paper towel that you used on the mug damp?
 
Back
Top