You are using an out of date browser. It may not display this or other websites correctly.
You should upgrade or use an alternative browser.
You should upgrade or use an alternative browser.
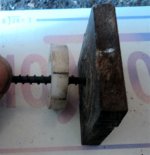
gluing fixture
- Thread starter buell
- Start date


I like it! Thanks for sharing :thumbup:
RBC
Deceased
It looks like it should work!
I would recommend one thing though.
What you will find is that as you put more and more cues or shafts in it, the added pressure against the screws will begin to loosen the ones you've already tightened. Basically, the first one pushes on the cross beam will give just a little. Then, when you put on a second, the added pressure will make it give a little more. By the time you get several tightened up, the first ones will be loose because of that give in the cross beam.
The fix is to use springs on the ends of your clamping screws. When you tighten, the springs will provide the pressure and will also have some compliance if the cross beam gives a little. Car engine valve springs work pretty good.
Royce
Destroyer125
Banned
I've been looking to build something like this! Why clog the lathe up as a glue fixture.

sometimes I use this

I do my hole/insert and cut the tenon for the ring-work in the same session (w/o removing from chuck).
This insures that the R/W is concentric to the hole.
I don't know how it could get much simpler than this:

The 'bolt' can be made from whatever pin stock you're currently using.
Clamps cost money and take up space. The fixtures are impressive but unnecessary.
KJ
This insures that the R/W is concentric to the hole.
I don't know how it could get much simpler than this:
The 'bolt' can be made from whatever pin stock you're currently using.
Clamps cost money and take up space. The fixtures are impressive but unnecessary.
KJ
RBC
Deceased
I do my hole/insert and cut the tenon for the ring-work in the same session (w/o removing from chuck).
This insures that the R/W is concentric to the hole.
I don't know how it could get much simpler than this:
View attachment 386095
The 'bolt' can be made from whatever pin stock you're currently using.
Clamps cost money and take up space. The fixtures are impressive but unnecessary.
KJ
Absolutely agree!
We cut our 3 level tenon, thread that tenon, install the joint collars with epoxy, face, drill, bore and thread for the insert or shaft threads, glue in the insert if it gets one, and face the end of the shaft all in one session on the machine.
In goes a "Partial", out comes the shaft with collars, and all inside work done. All it needs is the joint end tapered and it's ready for finish.
Royce
yeah im doing one extra stepI do my hole/insert and cut the tenon for the ring-work in the same session (w/o removing from chuck).
This insures that the R/W is concentric to the hole.
I don't know how it could get much simpler than this:
View attachment 386095
The 'bolt' can be made from whatever pin stock you're currently using.
Clamps cost money and take up space. The fixtures are impressive but unnecessary.
KJ
when i do the tenon for rings, i also pull back , and cut a 1/4" wide section on the shaft, behind the rings
that's my spot for my indicator next time it goes in chuck,
to insure being concentric as you said
Put 'witness marks' on the shaft relative to the chuck while you're doing your hole & tenon.
You can re-install the shaft at any time later by the 'marks'.
Face the shaft and then do everything else off the tail-stock center. You're done.
KJ
I just realized that was a pretty clever way to get me to reveal my machining schedule. Lol
Fact is Brent, I'd share anything with you except my women. Lol
Last edited:
I must like it complicated .
Stock tubes come with 5/8 hole .- a thou or more so I still ream them.
I bore the rings' ID larger than that.
Dry fit to the tenon. Mark where they end.
Thread the tenon . Turn down for thread clearance near the top of the collar so the face doesn't show the threads .
Keep the tenon at least .250 longer to part and get rid of the spur indentation.
When the epoxy has dried and the butt is pinned, turn down the collars to .002" over the cue's size.
Sand to match.
Coat and finish.
I do the same for butt plates. Works great for Delrin . Never had one rattle or come loose.
Last edited:
I must like it complicated .
Stock tubes come with 5/8 hole .- a thou or more so I still ream them.
I bore the rings' ID larger than that.
Dry fit to the tenon. Mark where they end.
Thread the tenon . Turn down for thread clearance near the top of the collar so the face doesn't show the threads .
Keep the tenon at least .250 longer to part and get rid of the spur indentation.
When the epoxy has dried and the butt is pinned, turn down the collars to .002" over the cue's size.
Sand to match.
Coat and finish.
but if you only do it 3 times a year, it's ok joey

messin with ya!!!!
why the spur and not dead center?
but if you only do it 3 times a year, it's ok joey
messin with ya!!!!
why the spur and not dead center?
They have a spur b/c I'm mean .
When I turn 1" dowels to .650" tapers, they need the spur .
A lot of those dowels have offset ferrule end holes, so they wobble like crazy on the first few cuts.
But, they sure make me happy when they get down to .600".
I wouldn't do it any other way . Been manually turning shafts a long time and have come to a conclusion what really gets the most yield.
"Boring" the ring holes can be easy and fast if you use metric end mills.
Beauty of live threading is, you're not stuck with the cookie cutter taps and dies.
Welded Steel Frame with threaded rod in center works for me.
I don't put shafts under compression from end to end. Only butts.

I don't put shafts under compression from end to end. Only butts.

Last edited:
Rick,
IIRC, you install your 3/8x14 pin early in the build.
Fab some 3/8x14 nuts and you wouldn't need the clamp fixture for jnt. rings.
If your wght.blt hole is also done early and it's 3/8x16,
you don't have to make anything to clamp butt-caps.
One of the downsides of using a clamp-fixture is that it subjects whatever is being clamped, to bow.
Shafts bow real easy. Handles are also subject to bow though you may not notice that.
Why subject either to bow when it's not necessary ?
HTHs, KJ
Rick,
IIRC, you install your 3/8x14 pin early in the build.
Fab some 3/8x14 nuts and you wouldn't need the clamp fixture for jnt. rings.
If your wght.blt hole is also done early and it's 3/8x16,
you don't have to make anything to clamp butt-caps.
One of the downsides of using a clamp-fixture is that it subjects whatever is being clamped, to bow.
Shafts bow real easy. Handles are also subject to bow though you may not notice that.
Why subject either to bow when it's not necessary ?
HTHs, KJ
KJ,
I gave up that pin first notion after I start making point cues in 2005 or 6.
The guy that taught me how to assemble a cue liked to do that but I dropped that procedure after gaining my own experience and practices. Live and learn.
Yeah I bowed a shaft and learned the hard way. On the butts I found that if you have precision faces that the cue does not need much compression to get the job done. I don't put cues in there thare under .900 at the nose. When I slide my handle on the dowel and gorilla glue it to core and forearm the cue is at over .950 as shown on the cue on the left.
Yeah bowing is a concern but one must be careful. I don't use this rig too much but it comes in handy once and awile when more than one cue is in process.
The rig that I showed was from the Omega DPK shop that was set up by David in the 1980s. He is my absolute favorite cue maker and that unit is a prized possession shop fixture because of the history.
Rick
Last edited:
Here is my shaft ring/collar clamp. The delrin ring's ID is tapered to lock on the shaft and grooved on opposite sides for the rubber bands to seat. Clean the collar face and exposed tenon (the other delrin piece is bored .650 to dodge an exposed tenon if that isn't obvious) and the other delrin piece pops off easily after cure.

Here is my shaft ring/collar clamp. The delrin ring's ID is tapered to lock on the shaft and grooved on opposite sides for the rubber bands to seat. Clean the collar face and exposed tenon (the other delrin piece is bored .650 to dodge an exposed tenon if that isn't obvious) and the other delrin piece pops off easily after cure.
Very Nice!