My "New" GC 134 - Part 1 (long)

MikeM

Pool Lover
Silver Member
Over two years ago I posted a thread entitled My "New" GC1 showing off an old table I bought off a friend of mine to go in the unfinished basement of our vacation cabin/retirement home in PA.

IMAG0012.jpg


(Before shot of table when I brought it in - 1961 GC1)

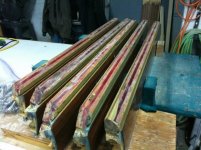
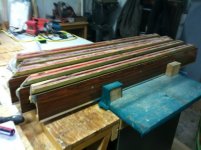
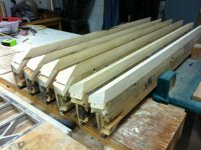
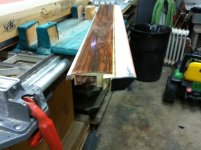
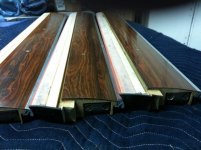
After two+ years of waiting for a mechanic to wander into my neck of the woods, I finally found Bob DeTurk of A Level Above Pool Tables thanks to a post on AZB. Bob was very responsive and after a few phone calls we set up an install date and I dropped off my rails for him to repair. When I dropped them off Bob told me he had a set of rails in better condition that he would substitute for mine.

IMAG0043.jpg


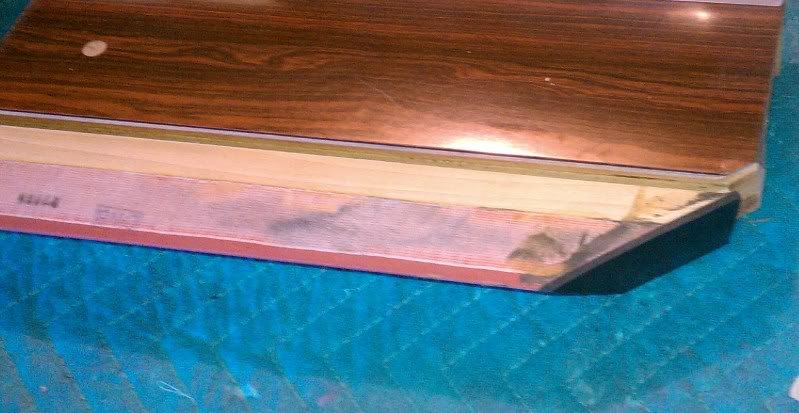
(finished rail with new extended subrail and new Brunswick Superspeed rubber)

I also had mismatched slates from two different tables that were in rough shape. Bob purchased a new set of GC3 slates just in case we needed them.

A couple of weeks ago, Bob and his assistant Robin made the two hour drive to Shickshinny PA on a Friday morning. They got there about 10AM.

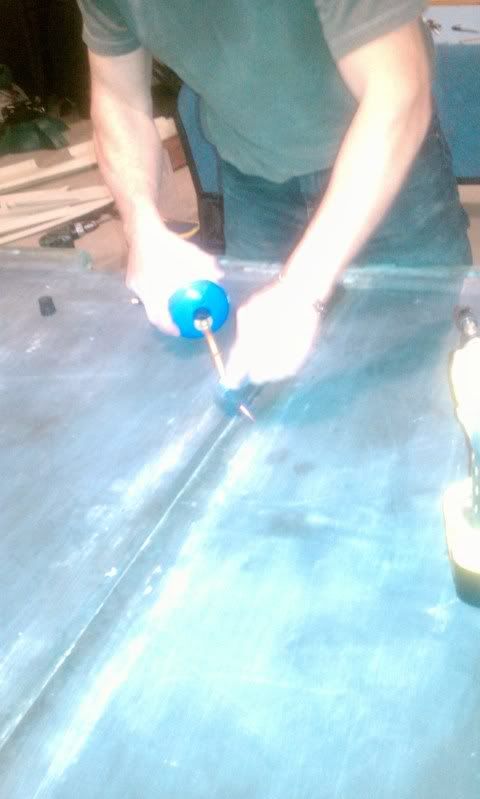
Bob had also had a nice shiny set of adjustable feet from a later model GC1 which he swapped out for my old dull ones.


IMAG0035.jpg

IMAG0036.jpg


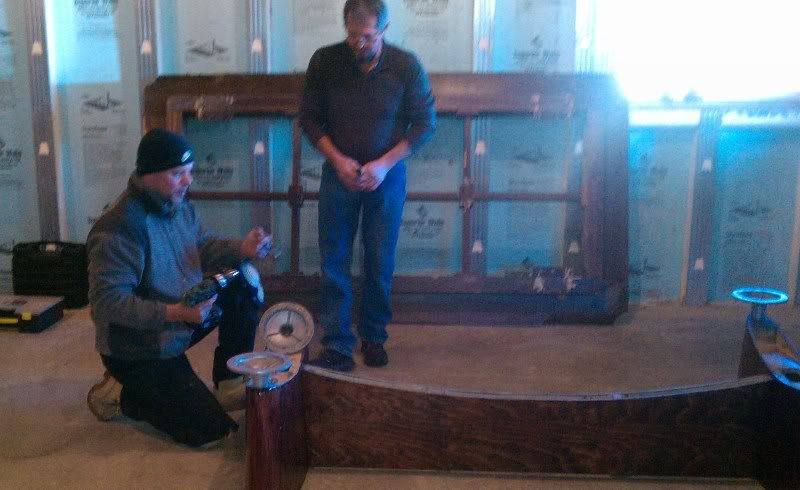
(Installing the adjustable feet. The last one took a long time to get just right, but they patiently plugged away until it was perfect.)

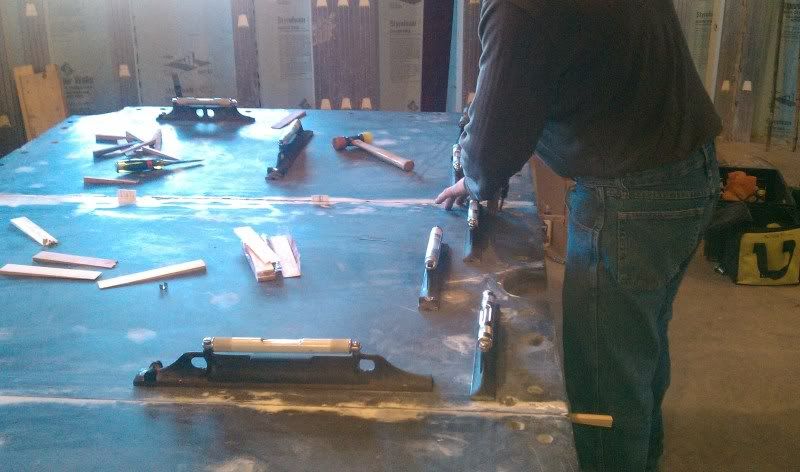
Next was assembling and leveling the frame. I am very impressed at the solid frame on these old tables.

IMAG0041.jpg


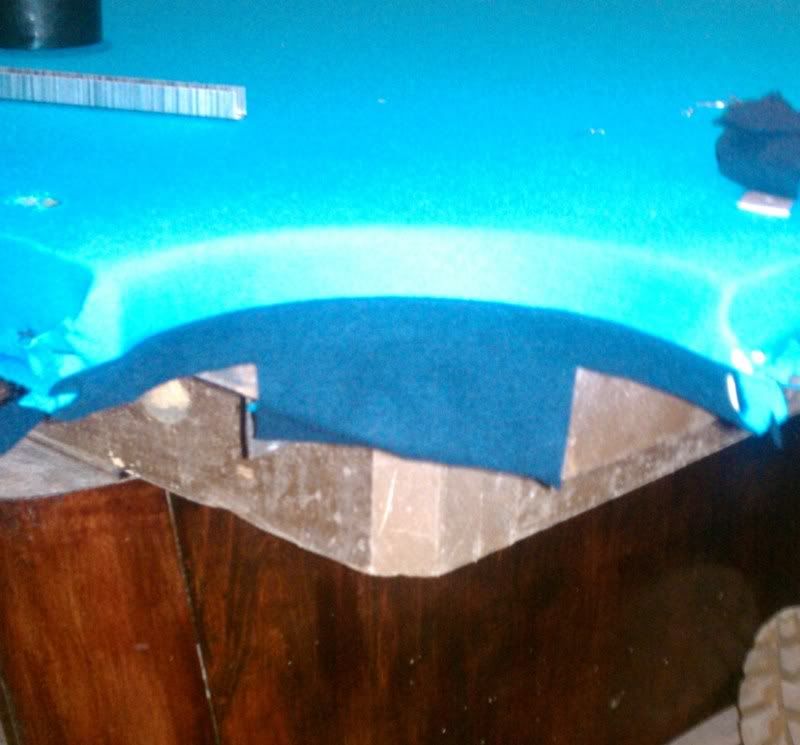
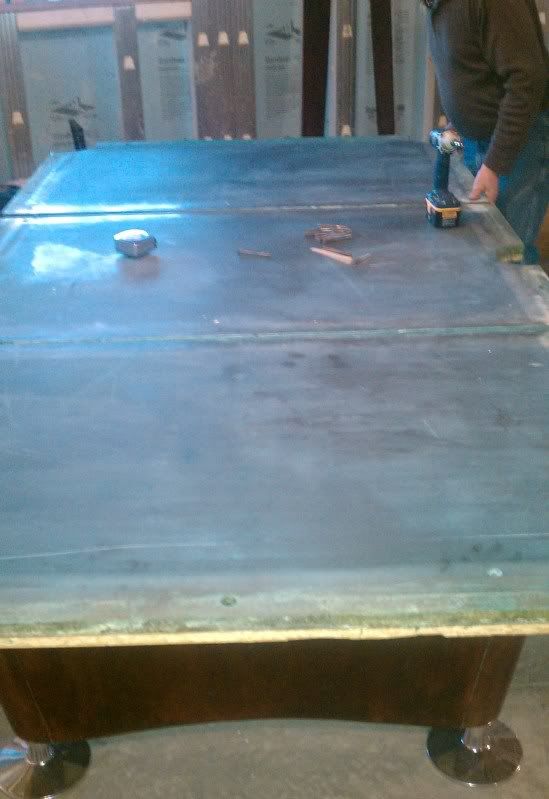
Robin then spent a long time attempting to level the old slates on the table. It was probably over two hours and ultimately we all realized that they just weren't going to work and I'd have to buy the new slates.

IMAG0045.jpg


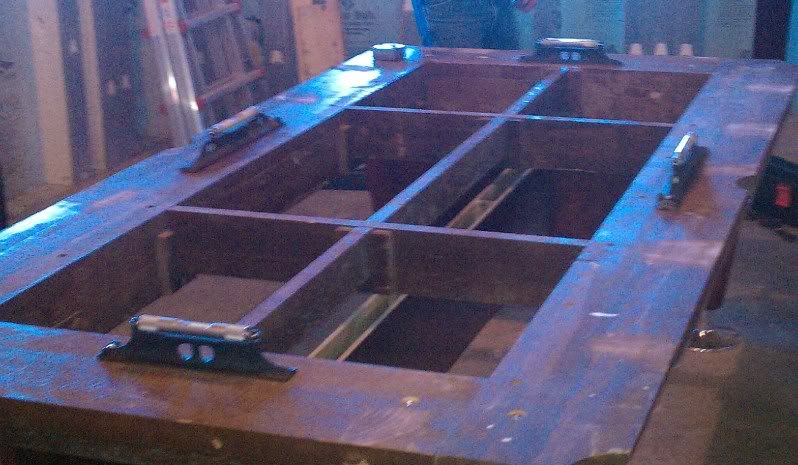
(Attempting to level the old slates.)

IMAG0047.jpg


(New GC3 slates)

IMAG0052.jpg


(Sealing the seams.)

Next installment - cloth!
 
Part 2

Now that the slate is installed, level and sealed it's time to put on the new Simonis Tournament Blue HR2.

IMAG0044.jpg


(Bob covers the rails)

IMAG0055.jpg


(Cloth, pre-stretch)

Bob can spread some cloth! This was my first time watching an install from start to finish and I was very impressed.

IMAG0056.jpg


(Cutting corners)

I had always wondered how the pockets are made to look so pretty. Now I know!

IMAG0057.jpg

IMAG0058.jpg

(Dark blue "tuxedos")

With the cloth stretched and glued, it was on to the rails. We are over 8 hours into this install by now! Along the way Bob and Robin ran into numerous little issues with the table. I guess that's to be expected with an almost 50 year old table. Without exception, they approached every obstacle with patience and skill and overcame. I would have quit long before the end!

The rails go on. I am getting excited.

IMAG0059.jpg


(Rails)

IMAG0061.jpg


(Making sure everything is just right.)

IMAG0062.jpg


Next up - the finished product!!!

(Lining up the spots with lasers)
 
Last edited:
Boy, you've got a couple of damn good mechanics helping you out here. And that's what you needed! :thumbup:
 
Part 3 - the finished product!

Here's the table finished - beautiful!

IMAG0067.jpg


4 1/2" corners tight but fair and hopefully won't discourage a hack like me. GC4 pocket inserts will be easier on my Centennials than the hard plastic ones from the GC1 - another throw in from Bob.

IMAG0064.jpg


I love the way the blinds finish off the look.

IMAG0070.jpg


IMAG0071.jpg


Ball Box

IMAG0072.jpg


Counters - with a big "font" for my old eyes!

IMAG0073.jpg


Blue felt jungle!

IMAG0075.jpg


Covered and ready for the next time!

If you can't tell, I am a VERY happy customer. It was about 10PM by the time Bob and Robin loaded up for the two hour ride home. That's over 12 hours of work spent on my table. As stated previously, they patiently worked their way through every little hiccup along the way and wouldn't stop until everything was just right. Thanks Bob and Robin.

I call this a GC134 because it began as a GC1, has a GC3 slate and GC4 pocket inserts. Definitely a one-of-a-kind table.

There were also many mechanics involved in the install. About a week before the initial install date I get a call from Bob at night. He has run into a big issue. The rails that he had already spent hours re-building for me had a big issue. He couldn't get the aluminum trim back on due to previous damage and they were trash. He was sick and very apologetic and didn't know how he was going to get the job done. He sent out a distress signal and John Burns was able to get him a set of rails in the middle of the night that are beautiful as you can see. Mark Gregory also lent him advice and parts of the table were contributed by other installers whose names I can't remember. The table mechanic community is tight.

So now I have a great playing GC134 and the only problem is that it is 200 miles away from home. Fortunately tomorrow I begin a week long hunting trip up there that I believe will consist of me propping up my rifle under the window at the head of the table and playing pool all week. If a buck happens to cross the field in front of me I'll take him and get back to shooting Centennials!!!

Mike
 
Last edited:
That's a great story Mike and the pictures added a lot to it.
Good luck with your "New" table.
 
Nice work and good looking table.
Some of the best table mechanics in the country like Bob Deturk are members of this forum.
If you want a table to be done right drop into Talk To A Mechanic and hook up with a pro.
 
matter of fact......you said vacation home....so your not busted by any means....if I were you......I'd take those chrome pocket caps and trim chrome on the rails and get them powdercoated white!

either way the table looks super sweet....just think that would set it over the top.
 
Here's the table finished - beautiful!

IMAG0067.jpg


4 1/2" corners tight but fair and hopefully won't discourage a hack like me. GC4 pocket inserts will be easier on my Centennials than the hard plastic ones from the GC1 - another throw in from Bob.

IMAG0064.jpg


I love the way the blinds finish off the look.

IMAG0070.jpg


IMAG0071.jpg


Ball Box

IMAG0072.jpg


Counters - with a big "font" for my old eyes!

IMAG0073.jpg


Blue felt jungle!

IMAG0075.jpg


Covered and ready for the next time!

If you can't tell, I am a VERY happy customer. It was about 10PM by the time Bob and Robin loaded up for the two hour ride home. That's over 12 hours of work spent on my table. As stated previously, they patiently worked their way through every little hiccup along the way and wouldn't stop until everything was just right. Thanks Bob and Robin.

I call this a GC134 because it began as a GC1, has a GC3 slate and GC4 pocket inserts. Definitely a one-of-a-kind table.

There were also many mechanics involved in the install. About a week before the initial install date I get a call from Bob at night. He has run into a big issue. The rails that he had already spent hours re-building for me had a big issue. He couldn't get the aluminum trim back on due to previous damage and they were trash. He was sick and very apologetic and didn't know how he was going to get the job done. He sent out a distress signal and John Burns was able to get him a set of rails in the middle of the night that are beautiful as you can see. Mark Gregory also lent him advice and parts of the table were contributed by other installers whose names I can't remember. The table mechanic community is tight.

So now I have a great playing GC134 and the only problem is that it is 200 miles away from home. Fortunately tomorrow I begin a week long hunting trip up there that I believe will consist of me propping up my rifle under the window at the head of the table and playing pool all week. If a buck happens to cross the field in front of me I'll take him and get back to shooting Centennials!!!

Mike

Mike...in case you didn't know it already...you had one of the top 10 table mechanics in this country working on your table:D

Glen
 
Mike,
Thank you, I hope the table is what you expected! I got a lot of help on this one. Pat O'Donnel drove 11 hours round trip to John Burn's shop. I had the rails in my hands to start the rebuild the next day. John and Pat saved my butt. John came through with a beautiful set of GC2 rails. I started the rebuild as soon as they arrived. I've rebuilt many GC 1's and 3's but the GC2 rails are different. I called Mark Gregory, and who walked me through some of the problems that could arise. The GC2 rails are thicker from top of formica to the base of the rail. When the sub-rail is cut to a proper height the drop from the formica to the cloth on the rail is too large. This required some experience. I am very proud of this table. The effort put forth by John, Pat and Mark is greatly appreciated. Your table was built by the A-Z Mechanics! I appreciate the opportunity to perform the work. I hope you you enjoy your GC1234.

Here are some before and after pic's of the rails:
 
Bobby is a great table mechanic, and a wonderful person.
I know the work he does on ALL different tables, and it is all top notch
work. Bobby is with out a doubt a perfectionist. I see pics of his work
And speak with him every week atleast 3 times. I don't know anyone
That can do any better work than you are doing. (BAR NONE)
Congratulating, great job--keep it going.
Your friend

Mark Gregory
 
Mike,
Thank you, I hope the table is what you expected! I got a lot of help on this one. Pat O'Donnel drove 11 hours round trip to John Burn's shop. I had the rails in my hands to start the rebuild the next day. John and Pat saved my butt. John came through with a beautiful set of GC2 rails. I started the rebuild as soon as they arrived. I've rebuilt many GC 1's and 3's but the GC2 rails are different. I called Mark Gregory, and who walked me through some of the problems that could arise. The GC2 rails are thicker from top of formica to the base of the rail. When the sub-rail is cut to a proper height the drop from the formica to the cloth on the rail is too large. This required some experience. I am very proud of this table. The effort put forth by John, Pat and Mark is greatly appreciated. Your table was built by the A-Z Mechanics! I appreciate the opportunity to perform the work. I hope you you enjoy your GC1234.

Here are some before and after pic's of the rails:

Here are some of the pics before and after.
 

Attachments

  • GC1.jpg
    GC1.jpg
    53.9 KB · Views: 506
  • GC2.jpg
    GC2.jpg
    97.4 KB · Views: 491
  • GC3.jpg
    GC3.jpg
    47.4 KB · Views: 491
  • GC4.jpg
    GC4.jpg
    93 KB · Views: 490
  • GC5.jpg
    GC5.jpg
    45.3 KB · Views: 485
Mike,
Thank you, I hope the table is what you expected! I got a lot of help on this one. Pat O'Donnel drove 11 hours round trip to John Burn's shop. I had the rails in my hands to start the rebuild the next day. John and Pat saved my butt. John came through with a beautiful set of GC2 rails. I started the rebuild as soon as they arrived. I've rebuilt many GC 1's and 3's but the GC2 rails are different. I called Mark Gregory, and who walked me through some of the problems that could arise. The GC2 rails are thicker from top of formica to the base of the rail. When the sub-rail is cut to a proper height the drop from the formica to the cloth on the rail is too large. This required some experience. I am very proud of this table. The effort put forth by John, Pat and Mark is greatly appreciated. Your table was built by the A-Z Mechanics! I appreciate the opportunity to perform the work. I hope you you enjoy your GC1234.

Here are some before and after pic's of the rails:

Thanks again, Bob. It gets even better, I forgot that the rails are GC2 rails...make that a GC1234!
 
Thanks so much for the post. The pics were great along with a terrific story. It would appear that your patient 2 year quest for a good mechanic was well rewarded. Magnificent job that resulted in an uber-table. It probably plays as well as it looks. Good luck with your "new table". This is a great forum.
 
Bob DeTurk and Pat O'Donnell worked on my table this summer; I posted about it here. Since then, these two rebuilt the old Gold Crowns at Sandcastle in Edison, NJ and got rave reviews. (Ed, the room's owner, also posted about his experience). Now this interesting post from MikeM showing the quality of Bob's work on a very tough project.

It is good to see both Bob and Pat getting recognized for their outstanding work. I can wholeheartedly recommend them to anyone who needs a table mechanic in the NY/NJ/PA area.
 
Back
Top