Custom Pool Room

How close to completion are you? Can't wait to see the finished product.

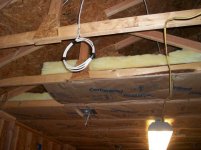
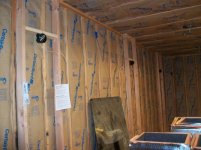
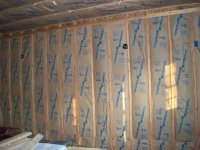
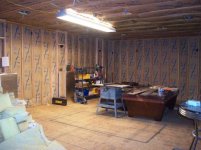
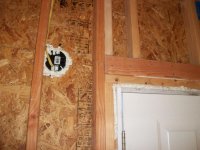
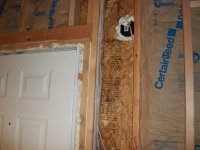
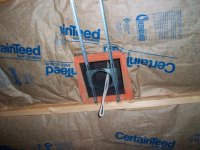
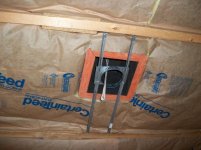
Well, I'm finishing up the final details before I begin installing the insulation. I just want to make sure I have thought of everything I need before I cover it up with insul. Like the wiring for speakers, lighting, and where I might need plugs for neon lights in the future. I'm in the process of designing the table lights, which affects the mounting brackets and their locations. These little details are really taking time. I just want to be sure as to think of everything before continueing to the next step. That being said, I hope to be done by November. Once I get the drywall up wainscotting the oak trim and building the bar will be alot of work but should be fun! Which means I'll get it done quick.
 
Just a bump hoping for some updated progress photos. I think we're all pretty anxious to see how your pool room turns out. :grin:
 
Well, I just joined this party today...I've read this entire thread and I have to admit, I'm hooked...I'm definitely going to stay tuned to see this dream come to final fruition...

You have done an absolute wonderful job on this pool room (note I didn't say "man-cave") to date!

Don't worry about not being good at pool...you obviously have a passion and a love for it...think of it like sex...you don't have to be good at it to enjoy it...it obviously helps your "playing partner" if you are...never mind...this is going downhill quickly...:embarrassed2:

Jason
 
Well I've been slow at posting pics lately but that's because I've been busy working on plumbing and items that really aren't Picture worthy and don't show the progress. I've decided to add non-interesteing photos to a photo Album under my Profile page. These will include extra photos not added to the tread. I'll try to keep them in cronilogical order so it won't be a big mess.
 
Here are some pictures I found of a Cue Rack I made for my Brother-in-law a few years back as a gift. He was in need of one and nice wooden racks ran upward in the $2-300 range. So I spent $40 and a few hours and built him this. I plan on building a more boxier nine cue rack that will go on the east wall that will be built into the wainscoting and crown molding.
 

Attachments

  • 100_0208.jpg
    100_0208.jpg
    61.2 KB · Views: 2,413
  • 100_0207.jpg
    100_0207.jpg
    99 KB · Views: 2,403
  • 100_0206.jpg
    100_0206.jpg
    98.9 KB · Views: 2,409
  • 100_0209.jpg
    100_0209.jpg
    98.6 KB · Views: 2,398
awesome project - kudos to you

another reason i love texas: rarely does residential code require wiring in conduit = a lot less expensive and a helluva lot faster!


p.s. dont forget to install an old-school wall mounted bottle opener. very important. it improves the flow of positive chi throughout the room :D
 
Looks great...good job! Hope your wood floor works out better for you than mine did a few years ago. I could never keep my table level and only had one in there. Mine was similar in size but I used french doors and a ramp rather than stairs and it made it very easy for bringing tables and everything else in and out. good luck
 
Nice looking project!

Looks like Austin is pretty accomodating with regard to set backs and total building footprint on the lot.

BTW, What is the secret to doing wainscoting for next to nothing?
 
Nice looking project!

Looks like Austin is pretty accomodating with regard to set backs and total building footprint on the lot.

Well as I mentioned in my very first post I did have issues with set back requirements. From rear the city required 20'. I could only give 8' due to the tree, plus I didn't want the room taking up my whole back yard. I argued the point that this was not on a foundation slab and not a permanent structure therefore classified as a portable building in which case, setbacks don't apply. They pointed out that the room was nearly 800 sq ft and not portable! Yes I said but not a permanent structure. I decide to conpromise and give them 9' and butt it up against the tree. They didn't appreciate my argument, but I could see they knew how determined I was to build this so they finally caved. Well after several weeks of buttin heads with the zoning department, I finally got approved.
 
Last edited:
BTW, What is the secret to doing wainscoting for next to nothing?

I never said I could do it next to nothing, but I did say I could do it cheap.
As for the wainscoting, I have planed to use plywood. Solid stock oak is very pricey, especially for large quantities in which I would need. I can rip plywood in 4" widths and get alot of stiles and rails. I'll get the panels from 1/4" oak and design the layout to be in 24" and 16" increments to use only four sheets of 1/4 plywood at $19 ea. I'll use 3/4" trim molding to trim the inside of the raised trim to hide the edge cuts and give more detail.
 

Attachments

  • Wainscoting detail rails.jpg
    Wainscoting detail rails.jpg
    82.6 KB · Views: 2,661
Last edited:
Everything looks great as far as the room and design. You will find out that down the road you would rather have 9 foot tables. Think of something you can do for the wife to upgrade to 9 footers.
 
Insulation

Well, the phase I have been dreading is finally here. I'm excited but darn I hate installing insulation (but good thing I have cheap manual labor). I picked up several bundles of R-30 for the ceilings and R-13 for the walls. I'll be installing R-19 for the subfloor at a later date.
I completed fabricating the recessed light boxes to create a complete thermal envelope. The R-30 butted up against it nicely. I made them 10" tall to be even with the insulation
p-0002 (1).jpg
p-0002 (2).jpg


The Cheap labor I was talking about! My eleven yr old
Picture 043-a.jpg
 
Last edited:
Insluation installed

Here are pics of the installation. As you can see I am not quite done yet but should complete installing everything this week.
 

Attachments

  • p-0002 (4).jpg
    p-0002 (4).jpg
    92.6 KB · Views: 2,453
  • p-0002 (7).jpg
    p-0002 (7).jpg
    93.7 KB · Views: 2,491
  • p-0002 (17).jpg
    p-0002 (17).jpg
    96.3 KB · Views: 2,458
  • p-0002 (14).jpg
    p-0002 (14).jpg
    95.4 KB · Views: 2,444
dsoriano...Your project is sure coming along nicely! It will certainly be a pleasurable place to "hang out" when you have it completed...especially knowing you did it all yourself (with a little help). :thumbup: When is your estimated completion?

Scott Lee
www.poolknowledge.com
 
Sealing

Before I installed the insulation I sealed all exterior penetrations with Hilti sealing foam. Although there weren't many for the reason I don't have many windows nor a back door or exterior outlets. But the few I did have I made sure to seal them before installing the batts.

Here's pics of the light boxes. To bad they are going to be covered up I think they came out very nice.
 

Attachments

  • p-0002 (8).jpg
    p-0002 (8).jpg
    95.3 KB · Views: 2,478
  • p-0002 (11).jpg
    p-0002 (11).jpg
    86.7 KB · Views: 2,420
  • p-0002 (12).jpg
    p-0002 (12).jpg
    98.9 KB · Views: 2,431
  • p-0002 (3).jpg
    p-0002 (3).jpg
    94 KB · Views: 2,441
  • p-0002 (15).jpg
    p-0002 (15).jpg
    91.6 KB · Views: 2,462
Back
Top