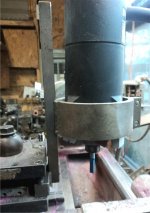
Well, I made another sneaky, and it looked and hit great, but yet again, the pin was crooked. It bugged the hell outta me all day. I kept going over what I did and couldnt figure out what I did wrong. I thought it was the face.....nope. I kept checking the runout on the pin, face, and collar and it was clear it was the pin. The cue was too good to trash, so I decided to try to fix it. I came home after working 12 hours and torched the pin and got it free. I flipped my jaws and bored them and center drilled the rest of my pins, and they turned out great! I flipped my jaws back and bored the inside jaws and got em down to just under .001 runout, woo hoo! I know my tailstock is way off, so i used the bar that came with my hightower 5/8 11 die and started an hour-long process of shimming and stoning until I got it as close as i could, which aint perfect, but its a helluva lot better, lol! Next I drilled my hole a little deeper and ran the tap in and out a couple times to clean out the old epoxy and add threads to the back of the hole. I used a very small amount of epoxy on the pin, and used my newly made pin gripper to install the pin (thanks for the idea Trent!). Once I got the pin in, I put my 60 degree live center in my tailstock and ran the center in the hole I drilled on the end of the pin, and turned my lathe on its lowest speed for a few minutes, and then let the 5 minute epoxy set for about 15-20 more minutes. I was worried, but when I took the center off, and checked my pin, it was dead nuts! I took it out to the cave, and it rolls straight, and hits great! Im pretty happy about it, but Im curious if you guys think this is a good repeatable process of installing a pin? And before anyone says it, I meant the second pin, lol. Ill post some pics and you can tell me what you think soon.
Joe